
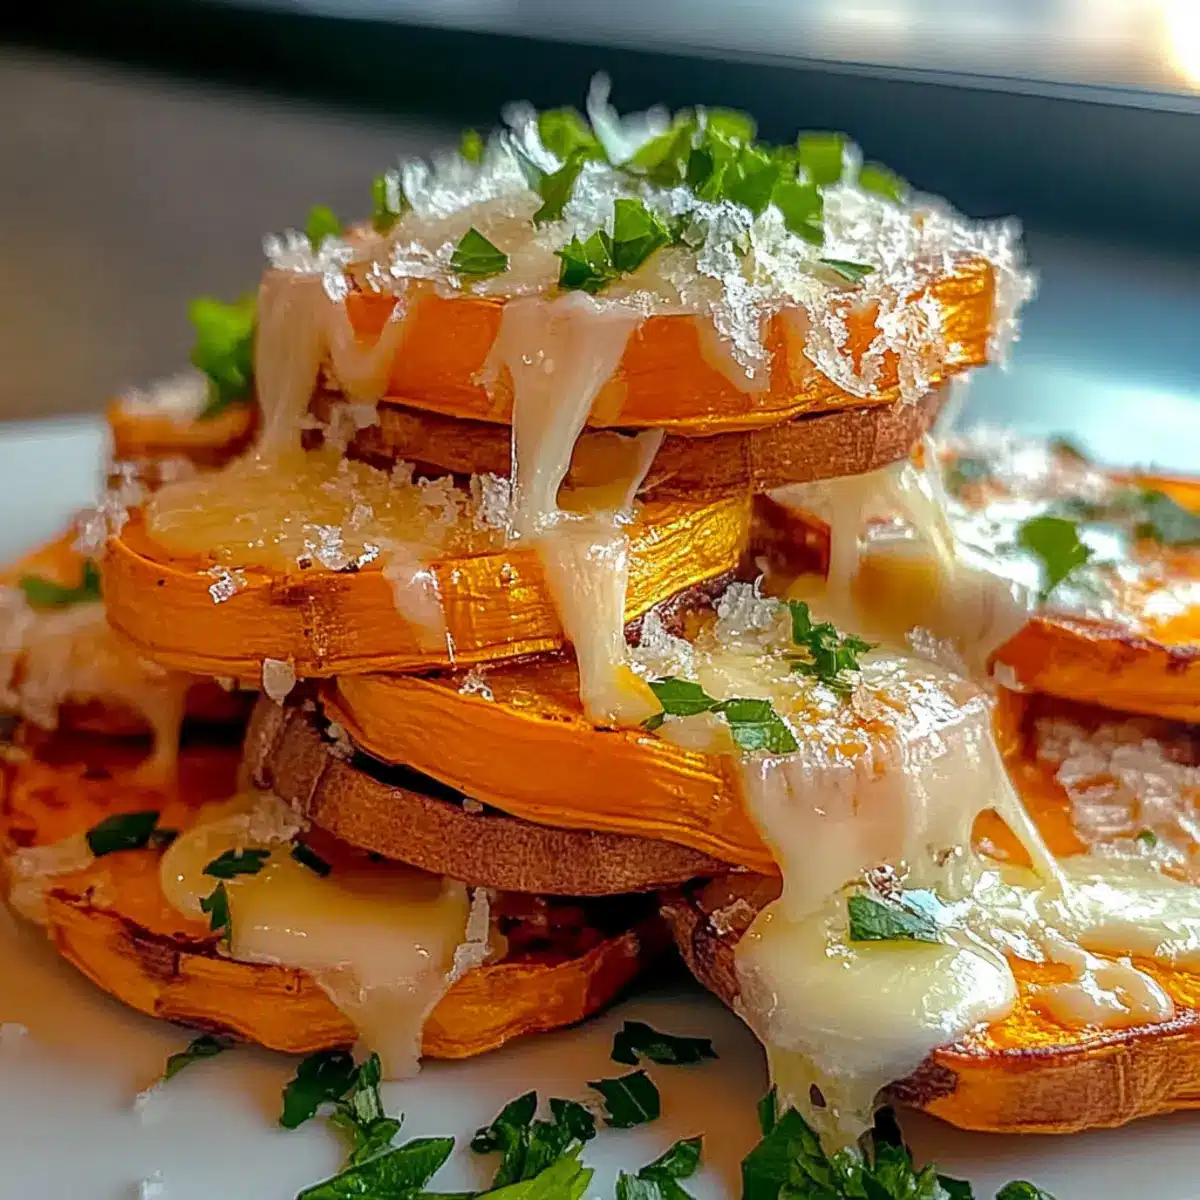
There’s something undeniably satisfying about watching a simple ingredient transform into something extraordinary, and that’s exactly what these Crispy Cheesy Sweet Potato Stacks deliver. With just a few humble sweet potatoes, we can create a visually stunning appetizer that’s perfect for family gatherings, cozy nights in, or game-day celebrations. What I love most about this recipe is that it’s not only gluten-free and beginner-friendly, but also customizable to suit your tastes. Whether you’re looking to impress guests or simply treat yourself, these savory stacks offer a delightful blend of textures and flavors that elevate the classic sweet potato experience. Curious how to master this delicious dish? Let’s dive into the recipe!
Why are Sweet Potato Stacks a Must-Try?
Versatile and Customizable: These stacks open the door to endless flavor combinations. Feel free to add toppings like crumbled bacon or fresh herbs to elevate your dish.
Crowd-Pleasing Appeal: Whether it’s a family dinner or a game-day celebration, these savory bites are sure to impress. Serve them with a side salad or as part of a fun appetizer spread!
Time-Saving Delight: With quick prep and easy cooking, you’ll have gourmet-style snacks ready in no time. Perfect for those busy weeknights!
Nutrient-Packed Goodness: Sweet potatoes are not just delicious but also rich in vitamins. These stacks pack a nutrition punch without compromising on flavor.
Beginner-Friendly: Ideal for cooks of any level, this recipe is super approachable. If you’re looking for other easy recipes, you might enjoy the Asian Sweet Ginger or Skull Potato Bites.
Sweet Potato Stacks Ingredients
For the Stacks
• Sweet Potatoes – The star of the dish, offering natural sweetness and a creamy texture. You can use Yukon Gold or Russet for a different twist.
• Olive Oil – Essential for roasting, this adds moisture and a delightful flavor to the sweet potatoes.
• Salt – A pinch is all you need to enhance the natural sweetness of the sweet potatoes.
• Black Pepper – Adds a mild heat that balances the sweetness perfectly.
• Garlic Powder – Provides a savory kick; fresh minced garlic is a great substitute if you prefer.
• Smoked Paprika – Infuses a rich, smoky depth; feel free to use regular paprika or even omit it if preferred.
For the Topping
• Shredded Cheese – A melty, creamy layer that ties the stacks together; try feta or goat cheese for a unique flavor profile.
• Sour Cream or Yogurt – A luscious drizzle at the end; swap in a dairy-free option if necessary.
For Garnish
• Green Onions – Adds a fresh crunch and vibrant color to your dish.
• Fresh Parsley – Brightens the stacks and enhances presentation.
These Sweet Potato Stacks are not only a feast for the eyes but also customizable to suit your taste buds!
Step‑by‑Step Instructions for Sweet Potato Stacks
Step 1: Preheat the Oven
Begin by preheating your oven to 400°F (200°C). While the oven heats up, line a baking sheet with parchment paper or lightly grease it with olive oil to prevent sticking. This will ensure your sweet potato stacks come out perfectly crispy, serving as a beautiful base for your delightful appetizer.
Step 2: Prepare the Sweet Potatoes
Wash, peel, and slice the sweet potatoes into thin, even rounds about 1/4 inch thick. In a large mixing bowl, toss the sweet potato slices with olive oil, salt, black pepper, garlic powder, and smoked paprika. Make sure each slice is evenly coated for maximum flavor and crunch, creating the perfect foundation for your sweet potato stacks.
Step 3: Roast the Sweet Potatoes
Spread the seasoned sweet potato slices in a single layer on the prepared baking sheet, making sure not to overcrowd them. Bake in the preheated oven for 20-25 minutes, flipping the slices halfway through. You’ll know they are done when the edges are crispy and the centers are tender, adding to the layers of texture in your Sweet Potato Stacks.
Step 4: Assemble the Stacks
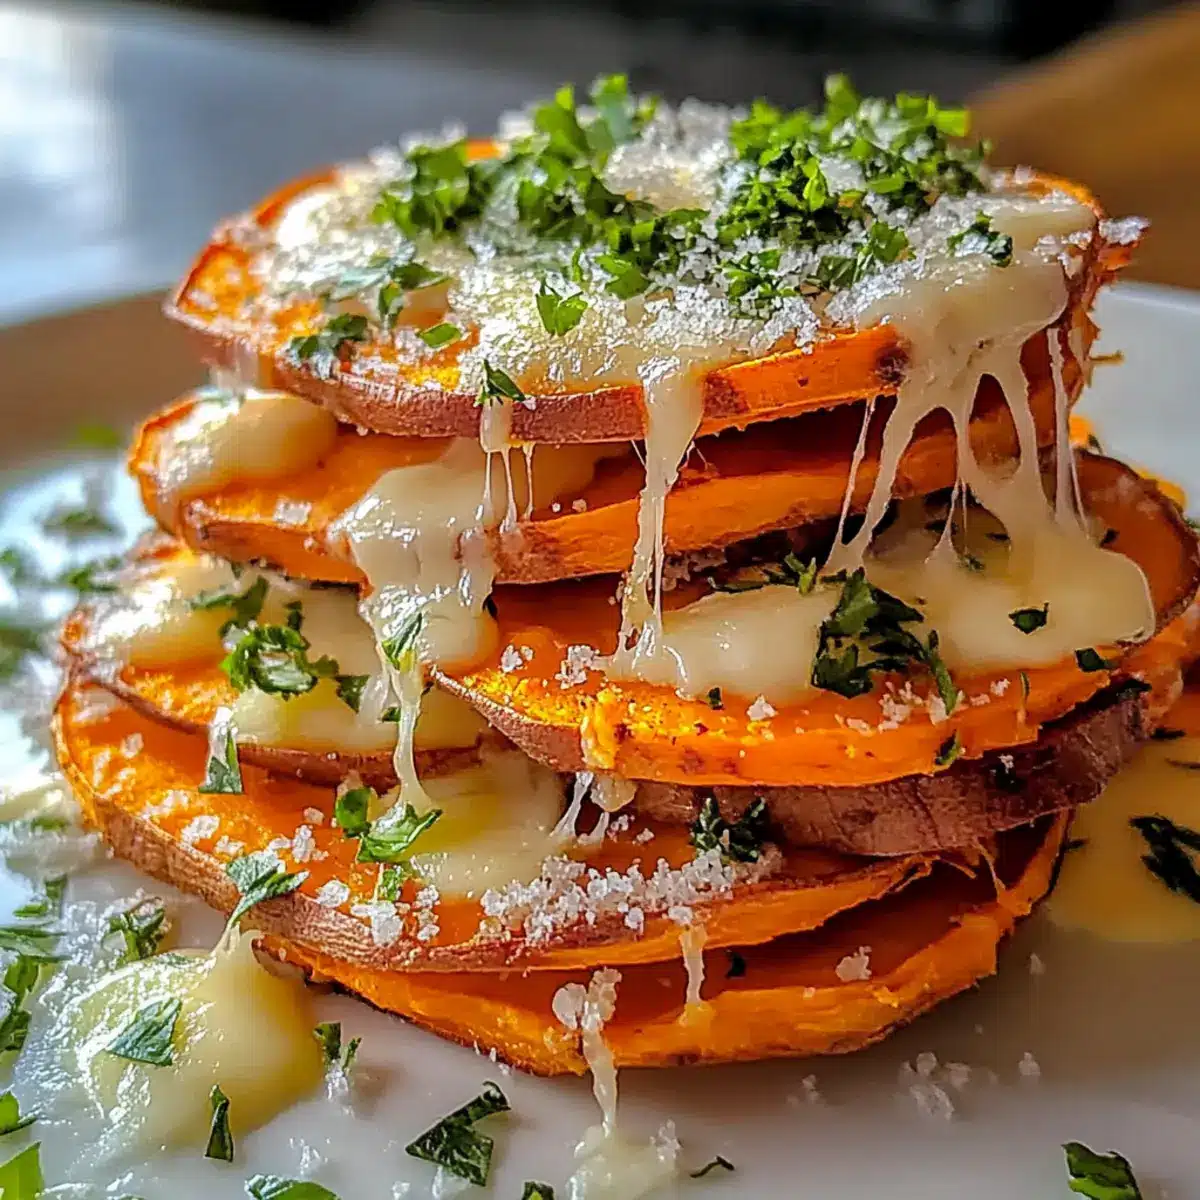
Once roasted, allow the sweet potato slices to cool slightly for easier handling. Begin layering the slices into stacks on a serving platter, alternating with cheese and stacking them high for visual appeal. This step adds both height and flavor to your dish, making each bite a creamy delight.
Step 5: Add Cheese and Re-Bake
Top each stack generously with shredded cheese of your choice, allowing it to melt beautifully. Return the assembled sweet potato stacks to the oven for an additional 5-10 minutes, or until the cheese is melted and bubbly. Keep an eye on the stacks during this time to prevent the cheese from burning and ensure a deliciously gooey finish.
Step 6: Finish and Garnish
Remove the sweet potato stacks from the oven and let them cool for a few minutes. Drizzle with sour cream or yogurt for added creaminess, then finish with a sprinkle of chopped green onions and fresh parsley for color and freshness. This final touch will elevate your Sweet Potato Stacks, bringing a burst of flavor and visual appeal to the table.
Step 7: Serve Warm
Once garnished, serve your Sweet Potato Stacks warm, allowing everyone to enjoy the incredible combination of textures and flavors. These stacks are perfect as an appetizer or a side dish, making for a delightful snack that will impress your family and friends alike.
What to Serve with Crispy Cheesy Sweet Potato Stacks
Looking to create a well-rounded meal that beautifully complements these delightful savory stacks? Here are some mouthwatering suggestions!
-
Crisp Green Salad: A vibrant mix of seasonal greens and a zesty vinaigrette balances the richness of the stacks while adding freshness.
-
Creamy Garlic Mashed Potatoes: These velvety potatoes offer a comforting contrast that enhances the flavors of the sweet potato stacks splendidly.
-
Savory Roasted Vegetables: Roasted Brussels sprouts or carrots add an earthy touch, harmonizing perfectly with the sweet and cheesy bites.
-
Warm Spinach Artichoke Dip: This indulgent dip provides a creamy, tangy companion that encourages everyone to gather for more convivial eating.
-
Zesty Quinoa Salad: The nutty flavor of quinoa, dressed with citrus and herbs, introduces an uplifting contrast to the rich stacks.
-
Grilled Chicken Skewers: Tender chicken marinated with spices pairs beautifully, offering a protein boost that keeps the meal satisfying.
-
Caesar Salad: The crunchy romaine and tangy dressing create a classic combination, enhancing the meal experience alongside the sweet potato stacks.
-
Chilled White Wine: A crisp Chardonnay or Sauvignon Blanc elevates the flavors, making every bite of your savory stacks even more delightful.
-
Chocolate Mousse: End the meal with a rich dessert that contrasts the savory notes while delivering a luscious finish to your dining experience.
Expert Tips for Sweet Potato Stacks
-
Even Slicing: Ensure sweet potatoes are sliced uniformly to guarantee consistent cooking and crunchiness in your Sweet Potato Stacks.
-
Taste Test: Always taste your seasoning blend before tossing, adjusting salt, pepper, or spices to personalize the flavor to your liking.
-
Watch the Cheese: Keep a close eye on your stacks as they melt in the oven; cheese can burn quickly, so remove them as soon as it’s bubbly.
-
Layering Trick: For optimal layering, stack in varying heights; this not only looks appealing but also enhances the texture with different cheese and potato bites.
-
Leftover Storage: Store leftovers in an airtight container for up to three days; reheat in the oven to keep your Sweet Potato Stacks crisp and delicious.
Sweet Potato Stacks Variations & Substitutions
Feel free to mix things up as you create your Sweet Potato Stacks, allowing your personality to shine through in every bite!
-
Dairy-Free: Substitute shredded cheese with a dairy-free blend, ensuring everyone can enjoy these delicious stacks.
-
Herb-Infused: Add fresh herbs like thyme or rosemary to the sweet potato seasoning for an aromatic twist that elevates this dish.
-
Crispy Bacon: Sprinkle crumbled bacon on top before the last baking stage for a savory crunch that complements the sweet potatoes perfectly.
-
Spice It Up: Incorporate diced jalapeños or a pinch of cayenne for a delightful kick, making your stacks sing with flavor.
-
Nutty Texture: Top with chopped nuts, such as pistachios or pecans, for added crunch and a nutty flavor that pairs beautifully with the sweetness.
-
Mediterranean Flair: Swap regular cheese for feta or goat cheese, and add kalamata olives for a Mediterranean twist on these classic stacks.
-
Vegetarian Boost: Layer some sautéed spinach or kale in the stacks for extra greens, offering not only flavor but also an appealing burst of color.
-
Smoky Flavor: Replace smoked paprika with chipotle powder for a smoky, spicy profile that will redefine your Sweet Potato Stacks.
For more delicious ideas, consider pairing these stacks with dishes like Lemon Chicken Potatoes or serve alongside a bowl of Slow Cooker Leek and Potato Soup for a cozy meal!
Make Ahead Options
These Sweet Potato Stacks are ideal for meal prep, making your cooking process a breeze, especially on busy weeknights. You can slice and season the sweet potatoes up to 24 hours in advance—just store them in an airtight container in the refrigerator to keep them fresh and prevent browning. Additionally, you can layer the stacks, adding cheese, and refrigerate them for up to 3 days. When you’re ready to serve, simply bake them in a preheated oven at 400°F (200°C) until the cheese is melted and bubbly, which should take about 5-10 minutes. This way, you’ll have a deliciously crispy appetizer ready with minimal effort!
How to Store and Freeze Sweet Potato Stacks
Room Temperature: Store leftover sweet potato stacks in a cool, dry place for up to 2 hours. They are best enjoyed warm, so avoid leaving them out for extended periods.
Fridge: Place cooled sweet potato stacks in an airtight container; they will stay fresh for up to 3 days. Reheat in the oven to maintain crispiness.
Freezer: If you have many leftover stacks, freeze them in a single layer on a baking sheet until solid, then transfer to a freezer-safe bag for up to 1 month.
Reheating: For the best texture, reheat frozen sweet potato stacks directly from the freezer in a preheated oven at 375°F (190°C) for 15-20 minutes until heated through and crispy.
Sweet Potato Stacks Recipe FAQs
How do I select the best sweet potatoes for the stacks?
Absolutely! When selecting sweet potatoes, look for ones that are firm, smooth, and free of dark spots or blemishes. Ideally, you want them to be uniform in size for even cooking. Larger sweet potatoes may take longer to cook, so it’s best to choose medium-sized ones for this recipe.
How should I store leftovers of the Sweet Potato Stacks?
For optimal freshness, store leftover sweet potato stacks in an airtight container in the refrigerator. They will last for up to 3 days. To reheat and maintain their crispiness, place the stacks back in a preheated oven at 375°F (190°C) for about 10-15 minutes until they’re warm and regain their delightful crunch!
Can I freeze Sweet Potato Stacks?
Very! Freezing is a great way to save your delicious stacks. First, allow them to cool completely, then arrange the stacks in a single layer on a baking sheet and freeze until solid. Once frozen, transfer them to a freezer-safe bag or container. They can be stored for up to 1 month. When it’s time to enjoy, just pop them directly from the freezer into a preheated oven at 375°F (190°C) for 15-20 minutes until they are heated through and crispy.
What should I do if my sweet potato stacks are soggy?
If your stacks turn out soggy, it’s often due to overcrowding the baking sheet or not baking them long enough. Next time, spread them out in a single layer and extend the baking time by a few minutes. If you’ve already baked them and they’ve turned soggy, try reheating them directly in the oven at a low temperature (around 300°F / 150°C) for a few minutes, which can help them regain their crispness.
Are Sweet Potato Stacks suitable for individuals with certain dietary restrictions?
Absolutely! These stacks are naturally gluten-free and can be made dairy-free by substituting the cheese and sour cream with plant-based alternatives. However, if you’re serving them to someone with allergies or dietary restrictions, always ask about specific ingredients and opt for safe substitutes as needed.

Savory Sweet Potato Stacks That Wow Every Dinner Guest
Ingredients
Equipment
Method
- Preheat your oven to 400°F (200°C) and line a baking sheet with parchment paper or lightly grease it with olive oil.
- Wash, peel, and slice the sweet potatoes into thin, even rounds about 1/4 inch thick. Toss with olive oil, salt, black pepper, garlic powder, and smoked paprika.
- Spread the seasoned sweet potato slices in a single layer on the baking sheet and bake for 20-25 minutes, flipping halfway.
- Allow the sweet potato slices to cool slightly, then layer them into stacks on a serving platter with cheese.
- Top each stack with shredded cheese and return to the oven for an additional 5-10 minutes until melted.
- Drizzle with sour cream or yogurt and garnish with green onions and parsley before serving warm.
Leave a Reply