
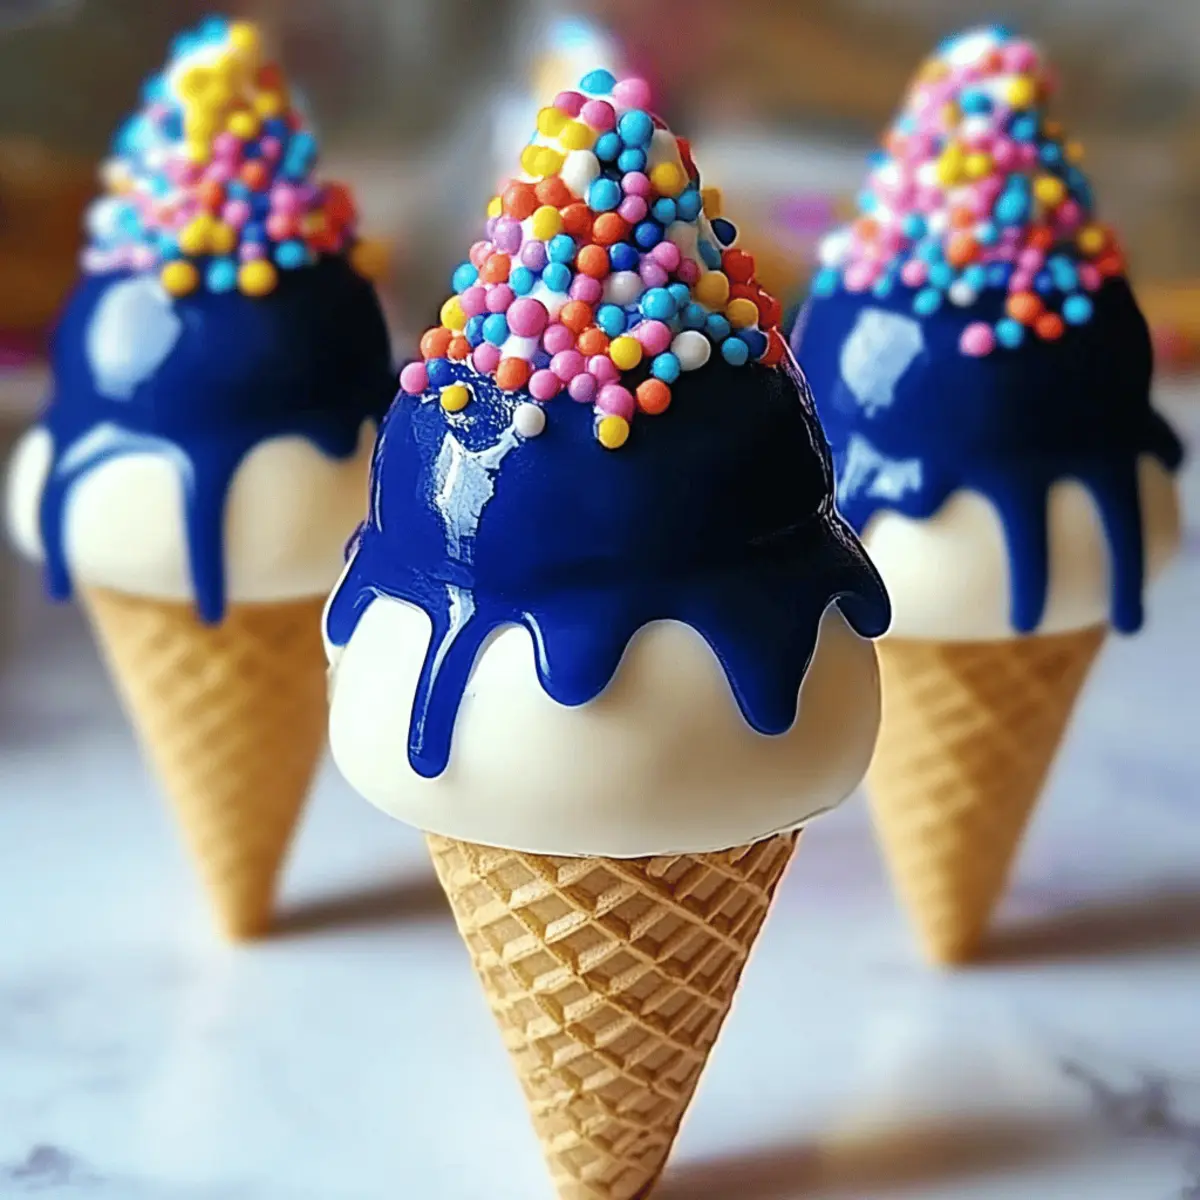
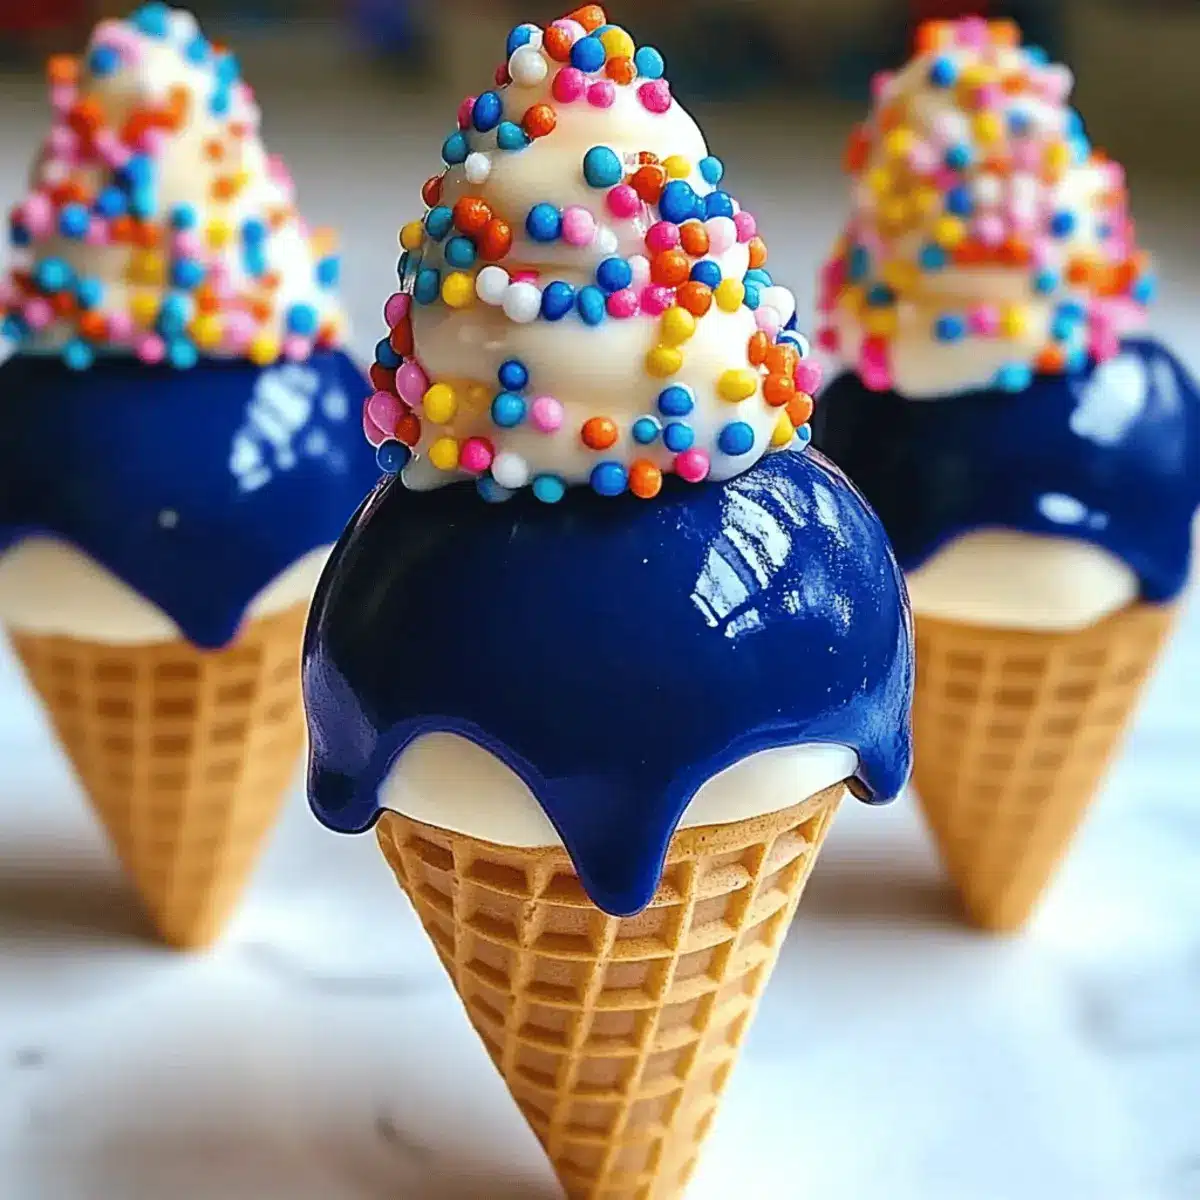
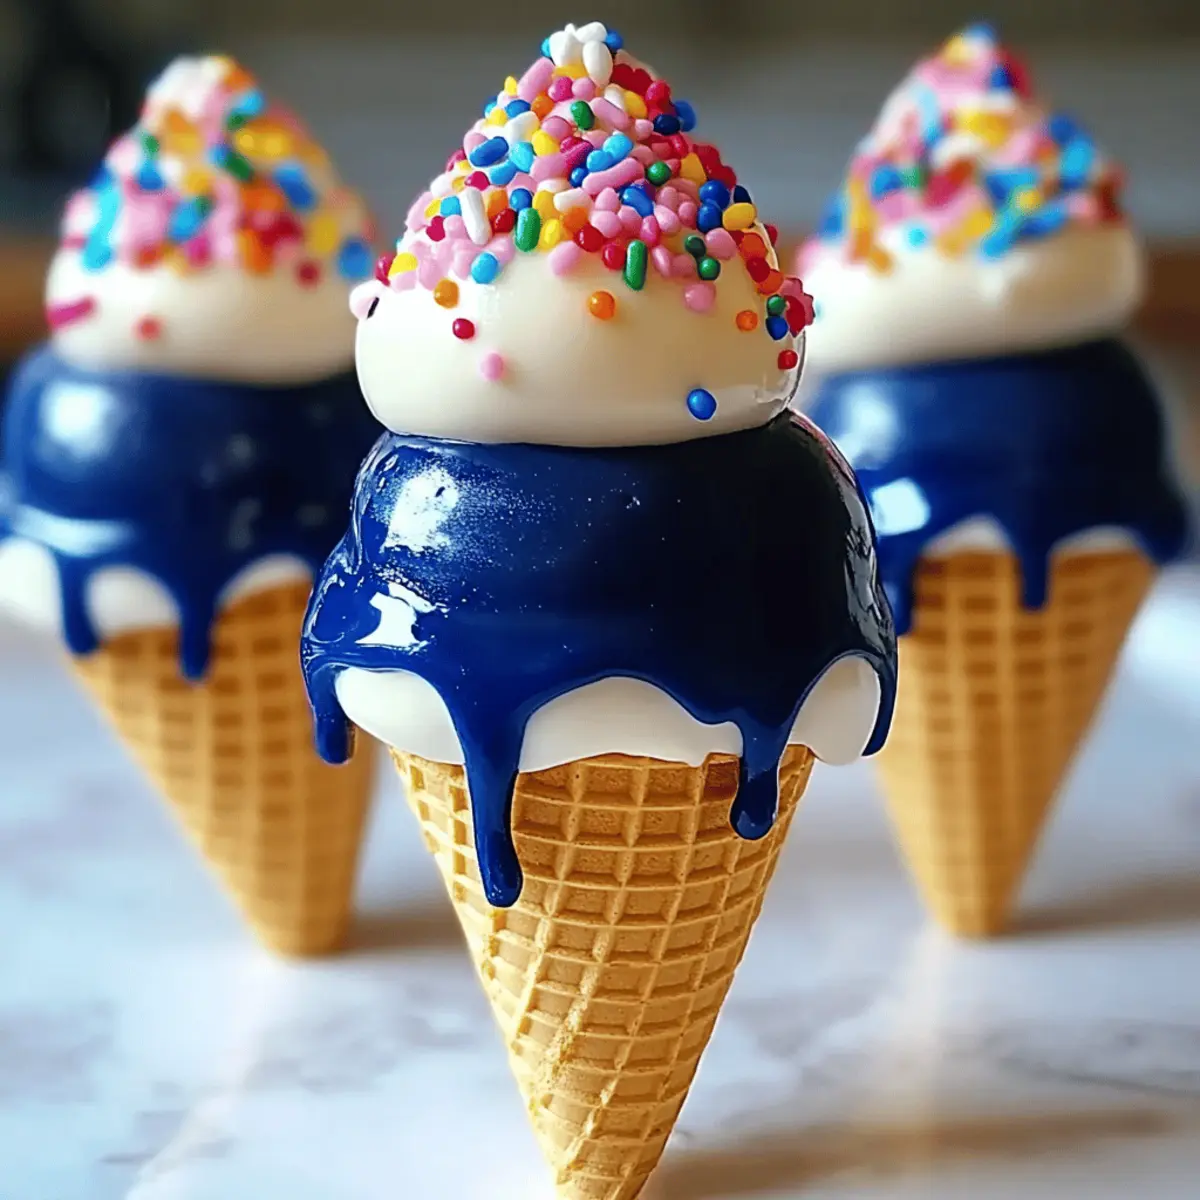
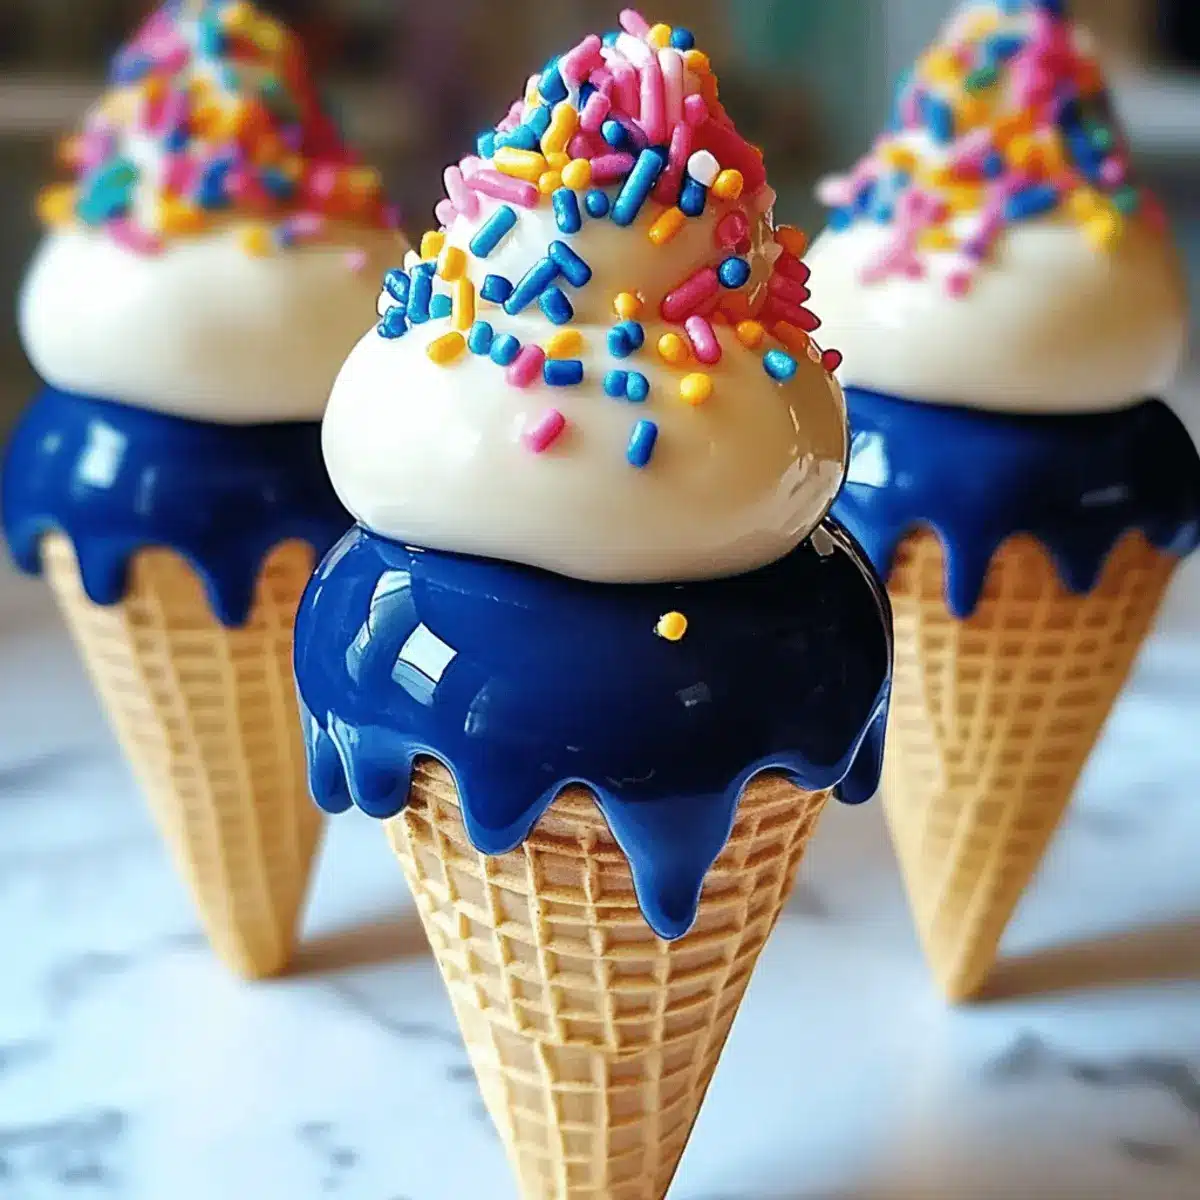
Stepping into the kitchen, I accidentally knocked a cone of ice cream to the floor, sending sprinkles flying like confetti. That little mishap sparked the inspiration for today’s recipe: Ice Cream Cone Cake Pops! These delightful treats combine the whimsy of mini cones with the heartiness of cake pops, creating a kid-friendly dessert that’s sure to impress at any gathering. Not only are they easy to make, but they also offer a customizable flavor experience that’s perfect for everyone in the family to enjoy. Whether you’re celebrating a birthday or hosting a backyard barbecue, these cake pops are the star of the show. Are you ready to bring a bit of joy and fun to your next get-together? Let’s dive into this playful recipe and unleash your inner baker!
Why Make Ice Cream Cone Cake Pops?
Endless Fun: These Ice Cream Cone Cake Pops are a delightful twist on classic cake pops that will ignite the creativity of both kids and adults alike.
Kid-Friendly: The whimsical presentation instantly engages children, making dessert an exciting part of any celebration.
Customizable Flavors: Mix and match flavors with your favorite cake mixes and frostings for a truly personalized treat, just like our Red Velvet Cake or a tangy touch from a Creamy Mushroom Soup.
Easy to Make: With simple instructions and minimal ingredients, this recipe promotes an enjoyable baking experience for everyone.
Perfect for Parties: These colorful pops are an eye-catching dessert that adds a festive atmosphere, rivaling even our delicious Mini Dessert Cake at any gathering!
Elevate your dessert game with this fun, tasty treat that promises smiles on every face!
Ice Cream Cone Cake Pops Ingredients
• Get ready to create a delightful treat!
For the Cake Pops
- Cake Mix – A delicious base; feel free to use homemade cake for an extra indulgent flavor.
- Frosting – This binds the cake crumbs together; cream cheese frosting adds a delightful tang if you’re feeling adventurous.
- Mini Ice Cream Cones – The fun vessel for your cake pops; regular-sized cones work too, just trim as needed!
For the Coating
- Candy Melts/Chocolate – Essential for coating your cake pops; if you’re out, almond bark or tempered chocolate are perfect substitutes.
- Sprinkles/Decorations – Adds that final touch of whimsy; consider colored sugars or edible glitter to elevate the visual appeal even further.
Get ready to dive into the wonderful world of Ice Cream Cone Cake Pops, where fun and flavor collide!
Step‑by‑Step Instructions for Ice Cream Cone Cake Pops
Step 1: Bake the Cake
Preheat your oven to the temperature specified on the cake mix package. Prepare your favorite cake mix and pour it into a greased cake pan. Bake for 25-30 minutes, or until a toothpick inserted into the center comes out clean. Once baked, remove from the oven and let it cool completely on a wire rack, ensuring it’s firm and ready for crumbling into cake pops.
Step 2: Crumble the Cake
After the cake has cooled, gently break it into chunks and place them into a large mixing bowl. Use your hands or a fork to crumble the cake into fine crumbs, ensuring there are no large pieces left. The texture should resemble breadcrumbs, making it easy to mix with frosting later. This step is vital for achieving that delightful Ice Cream Cone Cake Pops consistency.
Step 3: Mix with Frosting
Gradually add your chosen frosting to the cake crumbs, starting with a small amount. Use your hands to mix until the mixture holds together like cookie dough; it should be moist but not overly sticky. This blending gives your Ice Cream Cone Cake Pops their deliciously rich center. Adjust the frosting quantity as needed, ensuring it’s evenly combined.
Step 4: Form Cake Balls
Take portions of the mixture and roll them into 1-inch balls, placing each one on a parchment-lined baking sheet. Make sure they are uniform in size for even coating and presentation. Once all the cake balls are formed, refrigerate them for about 30 minutes. This chilling time helps them firm up, making it easier to attach them to the cones.
Step 5: Attach to Cones
If using sticks, melt a small amount of candy melts in a microwave-safe bowl. Dip the end of each stick in the melted candy, then insert it halfway into each firm cake ball. Next, take a mini ice cream cone, dip the rim in melted candy melts, and gently press it onto the bottom of the cake ball, creating a secure base for your Ice Cream Cone Cake Pops.
Step 6: Coat and Decorate
In a clean bowl, melt the remaining candy melts until smooth, stirring occasionally to avoid clumps. Carefully dip each cake pop into the melted candy, rotating to coat evenly, then gently shake off any excess. While the coating is still wet, add sprinkles or desired decorations to create that fun ice cream-like appearance.
Step 7: Serve and Enjoy
Place the coated Ice Cream Cone Cake Pops upright in a stand or on parchment paper to set. Allow them to cool completely until the candy coating hardens, which typically takes about 10–15 minutes. Present them at gatherings or store in an airtight container, and delight in the smiles they bring as a delicious treat!
Expert Tips for Ice Cream Cone Cake Pops
-
Chill Properly: Ensure cake balls are thoroughly chilled before attaching to cones to prevent them from falling off during assembly.
-
Stick “Glue”: Dip sticks in melted candy before inserting into cake balls for better adhesion, creating stable Ice Cream Cone Cake Pops.
-
Smooth Coating: Stir candy melts continuously until smooth; this prevents clumping and ensures an even coating for a beautiful finish.
-
Customize Wisely: Don’t be shy to mix flavors with your favorite cake and frosting combinations—this adds a personal touch to your Ice Cream Cone Cake Pops!
-
Avoid Overcoating: Shake off excess melted candy after dipping to maintain a light and attractive layer without flooding your cake pops.
Make Ahead Options
These Ice Cream Cone Cake Pops are perfect for busy home cooks looking to save time on special occasions! You can prepare the cake balls up to 3 days in advance; simply make them and refrigerate them in an airtight container to keep them fresh. For an even quicker assembly, you can coat the cake pops in chocolate and apply the sprinkles just 24 hours before serving. To maintain the pops’ delightful texture, ensure they are completely cooled before coating and allow the chocolate to set before storing. When it’s time to celebrate, just attach them to the mini cones and enjoy a fun dessert that’s just as delicious as if made the same day!
Ice Cream Cone Cake Pops Variations
Feel free to let your creativity shine by customizing these delightful cake pops to suit your taste and occasion!
-
Flavor Swaps: Try using different cake flavors like chocolate or lemon for a refreshing twist. Just think about the burst of flavor in every bite!
-
Frosting Options: Switch up the frosting with options like chocolate ganache or whipped cream for a delightful makeover. Your guests will love the unexpected flavor combination.
-
Dairy-Free Delight: Substitute the cake and frosting with dairy-free versions to cater to lactose-intolerant friends. They’ll appreciate the extra effort in making a tasty treat for everyone.
-
Nutty Crunch: Add finely chopped nuts to the cake mix for a delightful crunch. The contrast of textures makes each pop even more enjoyable!
-
Spicy Kick: Spice things up by incorporating a dash of cinnamon or cayenne pepper into your frosting. It’s a deliciously surprising way to elevate your dessert experience!
-
Decorate with Style: Instead of standard sprinkles, use themed decorations like edible glitter or miniature candies to match your party theme. It brings an added flair that makes your treats unforgettable.
-
Frozen Treats: Freeze the cake pops for a frosty dessert experience. They become a refreshing treat perfect for hot days, offering a new way to enjoy your sweet creation.
Dive into these variations and make your Ice Cream Cone Cake Pops uniquely yours! It’s all about mixing flavors and textures to create a showstopper at your next gathering.
What to Serve with Ice Cream Cone Cake Pops?
These delightful treats bring joy and whimsy to any gathering, inviting your loved ones into a world of sweet flavors and memories.
- Refreshing Fruit Salad: A mix of vibrant fruits adds a refreshing contrast to the sweetness of cake pops; it’s a light and healthy complement your guests will appreciate.
- Chocolate Fountain: Pair these pops with a chocolate fountain for a fun and interactive dessert experience. Guests can dip their cake pops for an added layer of indulgence!
- Creamy Milkshake: Serve with a classic chocolate or vanilla milkshake, rounding out the nostalgia of childhood treats. The cool creaminess balances the rich sweetness beautifully.
- Caramel Sauce Drizzle: A warm caramel sauce drizzled over the pops introduces a luscious flavor that enhances each bite, making them irresistibly delightful.
- Ice Cream Scoops: Offer small scoops of ice cream alongside your cake pops for a true ice cream parlor experience that’ll send everyone down memory lane.
- Sparkling Lemonade: A zesty sparkling lemonade perfectly complements the sweetness of cake pops, adding a refreshing touch that energizes the taste buds.
- Gourmet Coffee: For an adult twist, serve with a cup of gourmet coffee—its rich flavor adds depth and sophistication to the dessert experience.
- Mini Cupcakes: Offer mini cupcakes in complementary flavors for a variety platter that invites guests to treat themselves and satisfy every sweet tooth at the gathering.
- Chocolate-Covered Pretzels: The salty crunch of chocolate-covered pretzels creates a delightful contrast with the sweet cake pops, perfect for snacking!
Storage Tips for Ice Cream Cone Cake Pops
-
Room Temperature: Store in an airtight container at room temperature for up to 3 days. This keeps the cake pops fresh without compromising their delightful flavor.
-
Fridge: If you want to prolong their freshness, refrigerate them in an airtight container for up to a week. Just remember to let them come to room temperature before serving.
-
Freezer: For longer storage, place the cake pops in a freezer-safe container wrapped in plastic wrap. They can be frozen for up to 3 months for a sweet treat anytime.
-
Reheating: There’s no need to reheat these Ice Cream Cone Cake Pops, but if you’ve been adventurous with fillings, let them thaw in the fridge before enjoying for the best texture!
Ice Cream Cone Cake Pops Recipe FAQs
How do I choose the right cake mix or make it from scratch?
Absolutely! For the best flavor, consider using a high-quality cake mix or make it from scratch. If you opt for homemade, make sure your ingredients are fresh, and the batter is well-mixed for even baking. Enjoy flavor swaps by trying decadent alternatives like chocolate or red velvet for a special twist!
What’s the best way to store Ice Cream Cone Cake Pops?
To keep your delightful treats fresh, store them in an airtight container at room temperature for up to 3 days. If you wish to extend their life, refrigerate them for up to a week. Just let them come to room temperature before serving for that delightful experience!
Can I freeze Ice Cream Cone Cake Pops for later?
Absolutely! To freeze them, wrap each pop individually in plastic wrap and then place them in a freezer-safe container. They can be frozen for up to 3 months. When you’re ready to enjoy them, simply transfer them to the fridge to thaw overnight before serving.
What if my cake pops crumble or fall off the cone?
No worries! If your cake pops are crumbling or falling off, it’s likely that either the cake balls weren’t fully chilled or the coating isn’t thick enough. Make sure to chill the cake balls for at least 30 minutes before attaching them to the cones. Also, ensure you’re generously coating with melted candy to create a stable base.
Are there any dietary considerations for Ice Cream Cone Cake Pops?
Very! While this recipe is kid-friendly, if you’re making them for someone with dietary restrictions, you can customize accordingly. Use gluten-free cake mixes and dairy-free frosting alternatives to accommodate different dietary needs, ensuring everyone can enjoy these whimsical treats!
Can I customize the flavors?
The more the merrier! Feel free to experiment with various cake flavors, such as lemon for a refreshing twist or chocolate for a rich delight. You can also mix and match frostings and toppings, creating a unique Ice Cream Cone Cake Pop experience for every occasion!
Ice Cream Cone Cake Pops: A Whimsical Treat for Everyone
Ingredients
Equipment
Method
- Preheat your oven according to the cake mix package instructions. Prepare the cake mix and pour into a greased pan. Bake for 25-30 minutes until a toothpick comes out clean. Cool completely.
- Crumble the cooled cake into fine crumbs in a mixing bowl, ensuring there are no large pieces left.
- Gradually mix in the frosting until it holds together like cookie dough. Adjust frosting to ensure even moisture.
- Roll the mixture into 1-inch balls and refrigerate for 30 minutes to firm up.
- Melt a small amount of candy melts, dip sticks in it, insert halfway into the cake balls, then attach to mini cones.
- Melt remaining candy melts until smooth. Coat each cake pop and add sprinkles before coating sets.
- Place coated cake pops upright to set for 10–15 minutes. Enjoy or store properly!
Leave a Reply