
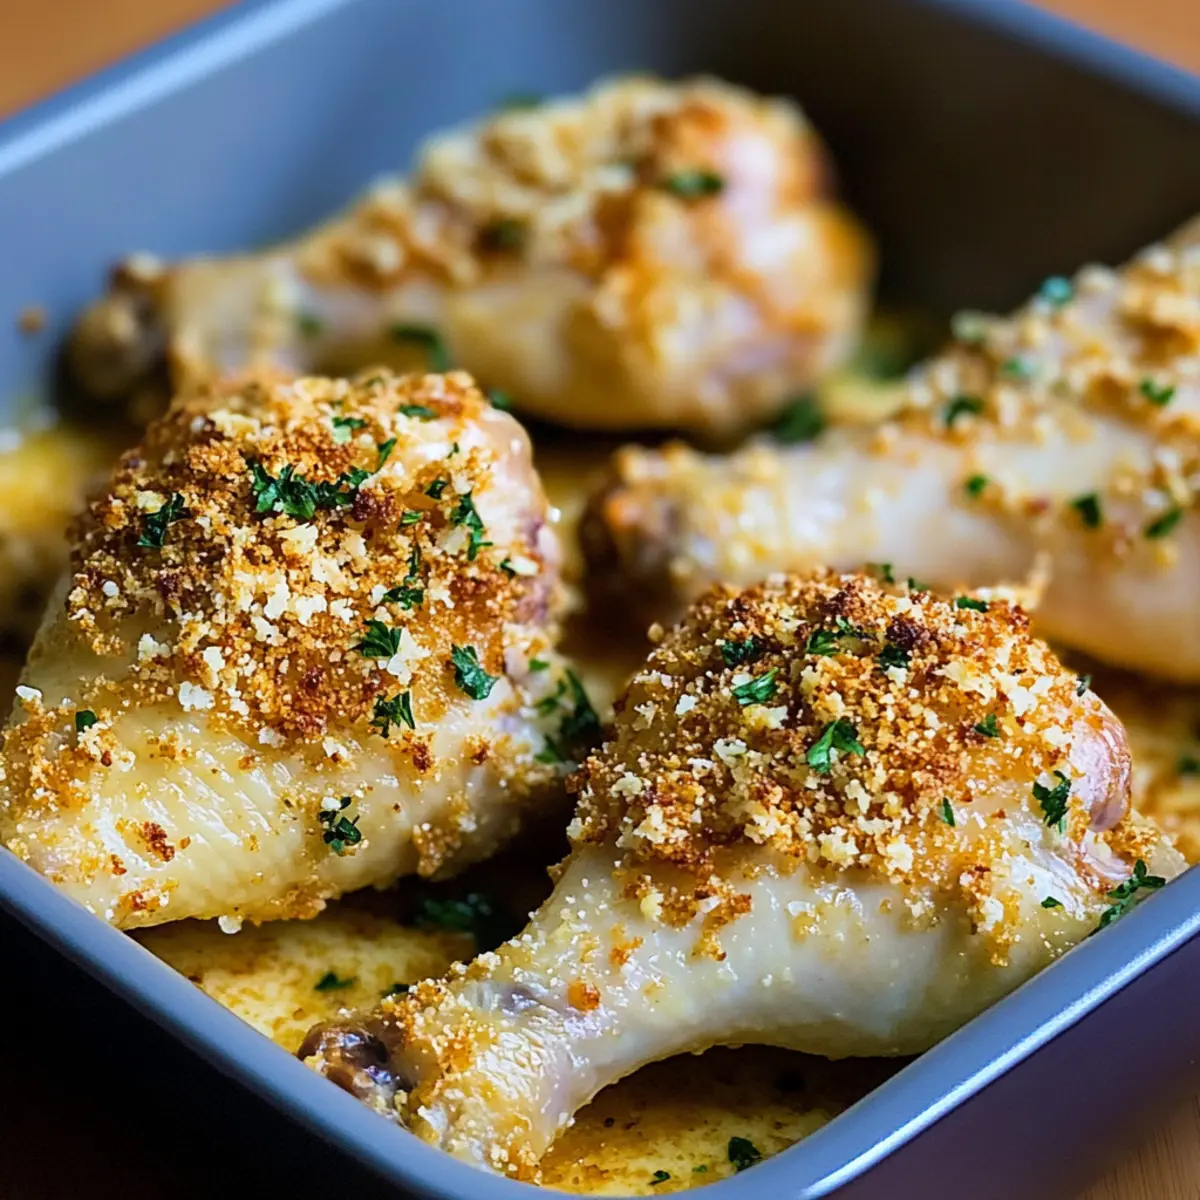
As the aroma of freshly baked chicken fills the kitchen, I can’t help but feel a wave of comfort wash over me. Garlic Parmesan Chicken Legs are my go-to dish for quick weeknight dinners and casual get-togethers alike. This recipe brings together simple pantry staples to create a crispy exterior and juicy interior that your family will adore. Not only is it a breeze to make, but it also caters to various dietary preferences with easy adaptations for gluten-free and low-carb diets. Just imagine the delight on everyone’s faces as they sink their teeth into these flavorful legs! Are you ready to discover just how easy it is to elevate your dinner routine?
Why Are Garlic Parmesan Chicken Legs So Great?
Crispy Satisfaction: These Garlic Parmesan Chicken Legs deliver an extraordinary crunch that rivals any fried chicken, without the fuss.
Flavor Explosion: The perfect blend of garlic and Parmesan creates a savory taste that will leave everyone asking for seconds.
Versatile Cooking Methods: Whether you choose to bake, grill, or air-fry, this recipe adapts beautifully to your preferred cooking style.
Time-Saving Delight: Ready in just 45 minutes, it’s the ultimate choice for busy weeknights without sacrificing flavor.
Dietary Friendly: With easy gluten-free and low-carb swaps, this dish can accommodate various dietary needs, just like my Healthy Sticky Chicken recipe!
Crowd Pleaser: Ideal for family dinners or friendly get-togethers, these chicken legs will impress everyone at the table!
Garlic Parmesan Chicken Legs Ingredients
For the Chicken
• Chicken Legs (drumsticks) – The centerpiece of this dish; they stay juicy and full of flavor during cooking.
For the Coating
• Garlic (2 cloves, minced) – Infuses a strong aroma and depth that pairs wonderfully with chicken.
• Parmesan Cheese (½ cup, grated) – Adds richness and creates that irresistible crispy crust—freshly grated is always best!
• Breadcrumbs (⅓ cup or crushed pork rinds for low-carb) – Provides the crunch and texture that turns ordinary chicken into a sensational meal.
For Flavoring
• Olive Oil (2 tbsp) – Essential for crisping the chicken and binding the coating for a delightful crunch.
• Paprika (1 tsp) – Adds mild sweetness and a beautiful color to the dish.
• Salt (½ tsp) and Black Pepper (½ tsp) – Enhances overall flavor, making each bite pop with deliciousness.
For Garnish
• Fresh Parsley (2 tbsp, chopped) – Brightens the dish and adds a touch of freshness, making your serving look enticing!
These Garlic Parmesan Chicken Legs ingredients come together to create a memorable meal that your family will love. Happy cooking!
Step‑by‑Step Instructions for Garlic Parmesan Chicken Legs
Step 1: Preheat Your Oven
Begin by preheating your oven to 400°F (200°C), ensuring it’s hot and ready for the Garlic Parmesan Chicken Legs. While the oven warms up, prepare a baking sheet by lining it with parchment paper or lightly greasing it with olive oil to prevent sticking. This preparation enhances the crispy texture of the chicken.
Step 2: Create the Flavorful Coating
In a mixing bowl, combine the freshly grated Parmesan cheese, minced garlic, breadcrumbs, paprika, salt, and black pepper. Stir the mixture well until it’s evenly blended, creating a delicious coating that will elevate the flavor of your chicken. Make sure each ingredient is well-distributed for the best culinary experience.
Step 3: Prepare the Chicken Legs
Take your chicken legs and pat them dry with paper towels to remove any excess moisture, which helps the coating stick better. Drizzle about 2 tablespoons of olive oil over the chicken legs, ensuring they are well-coated. This step enhances the crispiness and locks in moisture while baking.
Step 4: Coat the Chicken
Now it’s time to coat the chicken legs in the flavorful mixture. Press each leg firmly into the Parmesan mixture, ensuring it is fully coated on all sides. This layer of coating adds not only great flavor but also a beautifully crispy texture when the chicken is baked.
Step 5: Arrange and Bake
Place the coated chicken legs on the prepared baking sheet, making sure to leave some space between each piece for even cooking. Slide the baking sheet into the oven and bake for 35–45 minutes, or until the chicken is golden brown and reaches an internal temperature of 165°F (74°C). Keep an eye on them for that perfect crispiness!
Step 6: Garnish and Serve
Once done, carefully remove the Garlic Parmesan Chicken Legs from the oven. Sprinkle freshly chopped parsley over the top for a pop of color and freshness before serving. The enticing aroma will fill your kitchen, making it impossible to resist digging in right away!

What to Serve with Garlic Parmesan Chicken Legs
Elevate your dining experience by pairing these crispy chicken legs with sides that enhance their rich, savory flavor.
-
Creamy Mashed Potatoes: Their buttery texture pairs perfectly with the crispy chicken, soaking up the delicious juices beautifully.
-
Garlic Roasted Broccoli: Nutty and tender, this fresh vegetable adds brightness and a delightful crunch, perfectly complementing the richness of the chicken.
-
Caesar Salad: The crisp romaine and tangy dressing create a refreshing contrast to the savory, cheesy notes of the chicken, making every bite satisfying.
-
Honey Glazed Carrots: The sweet and slightly caramelized carrots provide a delightful balance to the savory chicken, ensuring a colorful plate.
-
Quinoa Pilaf: A nutty and hearty side, this dish adds texture and healthy grains, making it an ideal accompaniment to the flavorful chicken.
-
Lemon Herb Rice: Fluffy rice with a hint of lemon complements the Garlicky Parmesan flavors, bringing a fresh and zesty element to your meal.
-
Crisp White Wine: A chilled glass of Sauvignon Blanc or Chardonnay will enhance the flavors, making each bite of chicken even more enjoyable.
-
Chocolate Lava Cake: Cap off this delectable meal with a warm, gooey dessert that offers an irresistible contrast to the savory chicken legs.
Expert Tips for Garlic Parmesan Chicken Legs
-
Fresh Parmesan: Always use freshly grated Parmesan cheese for the best flavor and texture; pre-grated versions often lack that delicious creaminess.
-
Crispy Finish: For an extra crispy crust, broil the chicken legs for the last 2–3 minutes of baking. Keep a close watch to prevent burning!
-
Avoid Moisture: Pat the chicken legs dry thoroughly before coating; excess moisture can cause the breading to become soggy instead of crispy.
-
Cooking Time: If you’re using chicken thighs or wings, adjust the cooking time accordingly. Thighs may need a few extra minutes to reach 165°F (74°C) internal temperature.
-
Meat Thermometer: Use a meat thermometer to ensure your Garlic Parmesan Chicken Legs are cooked to perfection and safe to eat.
Make Ahead Options
Garlic Parmesan Chicken Legs are a fantastic option for meal prep, saving you time during busy weeknights! You can easily prepare the coating (Parmesan, garlic, breadcrumbs, paprika, salt, and pepper) up to 24 hours in advance by mixing it and storing it in an airtight container. Additionally, you can coat the chicken legs and place them on the baking sheet up to 3 hours ahead—just be sure to refrigerate to maintain their quality and prevent any bacteria growth. When you’re ready to serve, simply bake them straight from the fridge at 400°F (200°C) until golden and crispy, which ensures you achieve that mouthwatering flavor with minimal effort!
How to Store and Freeze Garlic Parmesan Chicken Legs
Fridge: Store leftovers in an airtight container for up to 4 days. This keeps the chicken legs moist while maintaining their zesty flavor.
Freezer: For longer storage, wrap each chicken leg individually in plastic wrap, then place them in a freezer-safe bag. They can be frozen for up to 2 months.
Reheating: To restore crispiness, reheat in the oven at 375°F (190°C) for 15–20 minutes, or until heated through. Avoid microwaving to keep the texture intact.
Room Temperature: Ideally, keep cooked chicken legs at room temperature for no longer than 2 hours to ensure food safety.
Garlic Parmesan Chicken Legs Variations
Feel free to personalize your Garlic Parmesan Chicken Legs with these delightful twists to suit your taste and dietary preferences!
-
Gluten-Free: Use gluten-free breadcrumbs to make this dish safe for those with gluten sensitivities without sacrificing flavor.
-
Low-Carb Crunch: Substitute traditional breadcrumbs with crushed pork rinds for a crunchy, low-carb alternative that adds incredible texture.
-
Air-Fried Option: For a healthier twist, air-fry your chicken legs at 380°F (193°C) for just 25–30 minutes, flipping halfway to achieve that golden crisp.
-
Spicy Kick: Add a teaspoon of cayenne pepper or chili powder to the coating for a delicious heat that will wake up your taste buds.
-
Herb Infusion: Mix in dried herbs such as oregano or thyme with the Parmesan coating for an aromatic flavor boost that transforms the dish entirely.
-
Zesty Lemon: Squeeze fresh lemon juice over the chicken legs before serving, or add lemon zest to the coating for a bright, tangy finish.
-
Smoky Flavor: Incorporate smoked paprika instead of regular paprika for a unique, smoky undertone that pairs beautifully with the garlic and Parmesan.
-
Plated Perfection: Serve these chicken legs with a fresh side salad or roasted veggies, elevating the meal just like my Greek Chicken Gyro – simple and satisfying!
There’s no limit to how you can enjoy these chicken legs; let your creativity shine as you bring your unique twist to the table!
Garlic Parmesan Chicken Legs Recipe FAQs
How do I know if my chicken legs are ripe?
Absolutely! When selecting chicken legs, look for those with a fresh pink color and firm texture. Avoid any that appear slimy or have an off smell. If you’re buying whole chicken legs, the skin should be intact and not discolored.
How should I store leftovers?
To keep your Garlic Parmesan Chicken Legs juicy and flavorful, store leftovers in an airtight container in the refrigerator for up to 4 days. Make sure they have cooled to room temperature before sealing them tightly. This will preserve their deliciousness for your next meal!
Can I freeze the chicken legs?
Very! To freeze your Garlic Parmesan Chicken Legs, wrap each leg individually in plastic wrap, and then place them in a freezer-safe bag or container. They can be frozen for up to 2 months. When ready to enjoy, simply reheat them in the oven at 375°F (190°C) for about 15–20 minutes to restore their crispy exterior.
What if my coating doesn’t stick to the chicken?
If you find that the coating isn’t sticking well to your chicken legs, it might be due to excess moisture. Be sure to pat them dry thoroughly before applying any oil or coating mixture. Additionally, pressing the chicken legs firmly into the breadcrumb mixture can help ensure a better grip, giving you that perfect crispy crust.
Is it safe for pets?
You should avoid giving your pets Garlic Parmesan Chicken Legs since garlic can be toxic to dogs and cats in certain amounts. Always check with your veterinarian before introducing new foods into your pet’s diet, especially those that could pose potential risks.
Are there any common allergens in the recipe?
Yes, this recipe contains cheese, gluten (from breadcrumbs), and potentially nuts if you choose to use crushed nuts as a coating alternative. For a gluten-free version, use gluten-free breadcrumbs, and if there are lactose intolerances, try using vegan cheese or leave it out entirely. Always check the labels to ensure safety for those with allergies.
Garlic Parmesan Chicken Legs: Crispy, Juicy Perfection at Home
Ingredients
Equipment
Method
- Preheat your oven to 400°F (200°C) and prepare a baking sheet.
- Combine Parmesan, garlic, breadcrumbs, paprika, salt, and black pepper in a bowl.
- Pat the chicken legs dry and drizzle with olive oil.
- Coat the chicken legs in the Parmesan mixture, ensuring an even coat.
- Place the chicken on the baking sheet, leaving space between pieces. Bake for 35-45 minutes until golden brown.
- Remove and garnish with parsley before serving.
Leave a Reply