
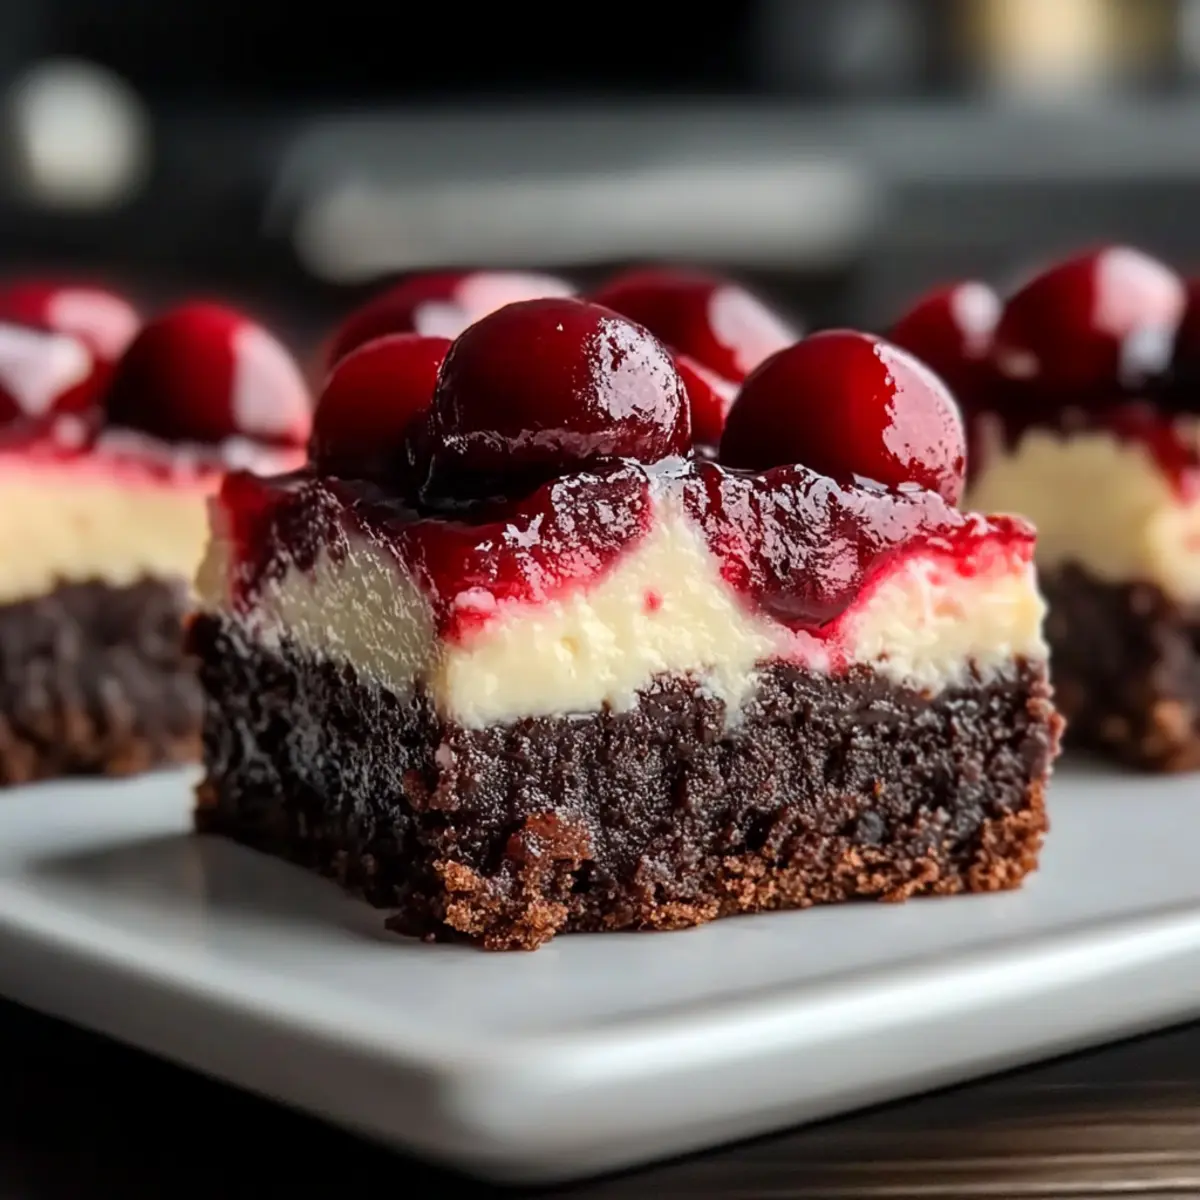
As I was slicing into these luscious Cherry Cheesecake Brownie Bars, the rich aroma of chocolate and cream cheese wafted through my kitchen, instantly transporting me to a world of sweet indulgence. This recipe brings together a fudgy brownie base and a velvety cheesecake layer, topped with juicy cherry goodness, making it a perfect treat for any occasion—especially when you’re looking to impress friends or simply soothe a sweet tooth craving. What’s even better? These bars can be whipped up in no time and can easily be adapted with various fruits or gluten-free options. Ready to elevate your dessert game? Let’s dive into this delightful recipe that promises to satisfy your cravings and leave everyone asking for seconds!
Why are these Cherry Cheesecake Brownie Bars irresistible?
Decadent Flavor: Each bite delivers a rich explosion of chocolatey goodness combined with a luscious cheesecake finish, perfectly balanced by the sweetness of cherries.
Quick Preparation: With simple steps and common ingredients, this recipe fits seamlessly into busy schedules, allowing you to whip up a showstopper in no time.
Versatile Options: Experiment with different fruit toppings, or add some chocolate chips for an extra melt-in-your-mouth experience. Consider trying out variations like our delicious Pumpkin Pie Bars for seasonal flair!
Crowd-Pleaser: These bars are sure to impress at any gathering, turning heads and satisfying palates.
Textures Galore: Enjoy the fudgy brownie base paired with creamy cheesecake and juicy cherry layers—each texture complementing the other for an indulgent experience.
Make-Ahead Friendly: These treats can be prepared in advance, chilling in the fridge for a delicious make-ahead dessert. Taste the joy with every square!
Cherry Cheesecake Brownie Bars Ingredients
For the Brownie Base
- Butter – Adds richness and moisture; unsalted butter is recommended for better salt control.
- Sugar – Sweetens both layers; you can use brown sugar for extra moisture and depth.
- Eggs – Provides structure and binding; make sure they’re at room temperature for best results.
- Vanilla Extract – Enhances the flavor profile; using pure vanilla extract is ideal for better taste.
- All-Purpose Flour – The key ingredient for the brownie structure; swap with gluten-free flour for a gluten-free version.
- Cocoa Powder – Imparts rich chocolate flavor; Dutch-processed cocoa can intensify the taste if desired.
- Salt – Balances sweetness and enhances overall flavor.
For the Cheesecake Layer
- Cream Cheese – The foundation of the cheesecake layer, bringing creaminess; it must be softened for a smooth texture.
- Sugar – Sweetens the cheesecake layer; adjust according to your taste preferences.
- Egg – Acts as a binder in the cheesecake layer; remember to keep it at room temperature.
- Vanilla Extract – Provides an additional flavor layer; pure extract works best for this recipe.
For the Cherry Topping
- Cherry Pie Filling – Adds a fruity sweetness and contrast; consider frozen cherries with a cornstarch and sugar mix as a substitute.
These delicious Cherry Cheesecake Brownie Bars are cheerfully easy to make and can be customized to suit your preferences. Enjoy crafting these dessert bars that are sure to delight your family and friends!
Step‑by‑Step Instructions for Cherry Cheesecake Brownie Bars
Step 1: Preheat and Prepare the Pan
Preheat your oven to 350°F (175°C) while you grease a 9×13-inch baking pan with butter or cooking spray. This ensures a non-stick surface for your luscious Cherry Cheesecake Brownie Bars, allowing for easy removal once baked. Set the pan aside so you can focus on mixing your brownie batter next.
Step 2: Mix the Brownie Batter
In a large mixing bowl, combine melted unsalted butter and sugar, stirring until fully incorporated. This should take about 2 minutes. Add room temperature eggs and pure vanilla extract, mixing well until the batter is smooth and glossy. The rich aroma of chocolate will start to fill your kitchen, making it hard to resist!
Step 3: Combine Dry Ingredients
In a separate bowl, sift together all-purpose flour, cocoa powder, and salt. Gradually pour the dry mixture into the wet ingredients, stirring gently until just combined. This brief mixing prevents tough brownies and keeps the texture fudgy. Once the mixture is smooth with a few flour streaks, transfer it into the bottom of your prepared baking pan.
Step 4: Prepare the Cheesecake Layer
In a clean bowl, beat softened cream cheese and sugar until smooth and creamy, about 2-3 minutes. Add an egg and a splash of vanilla extract, mixing until fully integrated. You want a silky texture with no lumps for this cheesecake layer that will sit atop your brownie base. Pour this luscious mixture over the brownie layer, spreading evenly.
Step 5: Add Cherry Topping
Spoon the cherry pie filling on top of the cheesecake layer, dolloping it in various spots. Use a knife or skewer to gently swirl the cherries into the cheesecake, creating delightful marbled patterns. Be careful not to mix too much; you want distinct layers in your Cherry Cheesecake Brownie Bars for a stunning presentation.
Step 6: Bake to Perfection
Place the pan in your preheated oven and bake for 30 minutes. The edges should be set, while the center remains slightly jiggly; this ensures a fudgy brownie texture. Once baked, remove from the oven and let the pan sit at room temperature for a few minutes to cool before chilling in the fridge.
Step 7: Cool and Slice
Allow the Cherry Cheesecake Brownie Bars to cool completely in the refrigerator, preferably for at least 2 hours, to ensure clean cuts. Once chilled, take them out and slice into squares with a sharp knife. This makes for the perfect treat to share at gatherings or to enjoy at home—a slice of pure joy!
Make Ahead Options
These Cherry Cheesecake Brownie Bars are perfect for busy home cooks looking to save time! You can prepare the brownie base up to 24 hours in advance—simply cover it tightly with plastic wrap or store it in an airtight container in the refrigerator to prevent drying out. The cheesecake layer can also be made ahead; just keep it in the fridge for up to 3 days. When you’re ready to indulge, spoon the cherry pie filling on top and swirl gently before baking. This way, you’ll enjoy the same delicious flavors and textures, all while saving precious time in the kitchen!
Cherry Cheesecake Brownie Bars Variations
Feel free to let your creativity shine while crafting these delightful bars and customize them to suit your taste!
-
Berry Bliss: Swap cherry pie filling for a mix of blueberries and raspberries for a vibrant summer twist. Each bite bursts with fruity freshness!
-
Chocolate Overload: Add a cup of chocolate chips to the brownie layer for a deeper chocolate flavor that melts in your mouth. Perfect for true chocolate lovers.
-
Nutty Crunch: Stir in chopped walnuts or pecans into the brownie batter for a delightful crunch and added texture that beautifully contrasts the creamy cheesecake.
-
Citrus Zest: Elevate the cheesecake layer by adding lemon or orange zest. This brightens the flavors and adds a refreshing taste that harmonizes with the cherries.
-
Almond Extract: Replace vanilla extract in the cheesecake with almond extract. The nutty aroma adds a delightful twist that pairs beautifully with the cherries.
-
Gluten-Free Goodness: Swap all-purpose flour with your favorite gluten-free flour blend. Enjoy the same fudgy texture without the gluten!
-
Spicy Kick: For a surprise twist, mix in a pinch of cayenne pepper to the brownie batter for a subtle heat that enhances the chocolate flavor wonderfully.
-
Tropical Escape: Use pineapple chunks or mango puree on top in place of cherries for an exotic flair that will transport your taste buds to paradise.
If you feel inspired, don’t forget to try out other delicious dessert recipes, like the creamy Strawberry Crunch Cheesecake or our delightful Cherry Amaretto Tiramisu, to keep your sweet cravings satisfied!
Storage Tips for Cherry Cheesecake Brownie Bars
- Room Temperature: Keep leftover bars in a cool place for up to 4 hours. However, it’s best to store them in the fridge for optimal freshness.
- Fridge: Place the bars in an airtight container and store in the refrigerator for up to 5 days to maintain their delicious taste and texture.
- Freezer: Wrap individual bars tightly in plastic wrap and freeze for up to 3 months. Thaw overnight in the fridge before enjoying.
- Reheating: For a warm treat, reheat in the microwave for 10-15 seconds, but enjoy them chilled or at room temperature for the best experience!
Expert Tips for Cherry Cheesecake Brownie Bars
-
Room Temperature Ingredients: Ensure cream cheese and eggs are at room temperature to achieve a smooth, lump-free cheesecake layer, avoiding any unwanted textures.
-
Gentle Mixing: Mix the brownie batter just until combined to keep it fudgy; overmixing can lead to tough, dry brownies.
-
Swirl with Care: When adding cherry pie filling, use a gentle hand while swirling to maintain distinct layers and avoid mixing into the cheesecake layer.
-
Cool Completely: Allow the bars to cool completely before slicing to prevent messiness and achieve clean, beautiful edges.
-
Use Fresh Ingredients: For the best flavor, opt for high-quality vanilla extract and fresh cherries when possible—this will elevate your Cherry Cheesecake Brownie Bars to a whole new level!
What to Serve with Cherry Cheesecake Brownie Bars?
Indulging in these sweet bars is just the beginning of your dessert adventure; let’s create a well-rounded treat experience!
-
Whipped Cream: A dollop of freshly whipped cream adds a light and airy contrast, perfectly balancing the rich flavors of the bars.
-
Vanilla Ice Cream: Creamy vanilla ice cream melts beautifully when served alongside these bars, enhancing the chocolate and cherry nuances.
-
Chocolate Sauce: Drizzling rich chocolate sauce over the bars elevates the chocolate experience, and adds an even more indulgent touch.
-
Fresh Berries: A side of plump strawberries or raspberries introduces a bright, fresh acidity that cuts through the sweetness beautifully.
-
Chilled Lemonade: A refreshing glass of lemonade brings a zesty contrast, cleansing the palate after each decadent bite.
-
Coffee or Espresso: Rich and aromatic, a warm cup of coffee enhances the flavors in the bars while providing a comforting finish to your dessert.
-
Nutty Brownies: Pair with nutty brownies for a chocolate lover’s dream – the crunch and richness of nuts complement the soft cheesecake layer.
Immerse yourself in a delightful experience by mixing and matching these accompaniments; your Cherry Cheesecake Brownie Bars are bound to impress!
Cherry Cheesecake Brownie Bars Recipe FAQs
How do I select ripe cherries for topping?
Absolutely! When choosing cherries, look for ones that are firm and have a vibrant color. Avoid any with dark spots or blemishes. Fresh cherries should feel plump and juicy. If fresh cherries aren’t available, high-quality canned or frozen cherry pie filling works wonderfully too!
How should I store leftover Cherry Cheesecake Brownie Bars?
To maximize freshness, store the bars in an airtight container in the fridge for up to 5 days. This will help retain the creamy texture and rich flavors. If you want to keep them longer, wrap individual bars tightly in plastic wrap and freeze them for up to 3 months.
Can I freeze Cherry Cheesecake Brownie Bars?
Absolutely! To freeze them, first allow the bars to cool completely. Then, wrap each square tightly in plastic wrap and place them in a freezer-safe container. They can be frozen for up to 3 months. When ready to enjoy, simply thaw overnight in the fridge before serving.
What if my brownie layer is too dry?
If you find your brownie layer turns out too dry, it may be due to overmixing or baking for too long. Ensure you mix just until combined for that fudgy texture! If you encounter dryness, consider serving the bars with a scoop of vanilla ice cream or whipped cream to add moisture and balance the richness.
Are Cherry Cheesecake Brownie Bars suitable for gluten-free diets?
Very! To make a gluten-free version, simply substitute all-purpose flour with a 1:1 gluten-free flour blend. Many brands offer excellent alternatives that mimic the texture of regular flour. Enjoy a delicious gluten-free treat without sacrificing flavor!
Can pets eat Cherry Cheesecake Brownie Bars?
No, it’s best to keep these bars away from pets, particularly dogs. Ingredients like chocolate and sugar can be harmful to them. While it’s tempting to share, stick to pet-safe treats instead!
Cherry Cheesecake Brownie Bars for a Decadent Delight
Ingredients
Equipment
Method
- Preheat your oven to 350°F (175°C) and grease a 9x13-inch baking pan.
- In a large bowl, combine melted butter and sugar for 2 minutes.
- Add eggs and vanilla extract, mixing until smooth.
- In a separate bowl, sift flour, cocoa powder, and salt.
- Gradually combine dry ingredients into wet ingredients until just mixed.
- Transfer the brownie batter to the prepared pan.
- In another bowl, beat cream cheese and sugar until smooth. Add egg and vanilla, mixing until creamy.
- Pour the cheesecake mixture over the brownie layer evenly.
- Dollop cherry pie filling on top and swirl gently to create marbled patterns.
- Bake for 30 minutes, until the edges are set and the center is slightly jiggly.
- Let cool at room temperature, then refrigerate for at least 2 hours before slicing.
Leave a Reply