
The aroma of freshly baked bagels wafted through my kitchen, instantly transporting me to my favorite brunch spot, where fluffy dough meets crispy perfection. Today, I’m excited to share my quick and easy recipe for Cottage Cheese Bagels—a delightful twist on a classic that you can whip up in mere minutes with just three ingredients! Not only are these bagels high in protein, making them a satisfying breakfast choice, but they also bring a fun touch to your morning routine. Whether you’re busy tackling the day ahead or simply craving a light snack, these bagels will elevate your meal while keeping things healthy and simple. So, what toppings will you experiment with on your homemade creations?
Why are Cottage Cheese Bagels a must-try?
Simplicity: With just three ingredients, this recipe makes it easy to whip up delicious bagels without endless prep.
High-Protein: A fantastic way to fuel your morning, these bagels deliver a protein-packed punch, perfect for keeping you energized.
Versatile: Dress them up or down! Try topping them with avocado or cream cheese for a classic feel, or get adventurous with spices.
Quick to Make: In under 30 minutes, you can enjoy freshly baked bagels—ideal for busy mornings or last-minute snacks.
Healthy Twist: These bagels retain the traditional bagel charm while offering a lighter, healthier alternative that won’t weigh you down.
Try pairing them with my Egg Cheese Toasts for a satisfying meal, or enjoy them alongside a bowl of homemade soup!
Cottage Cheese Bagels Ingredients
For the Dough
• Self-Rising Flour – This flour provides the structure needed for rise; if unavailable, combine all-purpose flour with baking powder and salt for a quick substitute.
• Cottage Cheese – Adds moisture and a protein boost; blending it before mixing can create a smoother dough.
• Egg – Used for the egg wash to enhance color and shine, it can be omitted for a vegan option or to keep things simple.
Optional Toppings
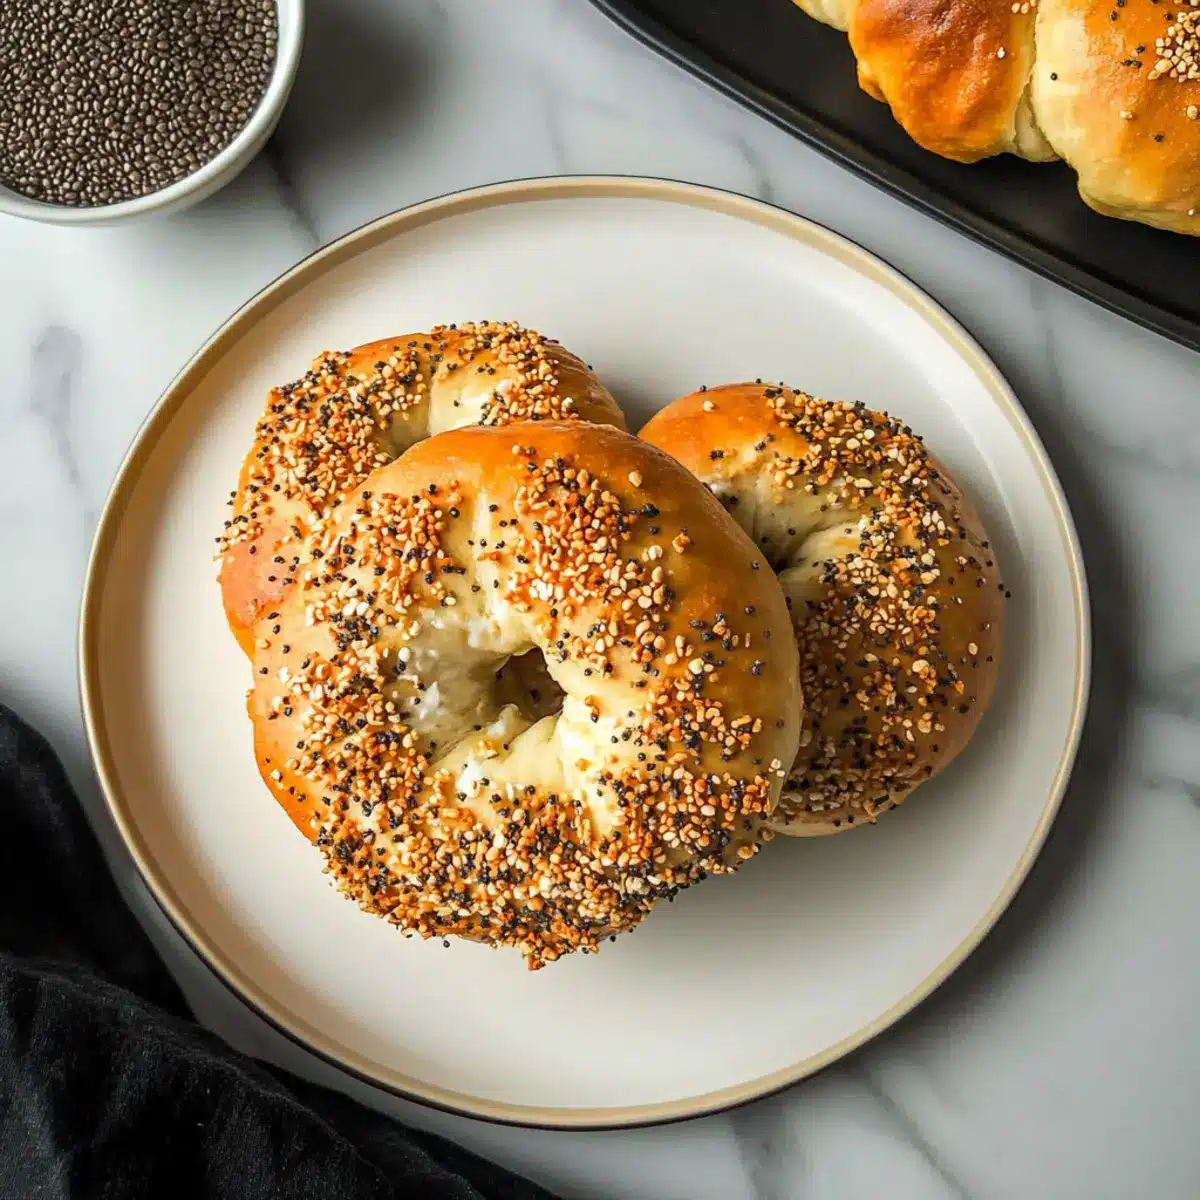
• Everything Seasoning – A flavorful mix that adds a delightful crunch and a savory touch to your bagels.
• Sliced Avocado – Creamy and nutritious, perfect for a light afternoon snack or breakfast pairing.
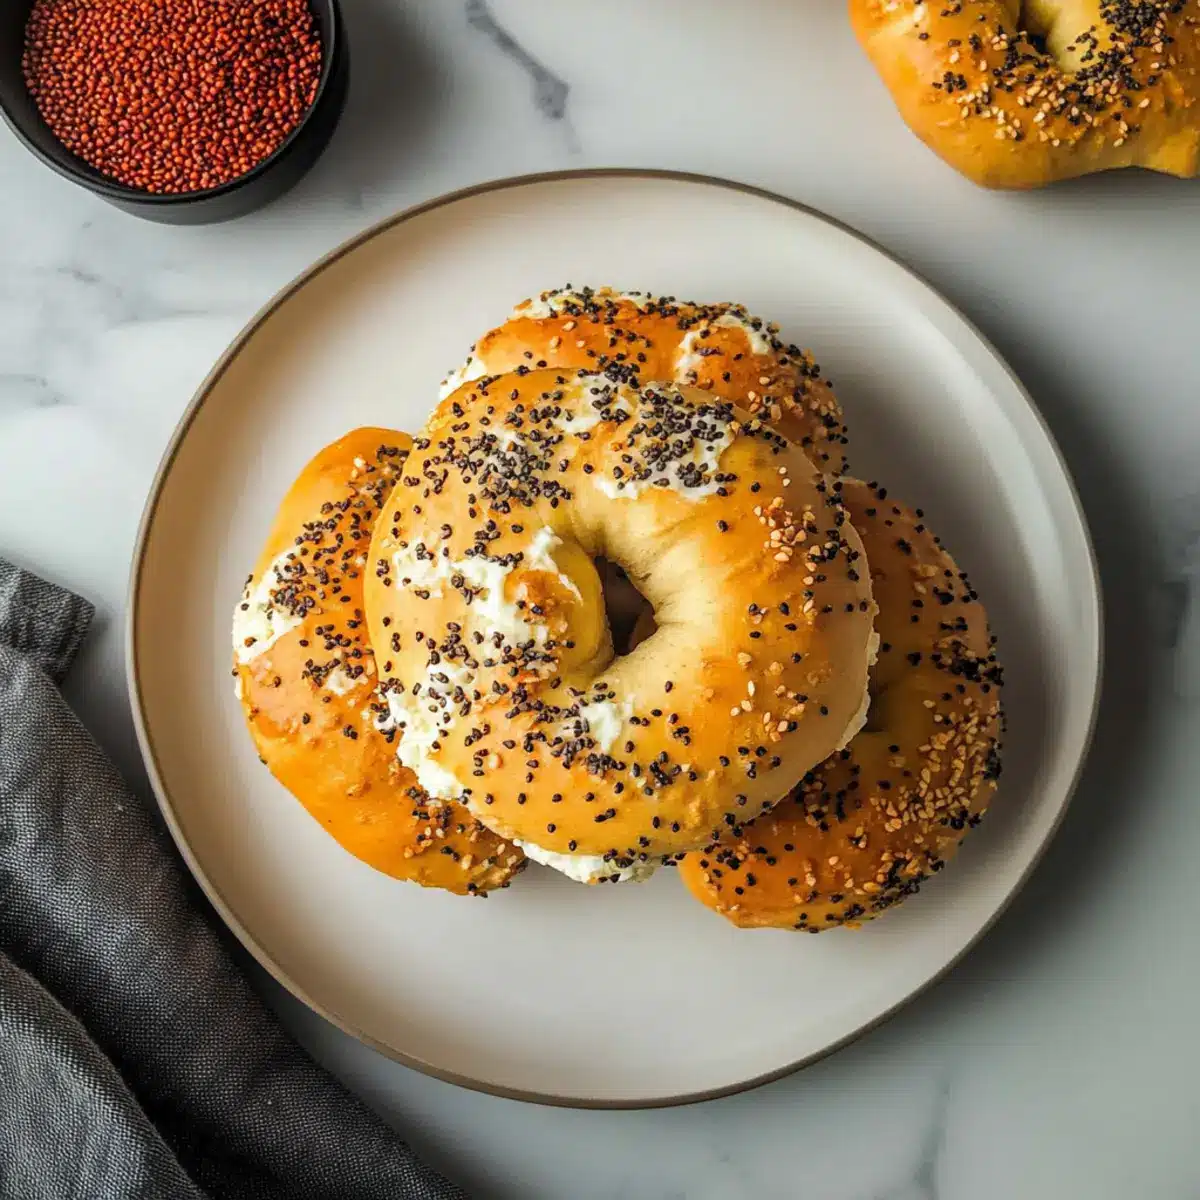
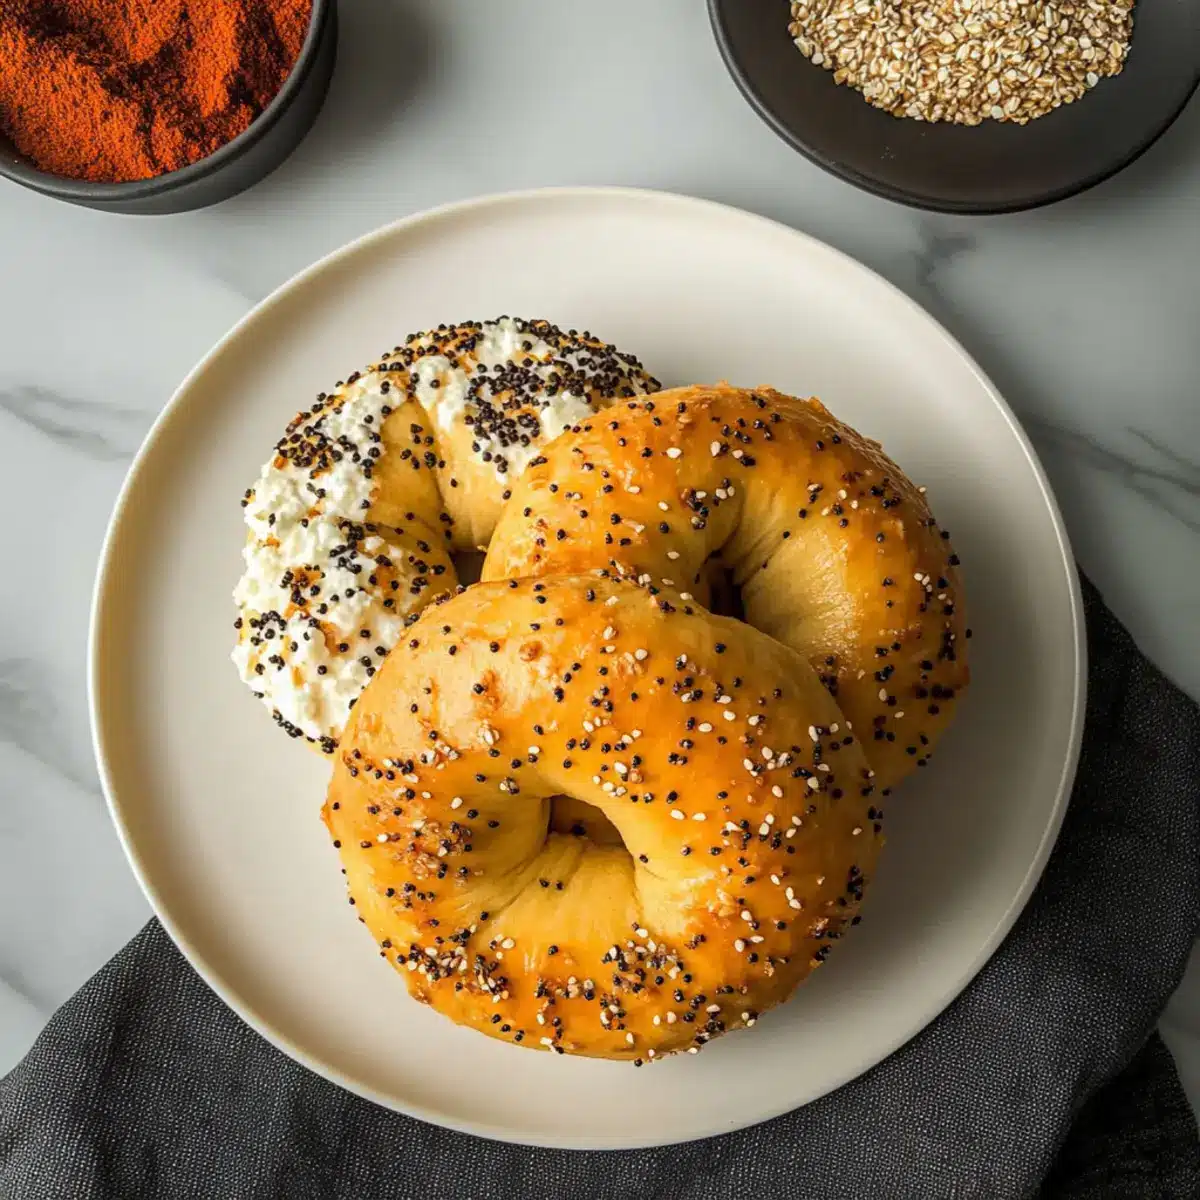
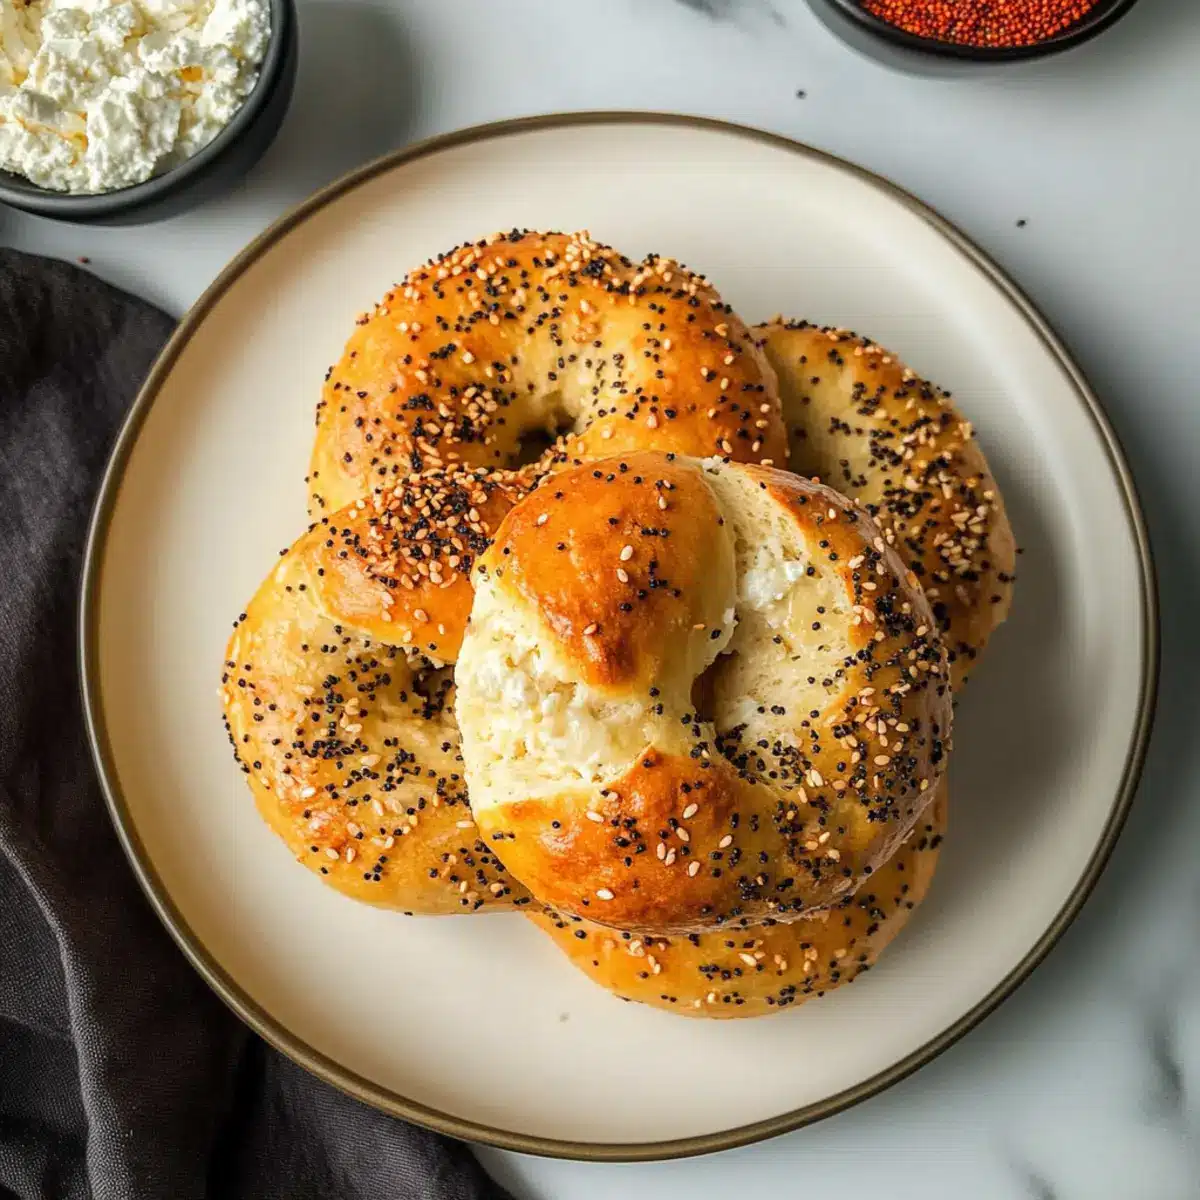
• Cream Cheese – Classic and always a favorite; adds a rich flavor that balances the bagel’s texture.
• Cinnamon and Raisins – For a sweet variation, mix these in for a delightful breakfast treat.
Enjoy experimenting with these Cottage Cheese Bagels and discover your perfect topping combination!
Step-by-Step Instructions for Cottage Cheese Bagels
Step 1: Preheat Your Oven
Start by preheating your oven to 350°F (175°C) to ensure it’s hot and ready for your Cottage Cheese Bagels. This step is crucial for achieving that perfect crispy outer layer while keeping the inside light and fluffy. If using an air fryer, set it to the same temperature for optimal cooking.
Step 2: Mix the Dough
In a large mixing bowl, combine self-rising flour with blended cottage cheese, stirring until a soft dough forms. The dough should be slightly sticky but manageable. If desired, a hand mixer or wooden spoon can help bring the mixture together seamlessly. Take care not to overmix, which could affect the texture of your bagels.
Step 3: Shape the Bagels
Once your dough is ready, sift some flour onto a clean surface to prevent sticking. Take a handful of dough and roll it into a ball, then poke a hole in the center to form a ring. Carefully stretch the ring to create your bagel shape before placing each one on a lined baking sheet or air fryer basket.
Step 4: Apply the Egg Wash
If you’re using an egg wash, beat the egg in a small bowl. Using a pastry brush, gently coat the tops of your shaped bagels with the egg wash to enhance browning and shine. This step will not only add a beautiful glaze but also help any toppings adhere if you choose to sprinkle them on.
Step 5: Bake Your Bagels
Carefully place your bagels in the preheated oven and bake for 20-25 minutes. Keep an eye on them as they turn golden brown; this is a sign they are perfectly cooked. If using the air fryer, reduce the time to 10-12 minutes, checking for that same lovely golden hue.
Step 6: Cool and Serve
Once baked, remove the bagels from the oven and allow them to cool on a wire rack for about 5-10 minutes. This cooling period helps them set and makes slicing easier. Once slightly cooled, feel free to slice and serve your delightful Cottage Cheese Bagels warm, topped with your favorite spreads or toppings!
Make Ahead Options
These Cottage Cheese Bagels are perfect for meal prep enthusiasts looking to save time during busy mornings! You can mix the dough up to 24 hours in advance and refrigerate it wrapped in plastic wrap. Once ready to bake, simply shape the bagels, let them sit at room temperature for about 15 minutes (to take the chill off), and then proceed to brush with egg wash and bake. If you prefer, you can shape the bagels and freeze them for up to 3 months. Just be sure to double wrap them to prevent freezer burn. When you’re ready, bake straight from the freezer, adding a few extra minutes to the cooking time for delicious, fresh bagels with minimal effort!
Expert Tips for Cottage Cheese Bagels
• Flavor Boost: Enhance taste by adding spices or herbs directly into the dough before baking for a delicious twist.
• Avoid Sticking: Dust your workspace with flour while shaping to prevent the dough from sticking and ensure easy handling.
• Check Doneness: Golden brown is key! Make sure to watch your bagels closely in the oven; too much time can lead to dryness.
• Storage Savvy: Store leftover Cottage Cheese Bagels in an airtight container for 1-2 days or freeze for longer preservation without sacrificing texture.
• Egg Wash Alternatives: If going vegan, consider using almond milk or omit the wash entirely for a still-delicious crust on your bagels.
Cottage Cheese Bagels Variations & Substitutions
Feel free to explore the endless possibilities of flavors and textures—let your creativity shine in the kitchen!
-
Vegan Option: Skip the egg wash or use almond milk for a delightful vegan twist that still looks appealing.
-
Sweet Treat: Add cinnamon and raisins to the dough for a delightful breakfast bagel that’ll remind you of fresh cinnamon rolls.
-
Savory Boost: Sprinkle everything seasoning on top before baking for an aromatic, crunchy layer that elevates every bite.
-
Herbed Delight: Mix in chopped herbs like chives or dill into the dough for a fragrant and flavorful experience that pairs perfectly with cream cheese.
-
Cheddar Twist: Fold in shredded cheese like cheddar or mozzarella before shaping your bagels for a cheesy surprise in every bite.
-
Gluten-Free: Substitute self-rising flour with a gluten-free flour blend to make these bagels accessible for gluten-sensitive fans—just ensure it’s proportioned correctly!
-
Spicy Kick: Add cayenne pepper or crushed red pepper flakes to the dough for a warm, inviting heat that invigorates your morning meal.
-
Sweet Toppings: Drizzle with honey or maple syrup post-baking for a sweet finish, perfect for a snack or light dessert.
For a complimentary dish, serve your bagels warm alongside my creamy Pumpkin Goat Cheese Risotto for a truly memorable meal! Let your taste buds guide you on this delicious journey!
What to Serve with Cottage Cheese Bagels
Enhance your breakfast experience with these delightful pairings that complement the unique flavors of your freshly baked bagels.
-
Creamy Avocado: Spread ripe avocado on your bagel for a buttery texture that balances the bagel’s lightness, creating a satisfying, nutritious bite.
-
Lox and Capers: Layer smoked salmon with tangy capers for a luxurious topping that adds an elegant touch, transforming your bagel into a brunch-worthy delight.
-
Herbed Cream Cheese: A spread of herbed cream cheese not only adds richness but also brings fresh flavors, perfect for any classy morning gathering.
-
Sliced Tomatoes: Juicy, ripe tomatoes add a refreshing burst that enhances the bagel’s flavor profile, making each mouthful vibrant and delightful.
-
Everything Bagel Seasoning: Sprinkle this blend of sesame, poppy seeds, garlic, and onion over your bagels for a flavorful crunch that elevates your simple creation.
-
Fresh Fruit Salad: Pair with a colorful fruit salad for a sweet contrast and a burst of juicy freshness to round out your breakfast table.
-
Steamy Herbal Tea: Enjoy a warm cup of herbal tea alongside your bagels, bringing soothing flavors that perfectly complement the subtle notes of cottage cheese.
-
Mini Berry Parfaits: Layer yogurt and berries in a glass for a fun, nutritious treat, making your breakfast cohesive and adding a dash of sweetness.
-
Orange Juice or Mimosa: A glass of fresh-squeezed orange juice or a bubbly mimosa makes for a refreshing drink that brightens your morning meal.
How to Store and Freeze Cottage Cheese Bagels
Room Temperature: Store cooled Cottage Cheese Bagels in an airtight container for 1-2 days to maintain freshness; avoid slicing until ready to serve.
Fridge: For longer storage, refrigerate the bagels in an airtight container for up to 5 days; reheat in the oven or toaster for best results.
Freezer: Freeze bagels for up to 3 months; wrap them individually in plastic wrap and place in a freezer bag to prevent freezer burn.
Reheating: Thaw at room temperature or pop them in the toaster or air fryer for a quick reheat, ensuring they stay crispy on the outside.
Cottage Cheese Bagels Recipe FAQs
What type of flour is best for Cottage Cheese Bagels?
Absolutely! Self-rising flour is ideal because it provides the necessary structure and rise for your bagels. If you’re out of self-rising flour, you can easily create a substitute by mixing 1 cup of all-purpose flour with 1.5 teaspoons of baking powder and 0.25 teaspoons of salt. This blend will work just as well and keep your bagels light and fluffy!
How do I store Cottage Cheese Bagels once they’re baked?
After allowing your Cottage Cheese Bagels to cool, store them in an airtight container at room temperature for 1-2 days. If you want to keep them longer, feel free to refrigerate them for up to 5 days. Just remember to reheat in the oven or toaster to regain that crispy exterior!
Can I freeze my Cottage Cheese Bagels? How?
Very! To freeze, wrap each bagel individually in plastic wrap and place them in a freezer bag. This will prevent freezer burn and keep them fresh for up to 3 months. When you’re ready to enjoy one, simply thaw it at room temperature, or pop it in the toaster or air fryer for a speedy reheat that brings back their delightful texture!
What should I do if my bagels came out too dense?
If your Cottage Cheese Bagels are dense, it may be due to overmixing the dough or not incorporating enough air. To prevent this, mix just until the dough comes together and avoid kneading too much. You can also ensure your oven is preheated correctly to achieve that beautiful rise. If you’re using older flour, it could also affect the rise; always check freshness!
Are there any allergy considerations with Cottage Cheese Bagels?
Yes, definitely! If you or your family members are lactose intolerant, you might want to opt for a lactose-free cottage cheese. Additionally, ensure that your toppings are free from allergens that may affect anyone enjoying the bagels—especially if serving to guests or family with specific dietary needs.
What toppings work best with Cottage Cheese Bagels?
The more the merrier! While traditional choices like cream cheese or avocado are great, feel free to get creative! Try sprinkling on everything seasoning, sesame seeds, or parmesan cheese before baking. For a sweet version, mix in some cinnamon and raisins into the dough for a delightful breakfast treat. Enjoy experimenting!
Delightful Cottage Cheese Bagels: Quick, Healthy & Protein-Packed
Ingredients
Equipment
Method
- Preheat your oven to 350°F (175°C) to ensure it's hot.
- In a large mixing bowl, combine self-rising flour with blended cottage cheese until a soft dough forms.
- Roll the dough into balls and poke holes in the center to shape into bagels.
- Beat the egg for the egg wash and coat the tops of the bagels.
- Bake your bagels in the preheated oven for 20-25 minutes until golden brown.
- Cool on a wire rack for 5-10 minutes before serving.
Leave a Reply