
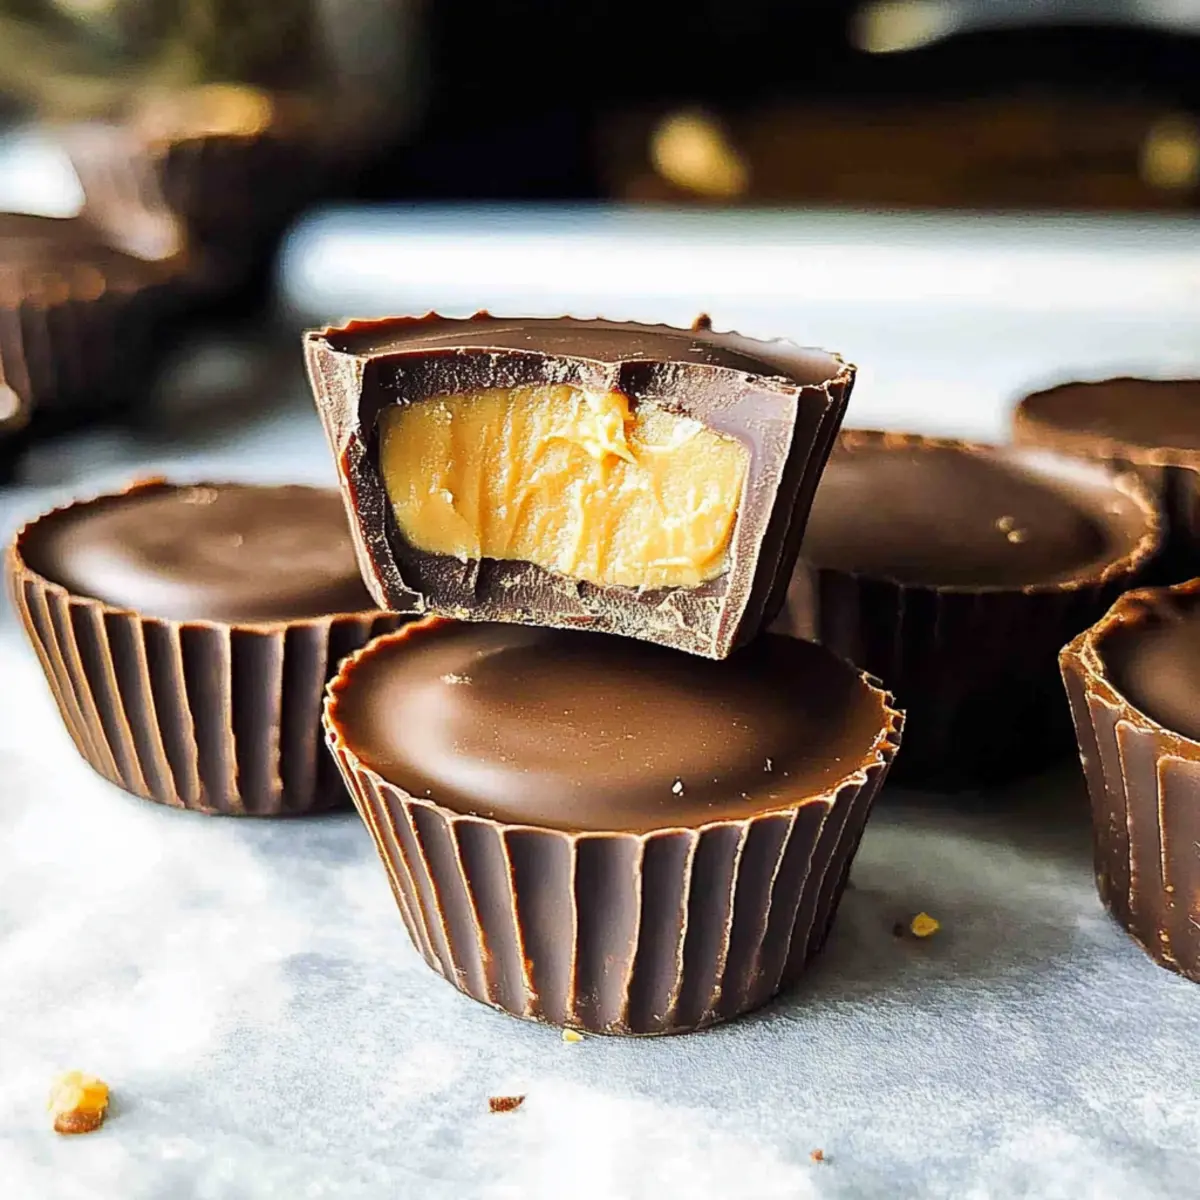
Standing in my kitchen, I can’t help but smile at the sight of melted chocolate and creamy peanut butter coming together—it feels like alchemy! These easy homemade Reese’s Peanut Butter Cups capture that beloved combination, merging sweet nostalgia with the joy of cooking in just minutes. With only a handful of ingredients, this DIY recipe is perfect for those moments when you’re craving something sweet but want to skip the store-bought options. Not only are these cups cost-effective, but they also allow you to control the quality and flavor, creating a treat that’s delightfully satisfying. So, are you ready to whip up a batch of this classic favorite and indulge in a little kitchen magic?
Why Make Homemade Reese’s Peanut Butter Cups?
Irresistible Flavor: The combination of smooth peanut butter and rich chocolate delivers a taste that’s both nostalgic and incredibly satisfying.
Quick and Easy: Whip up these cups in just a few minutes—perfect for a spontaneous sweet craving!
Cost-Effective: Skip the expensive store-bought treats and make your own at a fraction of the cost.
Crowd-Pleasing: These homemade delights are sure to impress guests at gatherings or family get-togethers. Consider pairing your treats with a side of Mini Dessert Cups for a delightful dessert spread.
Customizable: Feel free to experiment—add crunchy peanut butter for a fun twist or sprinkle with sea salt for that perfect salty-sweet balance. Make it your own!
Reese’s Peanut Butter Cups Ingredients
For the Filling
- Smooth Peanut Butter – Use a good quality brand for the best flavor and texture.
- Unsalted Butter – Adds richness; substitute with coconut oil for a dairy-free option.
- Brown Sugar – Brings sweetness and a hint of molasses flavor to the filling.
- Icing Sugar (Powdered Sugar) – Sweetens and creates a dough-like consistency; avoid low-quality brands to prevent graininess.
For the Coating
- Melting Chocolate – Forms the outer shell; feel free to substitute with dark or semi-sweet varieties for a different taste.
Step‑by‑Step Instructions for Easy Homemade Reese’s Peanut Butter Cups
Step 1: Prepare the Muffin Tin
Start by lining a mini muffin tin with paper patties. This step will ensure easy removal of your homemade Reese’s Peanut Butter Cups once they’re set. Aim for about 12 cups, ensuring each paper liner is snug in its well. Set the tin aside while you prepare the delicious filling.
Step 2: Combine Filling Ingredients
In a medium saucepan, combine 1 cup of smooth peanut butter, 1 tablespoon of unsalted butter, and ½ cup of brown sugar. Heat over medium heat, stirring continuously until the mixture is melted and bubbly, which should take about 3 to 5 minutes. Once combined and smooth, remove it from the heat to cool slightly before mixing in the powdered sugar.
Step 3: Mix in the Icing Sugar
Gradually add 1 cup of icing sugar to the warm peanut butter mixture, stirring until fully blended and smooth. The mixture should form a soft dough-like consistency. After thoroughly combining, allow it to cool for about 10 minutes in the refrigerator. This cooling will make it easier to shape your filling into cups later on.
Step 4: Melt the Chocolate
While the filling cools, melt half of your chocolate (about 1 cup) in a microwave-safe bowl. Heat it in 30-second intervals, stirring between each interval until the chocolate is completely smooth and glossy. This melting process usually takes about 1 to 2 minutes total, ensuring you don’t scorch the chocolate for your Reese’s Peanut Butter Cups.
Step 5: Create the Chocolate Base
Pour a small amount of the melted chocolate into each muffin cup liner, filling just enough to cover the bottom evenly (about 1 tablespoon per cup). Use a spoon or a brush to spread the chocolate across the base, then tap the muffin tin gently on the counter to flatten the chocolate layer. Place the tin in the refrigerator for about 10 minutes, allowing it to set.
Step 6: Form the Peanut Butter Filling
After the chocolate base has set, remove it from the refrigerator. Roll the cooled peanut butter filling into small balls, about 1 inch in diameter, and then flatten them slightly. Position one flattened ball on top of each chocolate base in the muffin cup. The filling should sit neatly on the chocolate layer, ready for another chocolate coat.
Step 7: Chill to Firm Up
Return the muffin tin to the refrigerator for about 20 minutes, allowing the peanut butter filling to firm up slightly. This chilling helps the filling maintain its shape and makes the final assembly easier. During this time, you can prepare the remaining chocolate mixture for the final coating.
Step 8: Cover with Remaining Chocolate
Melt the remaining chocolate in the same way as before. Once ready, carefully pour it over each filled cup, ensuring the tops are fully covered. Use a spoon to adjust and smooth the chocolate, ensuring even coverage across all cups. Put the muffin tin back in the refrigerator for another 20 minutes to let the chocolate harden completely.
Step 9: Unmold and Serve
Once the chocolate has set, carefully remove each homemade Reese’s Peanut Butter Cup from the muffin tin, peeling away the paper liners. Place them on a serving platter, and enjoy these delightful treats either chilled or at room temperature. The glossy chocolate exterior with the creamy peanut butter center will surely impress everyone around!
Expert Tips for Homemade Reese’s Peanut Butter Cups
-
Cool Before Rolling: Allow the peanut butter filling to cool slightly before shaping to avoid it becoming too sticky and messy.
-
Quality Matters: Use quality icing sugar to ensure a smooth texture in your filling; lower-quality brands can cause a grainy consistency that’s not appealing.
-
Tap to Set: Gently tap the muffin tin on the counter after pouring the chocolate base to create an even layer, which enhances the look and texture of your Reese’s Peanut Butter Cups.
-
Melting Chocolate: When melting chocolate, do it in short intervals to prevent scorching; you want a creamy, glossy finish that will beautifully coat your treats.
-
Experiment with Flavors: Consider adding a pinch of sea salt on top for a delightful sweet-salty balance—this adds sophistication to your homemade Reese’s Peanut Butter Cups!
What to Serve with Easy Homemade Reese’s Peanut Butter Cups?
There’s nothing quite like indulging in a homemade treat, and the perfect pairings can elevate your experience even more.
-
Classic Vanilla Ice Cream: A scoop of smooth vanilla ice cream complements the chocolate and peanut butter beautifully, providing a refreshing contrast. The creamy texture balances the richness of the cups perfectly.
-
Fresh Berries: Strawberries, raspberries, or blueberries add a burst of freshness and tartness, cutting through the sweetness of the cups. Their vibrant colors make an appealing presentation.
-
Crunchy Pretzels: Salty pretzels introduce a delightful crunch and a contrasting flavor. The saltiness enhances the sweetness of the Reese’s cups, creating an unexpected yet satisfying combination.
-
Chilled Milk: A classic pairing that never goes out of style, rich, cold milk is the ideal drink to wash down these sweet treats. Its creamy texture complements the flavors while balancing the sweetness.
-
Coffee or Espresso: Serving your peanut butter cups with a cup of freshly brewed coffee adds a sophisticated touch. The bitterness of the coffee enhances the chocolate’s richness, making each bite feel indulgent.
-
Homemade Whipped Cream: Light and fluffy whipped cream offers a heavenly accompaniment. Consider adding a hint of vanilla extract for extra flavor—it’s a classic touch that pairs perfectly with the cups.
-
Chocolate Sauce Drizzle: For the ultimate chocolate lover, drizzling warm chocolate sauce over your Reese’s cups adds an extra layer of decadence. It creates a luscious presentation and enhances the chocolate experience.
Exploring these delightful pairings will turn your homemade Reese’s Peanut Butter Cups into a truly memorable treat!
Reese’s Peanut Butter Cups Variations
Feel free to unleash your creativity with these delightful twists on the classic treat!
-
Crunchy Twist: Substitute smooth peanut butter with crunchy peanut butter for an exciting texture contrast. The added crunch will enhance each bite!
-
Dairy-Free Delight: Use coconut oil instead of unsalted butter for a fabulous dairy-free version that everyone can enjoy. It’s a simple and effective swap!
-
Flavored Chocolates: Experiment with white chocolate or even flavored chocolates like caramel or mint for a unique flavor explosion. This twist makes for a fun surprise!
-
Sea Salt Surprise: Sprinkle a little sea salt on top of the chocolate layer for that perfect salty-sweet balance that elevates your homemade cups. It’s an indulgent touch!
-
Nutty Overload: Add chopped nuts like almonds or walnuts to the peanut butter mixture for extra crunch and a nutty flavor dimension. It’s all about texture!
-
Mini Versions: Create bite-sized mini cups using a smaller muffin tin for a delightful snack that’s easy to share (or not!). Everyone loves a tiny treat!
-
Booster Bars: Turn the filling into bars instead of cups—just press the mixture into a lined baking dish, chill, and cut into squares for a different treat experience. A quick and easy alternative!
For a decadent dessert option, consider pairing these cups with Butter Poached Lobster for special occasions. You’ll be amazed by the delightful contrast in flavors!
Make Ahead Options
These Homemade Reese’s Peanut Butter Cups are perfect for meal prep enthusiasts! You can prepare the peanut butter filling up to 3 days in advance by mixing together the peanut butter, butter, brown sugar, and icing sugar. Store the mixture in an airtight container in the refrigerator to keep it fresh and maintain its creamy texture. When you’re ready to assemble, simply roll the chilled filling into balls and proceed with the chocolate layering steps. You can also melt and pour the chocolate coating up to 24 hours ahead, ensuring you reheat it gently before use to avoid any grittiness. With these prep options, you’ll have delicious, homemade treats at your fingertips, ready to impress family and friends!
How to Store and Freeze Reese’s Peanut Butter Cups
Room Temperature: Keep your peanut butter cups in a cool, dry place for up to 3 days, in an airtight container to prevent them from drying out or becoming too soft.
Fridge: For longer freshness, store the cups in an airtight container in the refrigerator for up to 2 weeks. This will keep the chocolate glossy and the filling smooth.
Freezer: Freeze your Reese’s Peanut Butter Cups in a single layer on a baking sheet for 1-2 hours, then transfer to an airtight container for up to 3 months. Thaw in the fridge before enjoying.
Reheating: If you prefer them slightly warm, let them sit at room temperature for 10-15 minutes; avoid microwaving, as it may alter the chocolate texture.
Reese’s Peanut Butter Cups Recipe FAQs
What type of peanut butter is best for this recipe?
Absolutely, for the best flavor and texture, it’s recommended to use smooth peanut butter. High-quality brands will give you the creaminess you crave, while natural varieties may contain oils that could affect the final consistency. I often choose brands without added sugar for a healthier option!
How should I store homemade Reese’s Peanut Butter Cups?
For sure! Store your peanut butter cups in an airtight container at room temperature for up to 3 days. If you want to keep them fresher for longer, refrigerate them for up to 2 weeks. Just be sure they’re well-sealed to maintain that delightful texture.
Can I freeze peanut butter cups, and how do I do it?
Definitely! To freeze your Reese’s Peanut Butter Cups, place them in a single layer on a baking sheet and freeze for around 1-2 hours. Once they’re firm, transfer them to an airtight container or heavy-duty freezer bag. They can be frozen for up to 3 months. When you’re ready to enjoy, simply thaw them in the fridge for a few hours or let them sit at room temperature for about 10-15 minutes.
What should I do if my chocolate is too thick when melting?
No worries! If your melting chocolate turns thick or clumpy, the most likely culprit is overheating. Try adding a small amount of coconut oil or vegetable shortening, about a teaspoon at a time, and stir until you achieve a smoother consistency. Ensure to melt the chocolate in shorter intervals, about 30 seconds at a time, stirring in between to keep it from scorching.
Are these peanut butter cups suitable for those with allergies?
I advise being cautious here! Homemade Reese’s Peanut Butter Cups do contain common allergens like peanut butter and butter. If you’re making treats for someone with allergies, consider using sunflower seed butter in place of peanut butter. Also, ensure any chocolate used is free of allergens, as some brands may process in facilities with nuts. Always check labels to ensure safety!
Homemade Reese’s Peanut Butter Cups That Will Wow You
Ingredients
Equipment
Method
- Line a mini muffin tin with paper patties.
- Combine peanut butter, butter, and brown sugar in a saucepan and heat over medium, stirring continuously until melted and bubbly.
- Gradually mix in the icing sugar until fully blended and smooth, then chill for 10 minutes in the refrigerator.
- Melt half of the chocolate in a microwave-safe bowl in 30-second intervals until smooth.
- Pour a tablespoon of melted chocolate into each muffin liner and spread evenly across the bottom.
- Roll the chilled peanut butter filling into small balls, flatten them and place one on top of each chocolate base.
- Chill the muffin tin for 20 minutes to allow the filling to firm up.
- Melt the remaining chocolate and cover each filled cup, smoothing the tops with a spoon.
- Chill for another 20 minutes to let the chocolate harden completely.
- Remove from the muffin tin and serve, enjoying them chilled or at room temperature.
Leave a Reply