
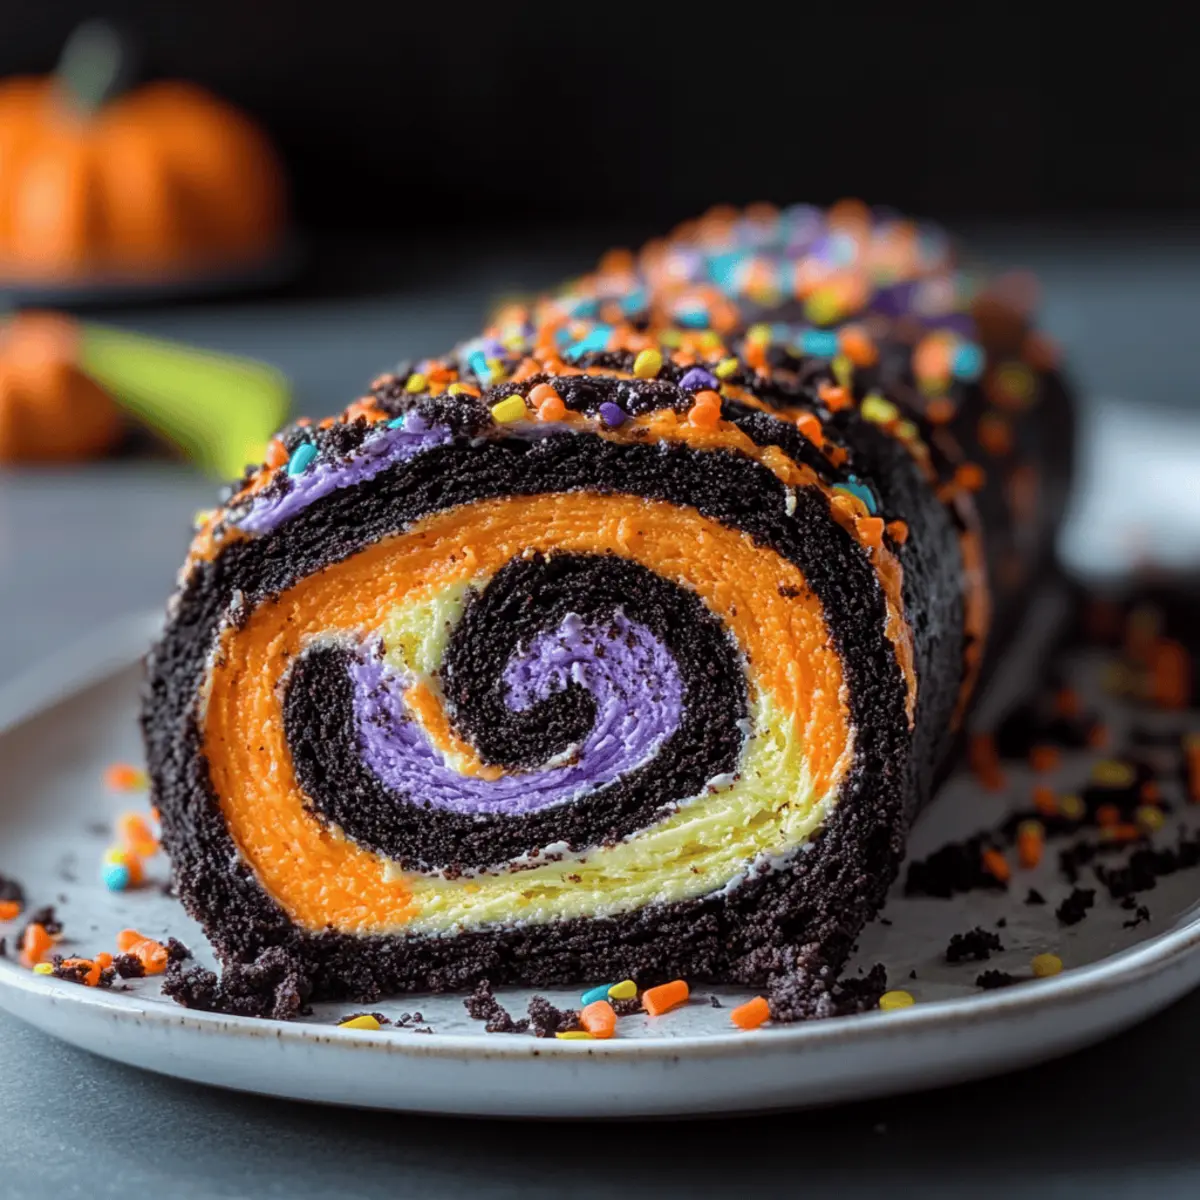
The rich aroma of crushed Halloween Oreos wafts through the kitchen, and I can’t help but smile at the festive chaos that’s about to unfold. Enter the Spooky No-Bake Halloween Oreo Roll—a delightful combination of chocolatey goodness and creamy frosting that promises to be the star of your Halloween celebrations. This easy-to-make dessert requires no baking, making it a perfect choice for last-minute parties or when you’re short on time. Not only is it a visual treat with its striking black-and-orange spirals, but it also guarantees a fun experience for both kids and adults alike as you craft this playful roll. Ready to bring a touch of magic to your Halloween festivities? Let’s dive into this spooky delight!
Why is the Halloween Oreo Roll irresistible?
Sweet, Festive Flavor: The combination of crushed Halloween Oreos and luscious cream cheese creates a rich, delightful treat that’s hard to resist.
No-Bake Ease: With simple steps and no baking required, this recipe is perfect for even novice bakers. It’s ideal for busy schedules or last-minute festivities!
Kid-Friendly Fun: Making this roll will be a blast for kids and adults alike. Watch as they unleash their creativity with colorful frosting and fun decorations.
Versatile Presentation: This dessert allows for endless customization—change up the colors to match your party theme or try different toppings like sprinkles or candy eyes.
Crowd-Pleasing Appeal: Impress your guests with a visually stunning roll that both looks and tastes amazing. Serve it at any gathering, and watch it disappear in no time!
Whether you’re hosting a Halloween party or just in the mood for a fun, no-bake dessert, this Halloween Oreo Roll is sure to be a treasured addition to your recipe collection.
Halloween Oreo Roll Ingredients
• Get ready to create the ultimate Halloween dessert delight!
For the Roll
- Halloween Oreos – The star ingredient, providing a rich and festive flavor; opt for orange crème variants if you want to amplify the holiday spirit.
- Cream Cheese – Essential for a creamy texture; using full-fat cream cheese yields the best results.
- Vanilla Extract – Enhances the overall flavor profile; feel free to substitute with almond extract for a unique twist.
For the Frosting
- Halloween-Colored Frosting – Use this to spread on the roll, offering vibrant color and sweetness; choose any hue that fit the Halloween theme—purple, green, or classic orange.
Optional Decorations
- Sprinkles – Add a playful crunch and a festive touch; choose your favorite Halloween-themed shapes!
- Candy Eyes – Perfect for a spooky effect that will excite the kids!
- Chocolate Drizzle – An optional indulgent final touch for those who crave extra sweetness.
Enjoy crafting your delicious Halloween Oreo Roll and let the festivities begin!
Step‑by‑Step Instructions for Halloween Oreo Roll
Step 1: Crush the Oreos
Begin by placing your Halloween Oreos into a food processor and pulse until they resemble fine crumbs, similar to coal dust. If you don’t have a food processor, put the Oreos in a sealed plastic bag and crush them using a rolling pin. This should take about 2-3 minutes. Once crushed, set the Oreo crumbs aside for the next step.
Step 2: Mix Ingredients
In a large mixing bowl, combine the crushed Halloween Oreos, softened cream cheese, and vanilla extract. Use a spatula to mix them together until the mixture resembles wet sand, ensuring that everything is well incorporated. This should take about 4-5 minutes. Knead the mixture gently with your hands to achieve a uniform consistency and prepare for rolling.
Step 3: Roll It Out
Place the Oreo mixture between two sheets of parchment paper. Using a rolling pin, roll it out into a rectangle measuring approximately 10×14 inches and about ¼-inch thick. Make sure the edges are neat and the thickness is even. This process should take around 5 minutes. Carefully peel away the top layer of parchment for the next step while keeping the bottom layer intact.
Step 4: Frost the Rectangular Base
Spread your Halloween-colored frosting evenly over the Oreo rectangle, using a spatula to achieve a smooth layer. Leave a 1-inch border around the edges free of frosting to help seal the roll. This should take about 3-4 minutes. The vibrant colors will add to the spooky aesthetic, making your Halloween Oreo Roll enticing.
Step 5: Roll It Up
Starting from one of the short edges, carefully lift the parchment paper and begin to roll the mixture tightly. Use the parchment to help guide the roll while tucking in the edges as you go. Continue until you reach the end of the rectangle, ensuring a tight roll formation. This step should take about 2-3 minutes, creating a beautiful spiral shape as you roll.
Step 6: Seal and Chill
Once rolled, gently press the edges to seal them and wrap the entire roll tightly in the parchment paper, followed by aluminum foil. This will help maintain its shape. Refrigerate the roll for at least 1 hour or freeze it for 20 minutes. This chilling time allows the flavors to meld and makes slicing easier.
Step 7: Slice and Serve
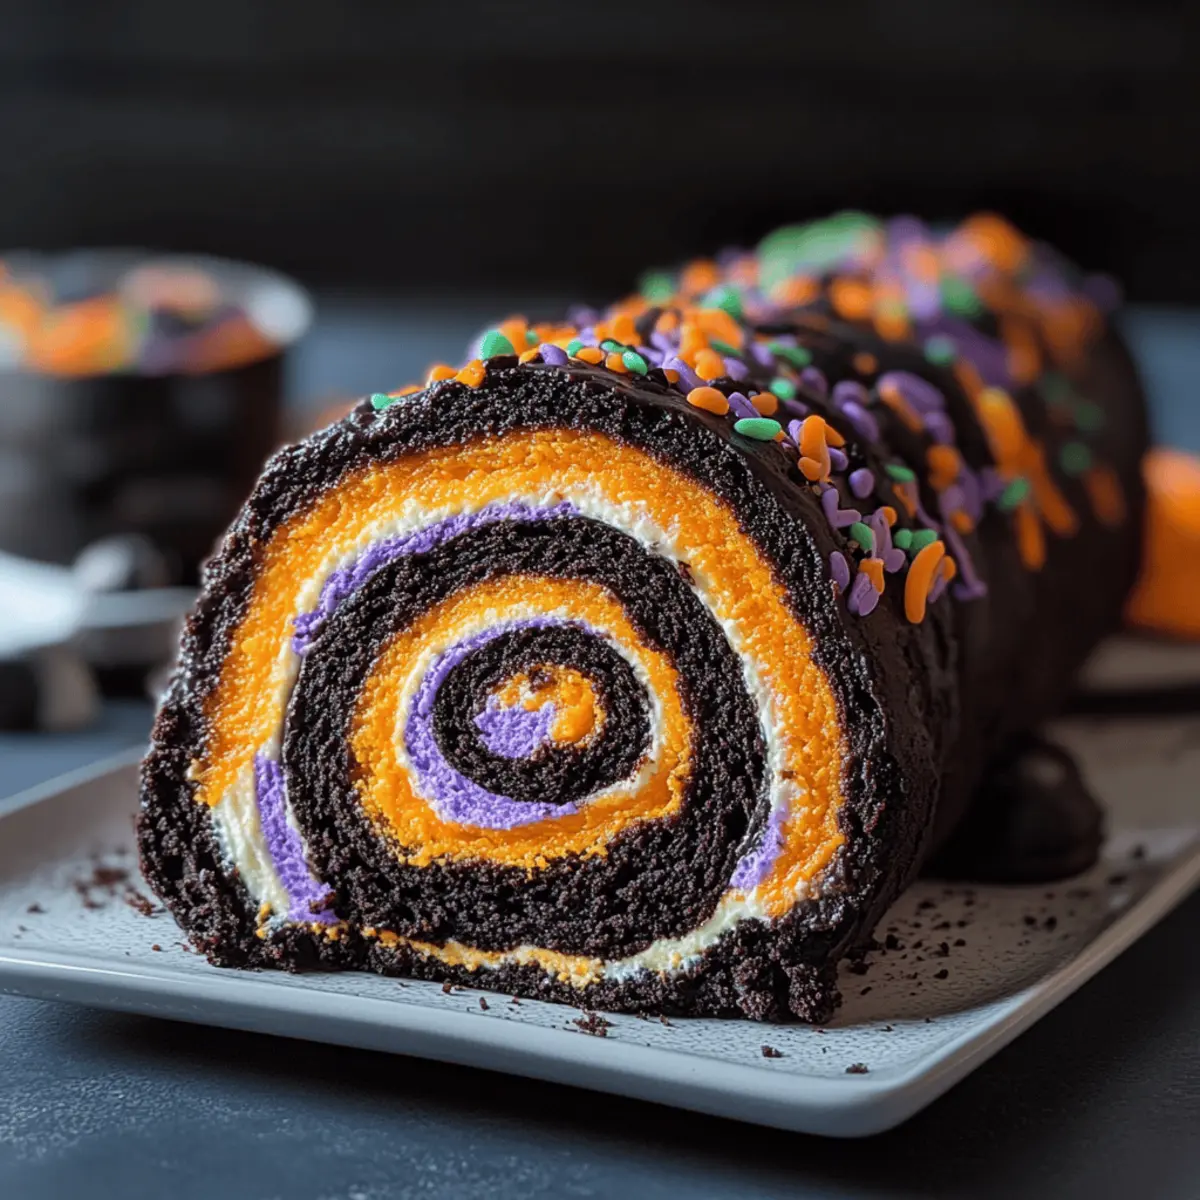
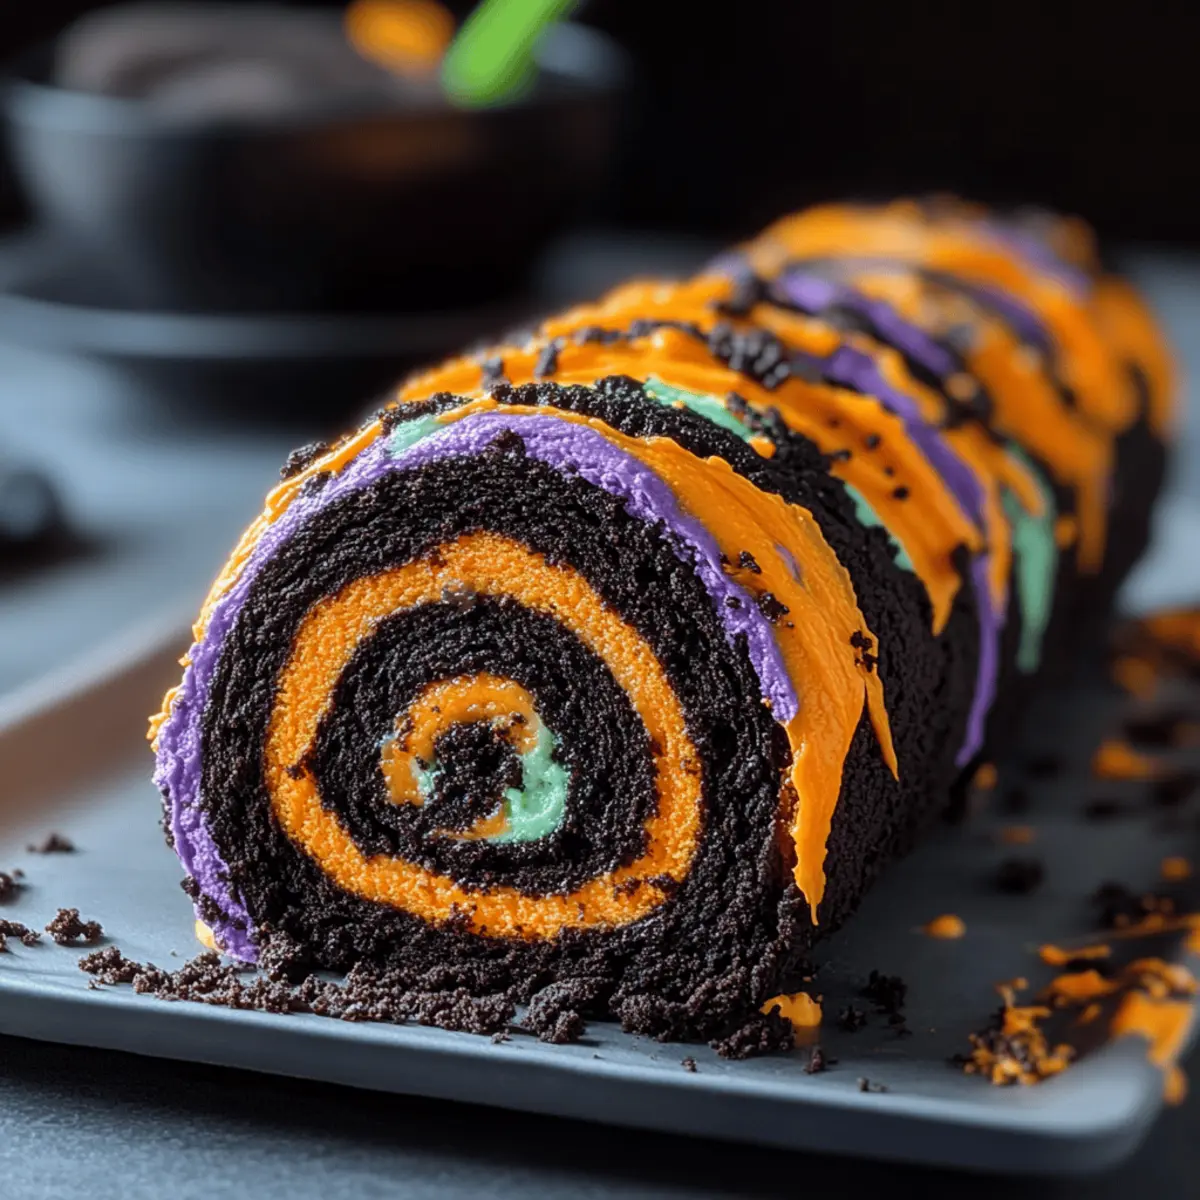
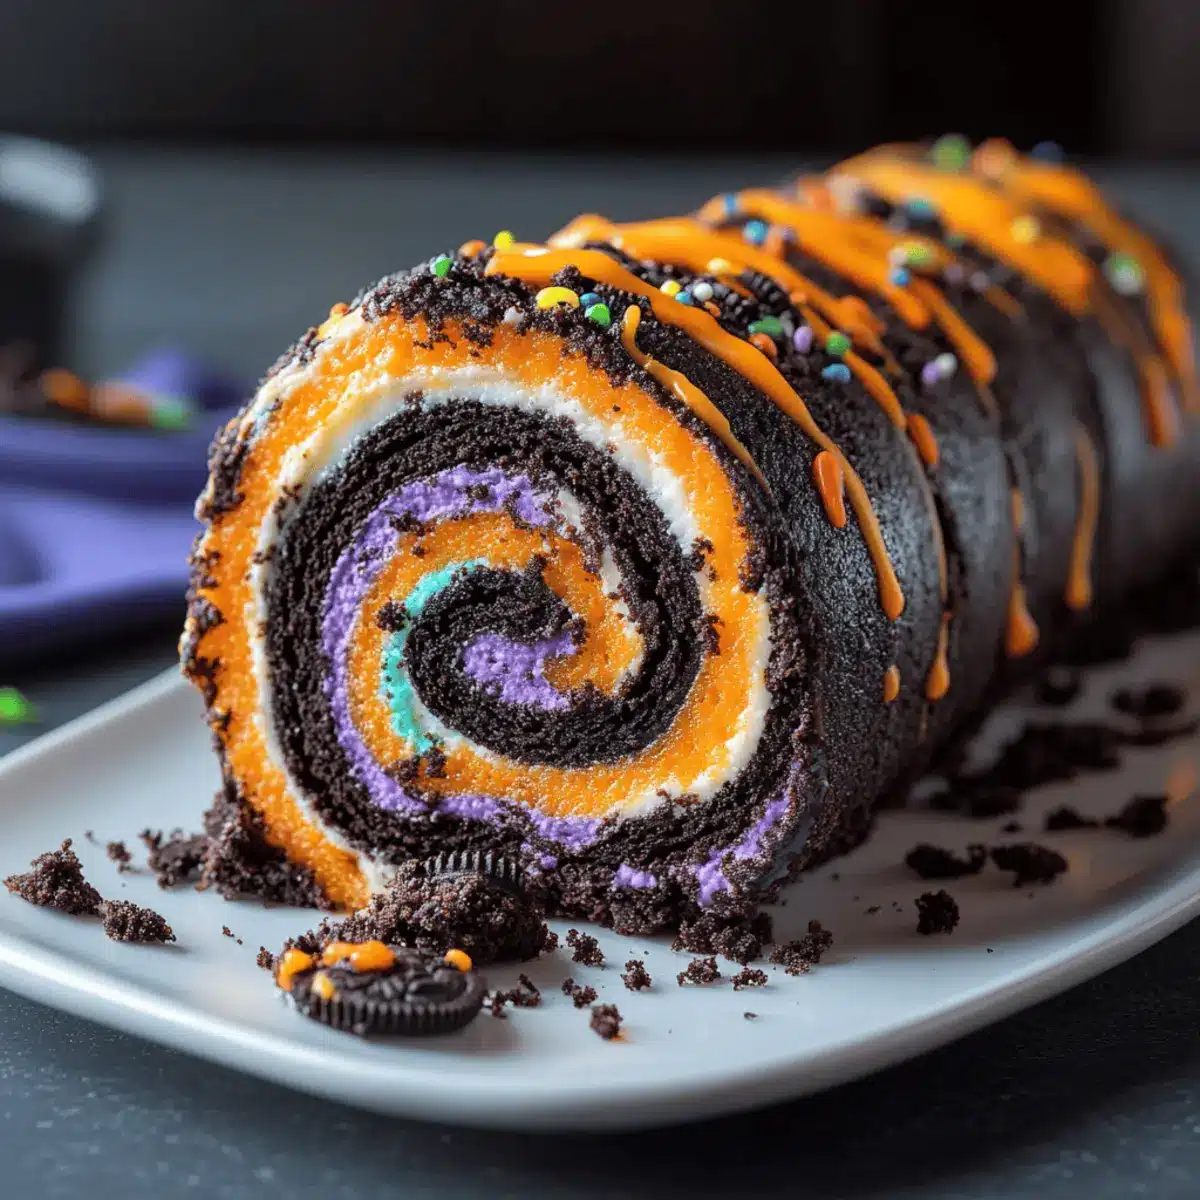
After chilling, unwrap the roll and place it seam-side down on a platter. Using a warm, serrated knife, slice the roll into 1-inch rounds for neat spirals. Wipe the knife clean between cuts to maintain a polished look. This should take around 5 minutes. Each piece will reveal the stunning black-and-orange swirls of your Halloween Oreo Roll.
Step 8: Add Finishing Touches
To elevate the visual appeal, decorate the sliced rolls with optional sprinkles, candy eyes, or a drizzle of chocolate on top. This step allows for creativity, making your Halloween Oreo Roll perfect for parties. Allow about 5 minutes for decoration, ensuring each piece looks festive and inviting for your guests.
Expert Tips for Halloween Oreo Roll
-
Use Room Temperature Ingredients: Ensure your cream cheese is at room temperature for easier mixing and a smoother texture in your Halloween Oreo Roll.
-
Mind the Chilling Time: Don’t skip the chilling step! This helps the roll set and makes slicing more manageable without crumbling.
-
Warm Knife for Slicing: For clean, neat spirals, use a warm knife. Simply run it under hot water and wipe it between cuts to maintain a polished look.
-
Embrace “Spooky” Cracks: If your roll cracks while rolling or slicing, don’t fret! These add character and can be viewed as a “spooky texture” that enhances the Halloween theme.
-
Decorate Creatively: Let your imagination run wild with decorations! Use a variety of colorful toppings for a fun and festive presentation that makes your Halloween Oreo Roll a showstopper.
How to Store and Freeze Halloween Oreo Roll
Fridge: Keep your Halloween Oreo Roll in an airtight container for up to 3 days. This helps maintain its flavor and creamy texture, making it perfect for snacking any day of the week.
Freezer: You can freeze the un-sliced roll tightly wrapped in plastic wrap and foil for up to 2 weeks. When ready to enjoy, simply thaw it overnight in the fridge.
Reheating: This dessert is best served chilled; however, if you’d like, you can leave it at room temperature for 15-20 minutes before serving to soften slightly.
Slicing Tip: For the cleanest cuts when serving, use a warmed knife, wiping it clean between slices for picture-perfect spirals.
What to Serve with Halloween Oreo Roll
Embrace the festive spirit of Halloween by complementing your Spooky No-Bake Halloween Oreo Roll with these delightful pairings.
- Witch’s Brew Punch: A fizzy, colorful drink that adds a refreshing touch, perfect for washing down the sweetness of the roll.
- Crispy Apple Slices: Their crunch creates an enjoyable contrast to the creamy texture of the roll and adds a fresh, fruity element.
- Ghostly Pudding Cups: Layered vanilla pudding and crushed Oreos topped with whipped cream make for a fun, thematic duo.
- Mummy Hot Dogs: These playful snacks wrapped in crescent dough offer a savory bite that perfectly balances out the sweetness of your dessert.
Imagine serving these on a platter alongside your Oreo roll, brightening up the festive display. - Pumpkin Spice Cupcakes: Their warming spices and soft texture harmonize beautifully with the chocolatey goodness of the roll, providing a seasonal touch.
- Colored Vegetable Sticks: Carrots, celery, and bell peppers provide a crisp and healthy contrast to the dessert, offering a balance of light flavors.
- Chocolate Milk: A childhood favorite, this creamy treat complements the rich flavors of the Oreo roll and takes you back to sweet memories of Halloween.
- Candy Corn Parfait: Layering candy corn with yogurt or whipped cream creates a visually appealing and fun addition that kids will love.
- Spiced Cider: Serve warm or chilled, this beverage’s comforting spices will pair wonderfully with the Halloween Oreo Roll during cooler nights.
- Orange Sorbet: Providing a light, refreshing finish, its citrusy flavor enhances the festive theme while cleansing the palate after the rich dessert.
Halloween Oreo Roll Variations
Feel free to get creative and make this Halloween Oreo Roll your own with these fun twists!
-
Gluten-Free Swap: Use gluten-free Oreos to make a completely gluten-free version without sacrificing flavor.
Replace standard Oreos with your favorite gluten-free brand, and delight everyone at the table! -
Chocolate Frosting: Try swapping the Halloween-colored frosting for rich chocolate frosting for an extra decadent treat.
The combination of chocolate flavors will truly elevate the treat into a chocolate lover’s dream! -
Fruit Additions: Mix in some finely chopped strawberries or bananas for a fruity surprise that complements the rich chocolate.
These fresh add-ins bring a refreshing burst of flavor and add a delightful texture to each bite! -
Nutty Crunch: Incorporate chopped nuts like walnuts or pecans for a delightful crunch that contrasts with the creamy filling.
A nutty addition brings an interesting texture twist and adds a bit of healthy goodness too! -
Dairy-Free Alternative: Swap out cream cheese with a dairy-free cream cheese for a vegan-friendly option.
Serve it at your next gathering and impress your guests with this deliciously inclusive twist! -
Spicy Kick: Add a dash of cayenne pepper or cinnamon to the frosting for an unexpected but delightful heat.
The warmth will complement the sweetness beautifully, giving your guests something to talk about! -
Layered Delight: Create mini dessert cups by layering Oreo crumbs, cream cheese mixture, and frosting in glass cups for individual servings.
It’s a fun way to serve and allows for personal garnishes, especially during parties or gatherings!
For even more inspiration, check out these delicious recipes like the Enoki Beef Rolls that focus on creative twists!
Make Ahead Options
The Spooky No-Bake Halloween Oreo Roll is a fantastic choice for meal prep, saving you time during the hectic days leading up to Halloween! You can prepare the roll up to 24 hours in advance by following the instructions up to the chilling step—simply wrap it tightly in parchment and foil and refrigerate. For longer storage, it can be frozen un-sliced for up to 2 weeks; just make sure to thaw it overnight in the refrigerator before serving. To maintain quality, keep it well-wrapped to prevent freezer burn. When you’re ready to impress your guests, slice it and garnish it with your choice of decorations for a delightful presentation that’s just as tasty as if it were made fresh!
Halloween Oreo Roll Recipe FAQs
How do I select the right Oreos for the Halloween Oreo Roll?
Absolutely! For the best festive flavor, I recommend using Halloween-themed Oreos with orange crème for a vibrant twist. You can also use regular Oreos if that’s what you have on hand, but choosing those special varieties adds an extra touch of fun and color!
How should I store the Halloween Oreo Roll?
Store your Halloween Oreo Roll in an airtight container in the refrigerator for up to 3 days. This keeps the flavors fresh and the texture creamy—perfect for a quick snack when the craving strikes!
Can I freeze the Halloween Oreo Roll?
Yes, you can! To freeze your un-sliced Halloween Oreo Roll, wrap it tightly in plastic wrap and then in foil to protect it from freezer burn. It can be frozen for up to 2 weeks. When you’re ready to enjoy it, simply transfer it to the refrigerator the night before to thaw gently.
What should I do if my Halloween Oreo Roll cracks while rolling?
No worries! If you notice some cracks forming, just consider them part of the ‘spooky’ charm of your Halloween Oreo Roll. It’s all about embracing that playful aesthetic! If the cracks are larger and troublesome, you can patch them up with a little frosting during the decorating phase.
Are there any dietary considerations I should be aware of?
Definitely! If you’re serving this Halloween Oreo Roll to a crowd, it’s a good idea to ask about allergies beforehand—especially since it contains cream cheese and Oreos, which may have hidden allergens like gluten or dairy. For those with gluten sensitivities, gluten-free Oreos can be substituted easily for a delicious alternative.
Can I make this Halloween Oreo Roll vegan or dairy-free?
Very! You can switch to vegan cream cheese to make this dessert dairy-free, and there are also some great dairy-free Oreos available. Plus, make sure to use plant-based frosting for the same fun festive look. It’s entirely possible to create a crowd-pleasing Halloween dessert that everyone can enjoy!
Delicious Halloween Oreo Roll: No-Bake Fun for Everyone
Ingredients
Equipment
Method
- Crush the Oreos by placing them in a food processor and pulse until fine crumbs form. Alternatively, crush them in a sealed plastic bag with a rolling pin.
- Mix crushed Oreos, softened cream cheese, and vanilla extract in a large bowl until well incorporated, resembling wet sand.
- Roll the mixture out between two sheets of parchment paper into a rectangle of approximately 10x14 inches.
- Spread the Halloween-colored frosting evenly over the Oreo rectangle, leaving a 1-inch border around the edges free of frosting.
- From one of the short edges, lift the parchment paper and roll the mixture tightly to form a roll.
- Seal the edges and wrap the roll in parchment and aluminum foil. Chill in the refrigerator for at least 1 hour or freeze for 20 minutes.
- Once chilled, unwrap and slice the roll into 1-inch rounds using a warm serrated knife.
- Decorate the sliced rolls with optional sprinkles, candy eyes, or chocolate drizzle for added flair.
Leave a Reply