
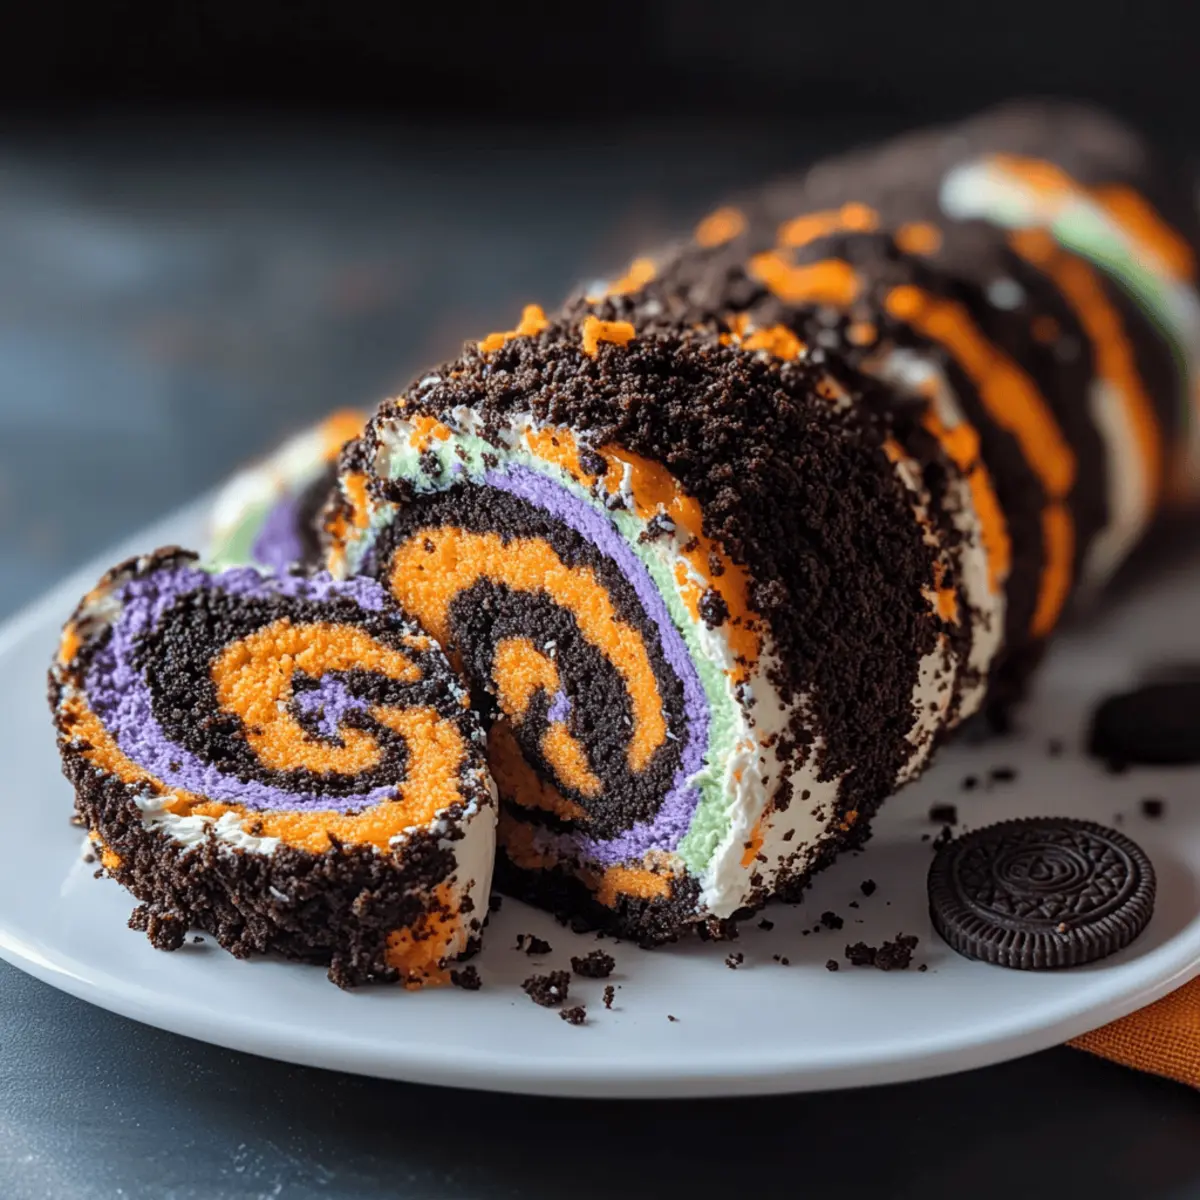
Amidst the crisp autumn air and the rustle of falling leaves, there’s a certain magic that comes alive with Halloween treats. That’s where my Spooky No-Bake Halloween Oreo Roll steps in—a delightful creation combining crushed Halloween Oreos and creamy frosting that is as simple to whip up as it is delicious. This recipe not only saves you from heating up the oven but also brings the whole family together for a fun, messy kitchen adventure. Plus, it’s the perfect party showstopper, guaranteed to impress both kids and adults alike. With vibrant colors and spooky decorations, this dessert will make any gathering festive and memorable. Curious to see how this easy, no-bake treat comes together? Let’s dive into the fun!
Why is the Halloween Oreo Roll a Must-Make?
Crowd-Pleasing Delight: This Halloween Oreo Roll is sure to impress guests, with its vibrant colors and spooky theme perfect for any Halloween gathering.
No-Bake Convenience: Who doesn’t love a dessert that requires no baking? This makes it super easy for even novice bakers to whip up without the stress of an oven.
Kid-Friendly Fun: Engage your little ones with a delightful kitchen adventure; they can help crush, mix, and decorate, making lasting memories while enjoying hands-on fun.
Versatile Flavors: Switch up the Oreos or use homemade frosting to create your unique spin. The possibilities are endless, making it as personalized as you like!
Quick & Simple: Ready in a flash, with minimal ingredients, this roll is a time-saver that still shines on your dessert table.
Elevate your next gathering with this favorite festive treat, and check out Enoki Beef Rolls for a savory option to complement your sweet spread!
Halloween Oreo Roll Ingredients
• Get ready to delight in this easy and fun treat!
For the Roll
- Halloween Oreos – The star of the show, providing rich flavor and a festive crunch. Opt for the orange crème version to amp up your Halloween spirit.
- Cream Cheese – Brings a creamy richness; full-fat cream cheese is ideal for the perfect texture.
- Vanilla Extract – Enhances the dessert’s flavor profile; almond extract can be a delightful swap for a nutty twist.
For the Frosting
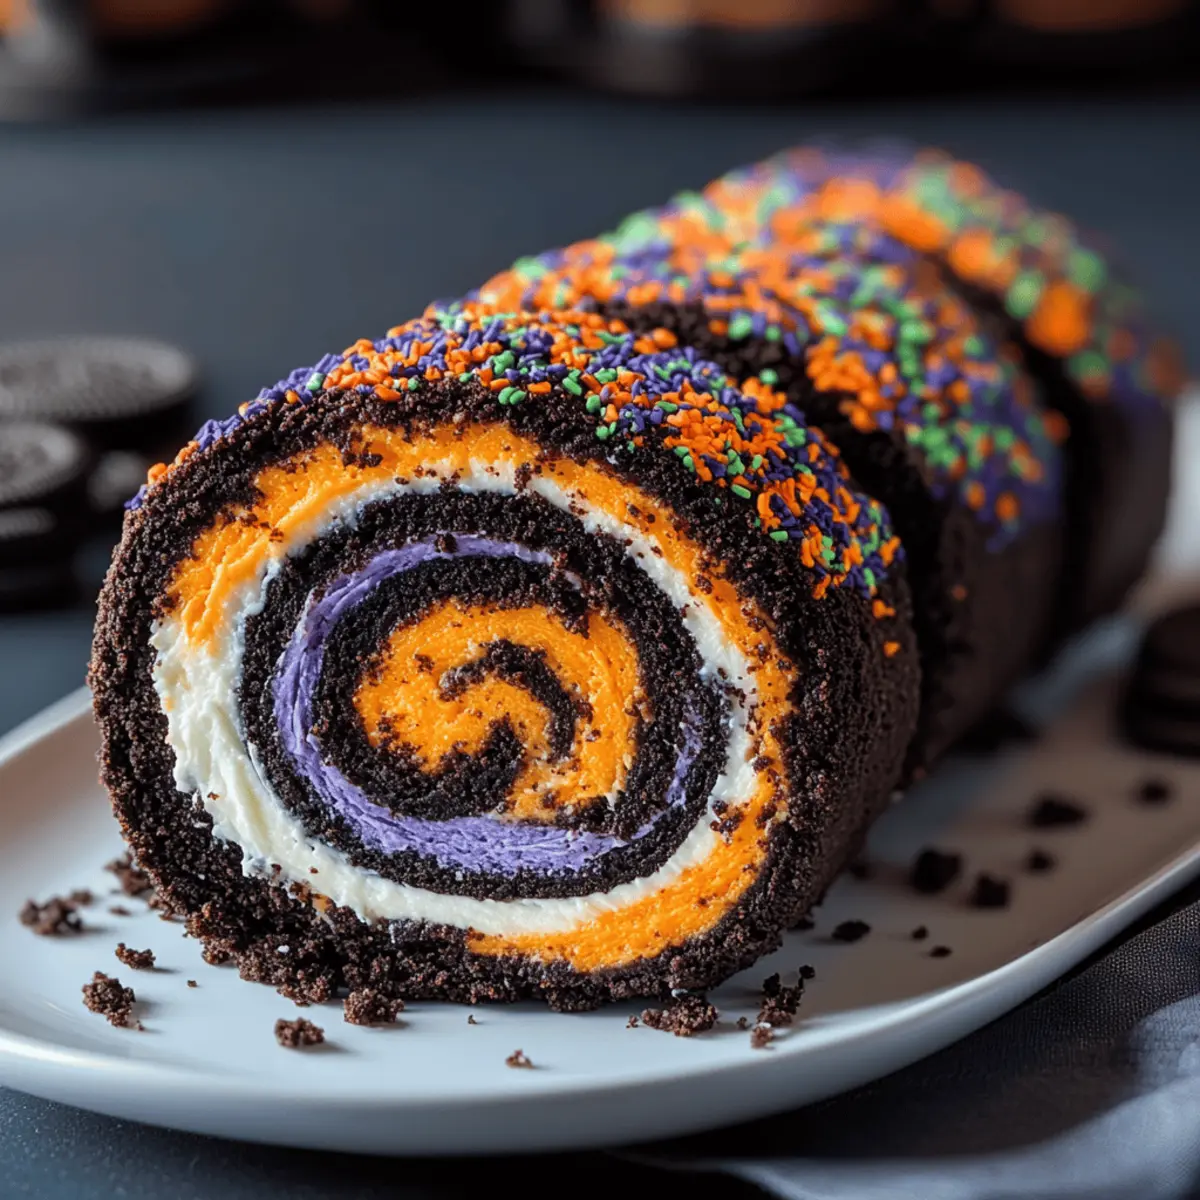
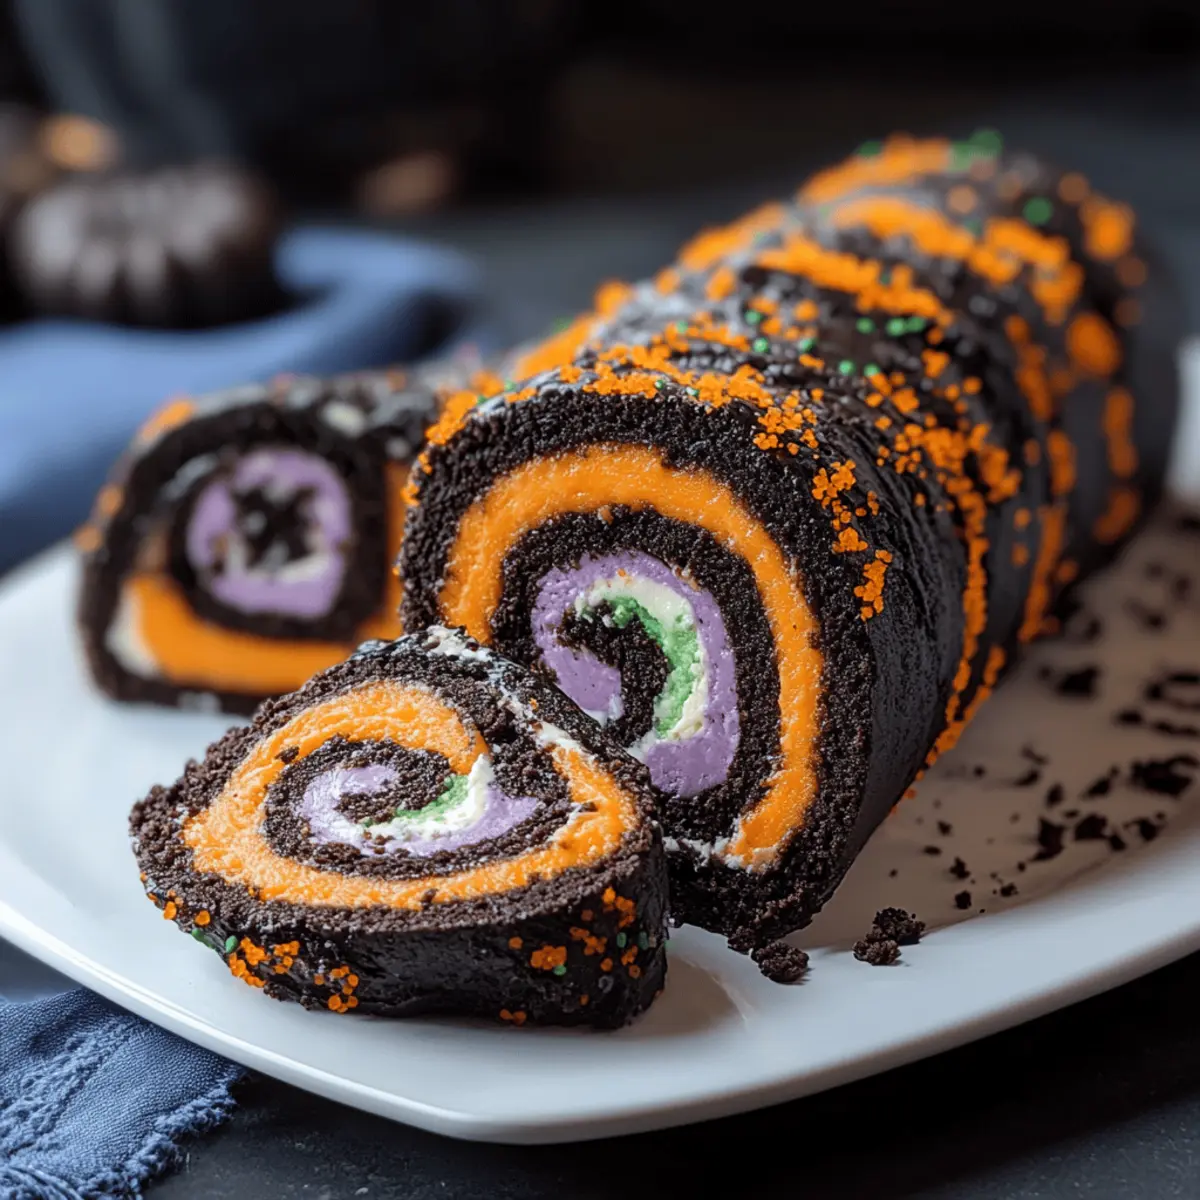
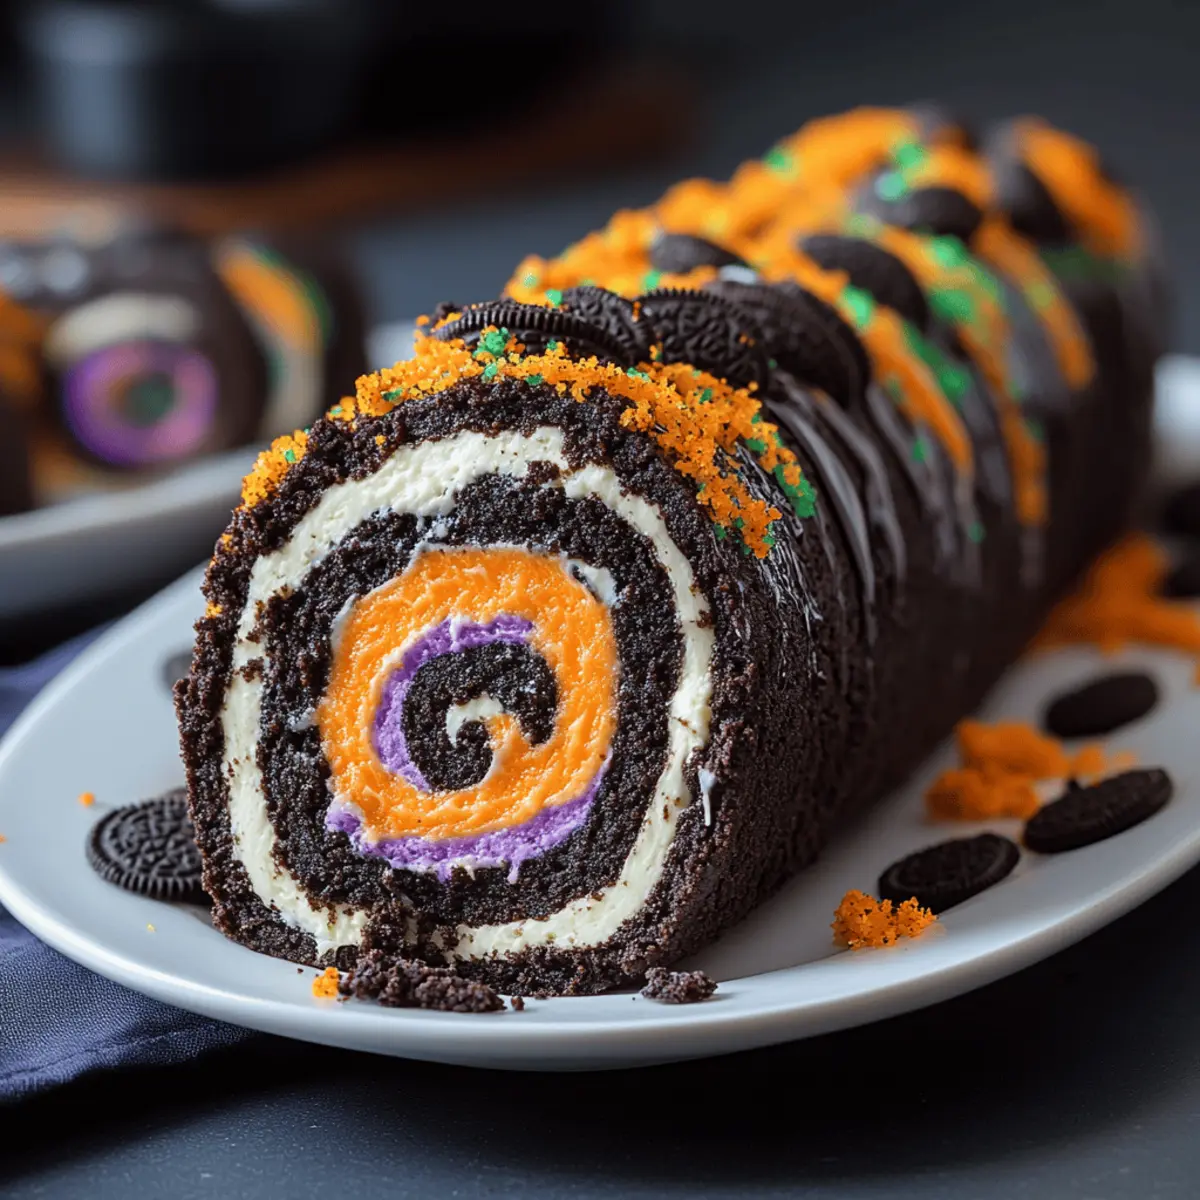
- Halloween-Colored Frosting – Adds sweetness and color; choose shades like purple, green, or orange to match your spooky theme.
Optional Decorations
- Sprinkles – For an extra pop of color, choose Halloween-themed sprinkles.
- Candy Eyes – Create a playful, spooky effect on your roll!
- Chocolate Drizzle – Elevate the look and flavor for a touch of decadence.
Step‑by‑Step Instructions for Halloween Oreo Roll
Step 1: Crush the Oreos
Begin by placing your Halloween Oreos into a food processor. Pulse them until the cookies are crushed into a fine powder, resembling coal dust. If you don’t have a food processor, you can put the cookies into a sealed plastic bag and crush them with a rolling pin. This should take about 3–5 minutes, ensuring all pieces are evenly crushed for the Halloween Oreo Roll.
Step 2: Mix the Ingredients
In a large mixing bowl, combine the crushed Oreos with softened cream cheese and vanilla extract. Use a spatula or your hands to mix until the texture resembles wet sand, ensuring all ingredients are well integrated. This process typically takes about 2–3 minutes. You want the mixture to be pliable and ready to roll, creating a tasty base for the Halloween Oreo Roll.
Step 3: Shape the Roll
Lay out a large piece of parchment paper on a clean surface. Transfer the Oreo mixture onto the parchment and place another piece of parchment on top. Using your hands, gently spread and shape the mixture into a rectangle approximately 10×14 inches and about ¼ inch thick. This might take around 3–5 minutes. Ensure the edges are smooth and even to create uniform slices after rolling.
Step 4: Spread the Frosting
Carefully peel off the top layer of parchment. Use a spatula to evenly spread your Halloween-colored frosting over the Oreo mixture, leaving a 1-inch border around the edges. Aim for an even layer that enhances the visual appeal of your Halloween Oreo Roll. This step should take about 2–3 minutes to ensure a good distribution of frosting.
Step 5: Roll the Mixture
Starting from one of the short edges, carefully lift the parchment paper to help you roll the mixture tightly into a log shape. Keep the roll as tight as possible without squeezing too much, using the parchment to guide you. This rolling process should take about 2–4 minutes. Tuck in the sides as you go to maintain a clean shape for your Halloween Oreo Roll.
Step 6: Seal and Chill
Once rolled, pinch the ends and edges to seal the roll. Wrap the roll tightly in the parchment, then in foil to help maintain its shape. Refrigerate for at least 1 hour or freeze for 20 minutes to firm up the roll. This chilling time helps the flavors meld together and is crucial for a perfect slice, requiring patience for about 1 hour or a quick 20-minute freeze.
Step 7: Slice the Roll
After chilling, unwrap the roll and place it seam-side down on a platter. Using a warm knife, slice the roll into 1-inch rounds. The warmth of the knife allows for cleaner cuts and neat spirals in your Halloween Oreo Roll. This slicing should take about 3–5 minutes, allowing you to serve beautiful pieces without crumbling.
Step 8: Decorate and Serve
Finally, get creative with optional decorations! Sprinkle your favorite Halloween-themed sprinkles, add candy eyes for a spooky effect, or drizzle melted chocolate over the slices. This step can take around 5 minutes and adds a festive touch to your Halloween Oreo Roll. Once decorated, serve and watch your guests delight in this charming treat!
Expert Tips for Halloween Oreo Roll
Room Temperature Ingredients: Use softened cream cheese and warm your vanilla extract before mixing to achieve a smoother blend and better texture.
Chill for Perfection: Ensure you refrigerate or freeze the roll adequately. This step is crucial for easier slicing and maintaining the roll’s shape.
Warm Knife Trick: For clean slices, run your knife under hot water before cutting the Halloween Oreo Roll, and wipe it between cuts to prevent sticking.
Creative Decorations: Don’t hold back on the festive elements! Use themed sprinkles, candy eyes, or colorful drizzles to make your roll visually enchanting.
Embrace Imperfections: If cracks appear in the roll, consider them part of the Halloween charm. Embrace the “spooky texture” and highlight it during serving!
How to Store and Freeze Halloween Oreo Roll
Fridge: Keep the Halloween Oreo Roll wrapped tightly in parchment or plastic wrap to maintain freshness for up to 3 days, avoiding any moisture.
Freezer: For longer storage, freeze the un-sliced roll tightly wrapped in foil for up to 2 weeks. Make sure to thaw overnight in the fridge before serving.
Reheating: This roll is best served cold or at room temperature. No reheating is necessary; simply slice and enjoy as is!
Serving Tip: If you’re prepping for a party, feel free to slice it ahead of time and store the slices in an airtight container in the fridge for up to 3 days.
Halloween Oreo Roll Variations
Feel free to let your creativity shine and customize this recipe for a unique twist!
-
Gluten-Free: Use gluten-free Oreos for a safe version that everyone can enjoy during Halloween celebrations.
-
Nutty Flavor: Swap vanilla extract for almond extract; this adds a warm, nutty essence to the roll that’s simply irresistible.
-
Colorful Frosting: Experiment with other festive frosting colors like spooky purple or ghastly green to match your Halloween theme perfectly.
-
Homemade Frosting: Create your own frosting using butter, powdered sugar, and food coloring, ensuring it’s thick enough for spreading. Homemade always taste better and can be customized too!
-
Fruit Add-In: Toss in some finely diced strawberries or crushed pineapple to add a fruity surprise inside your roll. This twist brings a burst of freshness that contrasts beautifully with the richness of the Oreos.
-
Pumpkin Spice: Add pumpkin spice to your cream cheese mixture to infuse a seasonal flavor that captures the essence of fall.
-
Cheesecake Version: Use cheesecake-flavored cream cheese for an even richer, creamier filling, enhancing the indulgence of your Halloween treat.
-
Spicy Kick: Add a smidgen of cayenne pepper to the frosting for a delightful surprise that pairs perfectly with the sweetness of the Oreos. If you’re feeling adventurous, let your taste buds lead the way!
If you’re looking to incorporate a savory dish alongside your dessert, consider pairing it with some delightful Enoki Beef Rolls for a balanced menu. Your guests will be talking about this spread for years to come!
What to Serve with Halloween Oreo Roll
Transform your Halloween gathering into a festive feast by pairing delicious sides and drinks that elevate the fun!
- Creamy Pumpkin Soup: This warm, velvety soup brings a comforting touch, perfectly balancing the sweetness of the Oreo roll while keeping the autumn theme alive.
- Ghostly Cheese Platter: Assemble an array of cheeses and Halloween-themed crackers for a spooky touch; this savory option contrasts beautifully with the dessert’s sweetness.
- Chilling Witch’s Brew: Whip up a vibrant punch using green soda and lime sherbet! This bubbly drink provides a refreshing complement to the rich flavors of the Oreo roll.
- Frightfully Fun Fruit Skewers: Combine colorful fruits like kiwi, strawberries, and black grapes on skewers for a healthy, vibrant addition to your spread that will entice kids and adults alike.
- Spooky S’mores: Create s’mores using ghost-shaped marshmallows and dark chocolate. This playful dessert can echo the Oreo roll’s charm with its sweet crunch.
- Caramel Apple Cups: For a creepy twist, serve sliced apples drizzled with caramel sauce in cute cups for easy snacking that pairs excellently with your dessert’s sweetness.
- Halloween Cupcakes: Whip up some fun, themed cupcakes adorned with candy decorations. This lively addition ups the celebration while echoing the sweet vibe of the Oreo roll.
- Crisp Green Salad: A fresh salad with crunchy veggies highlights the heaviness of the dessert, providing a refreshing contrast and wonderfully vibrant colors.
- Spiced Apple Cider: Serve warm apple cider infused with cinnamon for a cozy drink that awaits your guests, enhancing the fall ambiance of your festive gathering.
Make Ahead Options
These Spooky No-Bake Halloween Oreo Rolls are perfect for meal prep, allowing busy home cooks to stay ahead of the game! You can prepare the entire roll up to 24 hours in advance. Simply follow the recipe up to the chilling step, wrap the rolled cake tightly in parchment and foil, and refrigerate. This helps maintain the roll’s freshness and flavor. When you’re ready to serve, just slice the roll—using a warm knife for neat spirals—and decorate as desired. For longer storage, freeze the un-sliced roll for up to 2 weeks; thaw it overnight in the fridge before finishing. This ensures you’ll have a delightful treat, just as sweet and visually striking, ready to impress your guests!
Halloween Oreo Roll Recipe FAQs
How do I choose the best Halloween Oreos?
Absolutely! When selecting Halloween Oreos, look for the ones with vibrant orange crème filling for a festive touch. Make sure the cookies are fresh—if they have dark spots or a stale smell, it may affect the flavor of your Halloween Oreo Roll.
How should I store the Halloween Oreo Roll?
To keep your Halloween Oreo Roll fresh, wrap it tightly in parchment paper or plastic wrap, then store it in the refrigerator for up to 3 days. This prevents it from drying out and keeps the creamy texture intact.
Can I freeze the Halloween Oreo Roll?
Very! You can freeze the un-sliced Halloween Oreo Roll by wrapping it securely in foil, preserving its taste for up to 2 weeks. When you’re ready to serve, simply thaw it overnight in the refrigerator for the best results.
What if my Halloween Oreo Roll cracks while rolling?
Don’t worry if you see cracks! Embrace those “spooky textures” as part of the charm. If it happens, just make sure to roll it gently but tightly and don’t stress too much about imperfections; it’ll still taste delicious!
Are there any allergy considerations for this recipe?
Yes, definitely! This recipe contains cream cheese and Oreos, which may have gluten and dairy. If you’re hosting for someone with dietary restrictions, consider using gluten-free Oreos and plant-based cream cheese as alternatives. Always check labels for allergens like nuts or soy, and feel free to adapt for any allergies.
How can I add a personal touch to the Halloween Oreo Roll?
You can easily personalize your Halloween Oreo Roll! Experiment by adding in crushed pretzels or nuts for extra crunch, or swap the frosting for homemade options to control sweetness. You could even decorate with festive themes like ghosts or pumpkins using different colored sprinkles or candy. The more, the merrier!
Easy Halloween Oreo Roll that Kids Will Love to Make
Ingredients
Equipment
Method
- Crush the Oreos until they resemble a fine powder.
- Mix the crushed Oreos with cream cheese and vanilla extract until combined.
- Shape the mixture into a rectangle approximately 10x14 inches on parchment paper.
- Spread the Halloween-colored frosting evenly over the Oreo mixture.
- Roll the mixture tightly from one end into a log shape using parchment paper.
- Seal the roll and chill in the refrigerator for at least 1 hour or freeze for 20 minutes.
- Slice the roll into 1-inch rounds using a warm knife.
- Decorate with optional sprinkles, candy eyes, or chocolate drizzle before serving.
Leave a Reply