
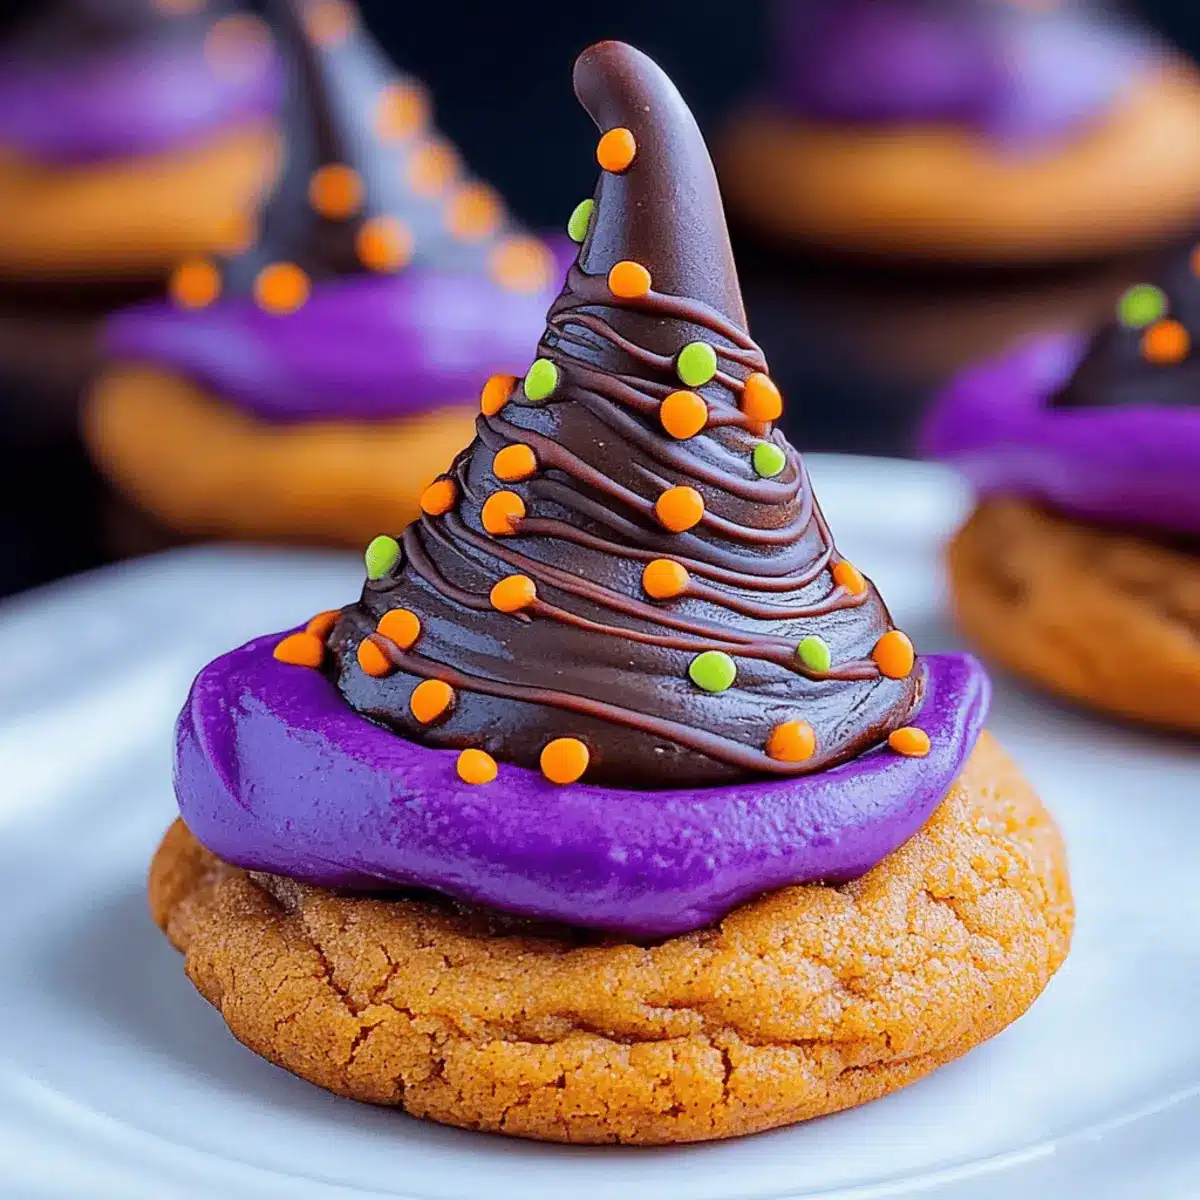
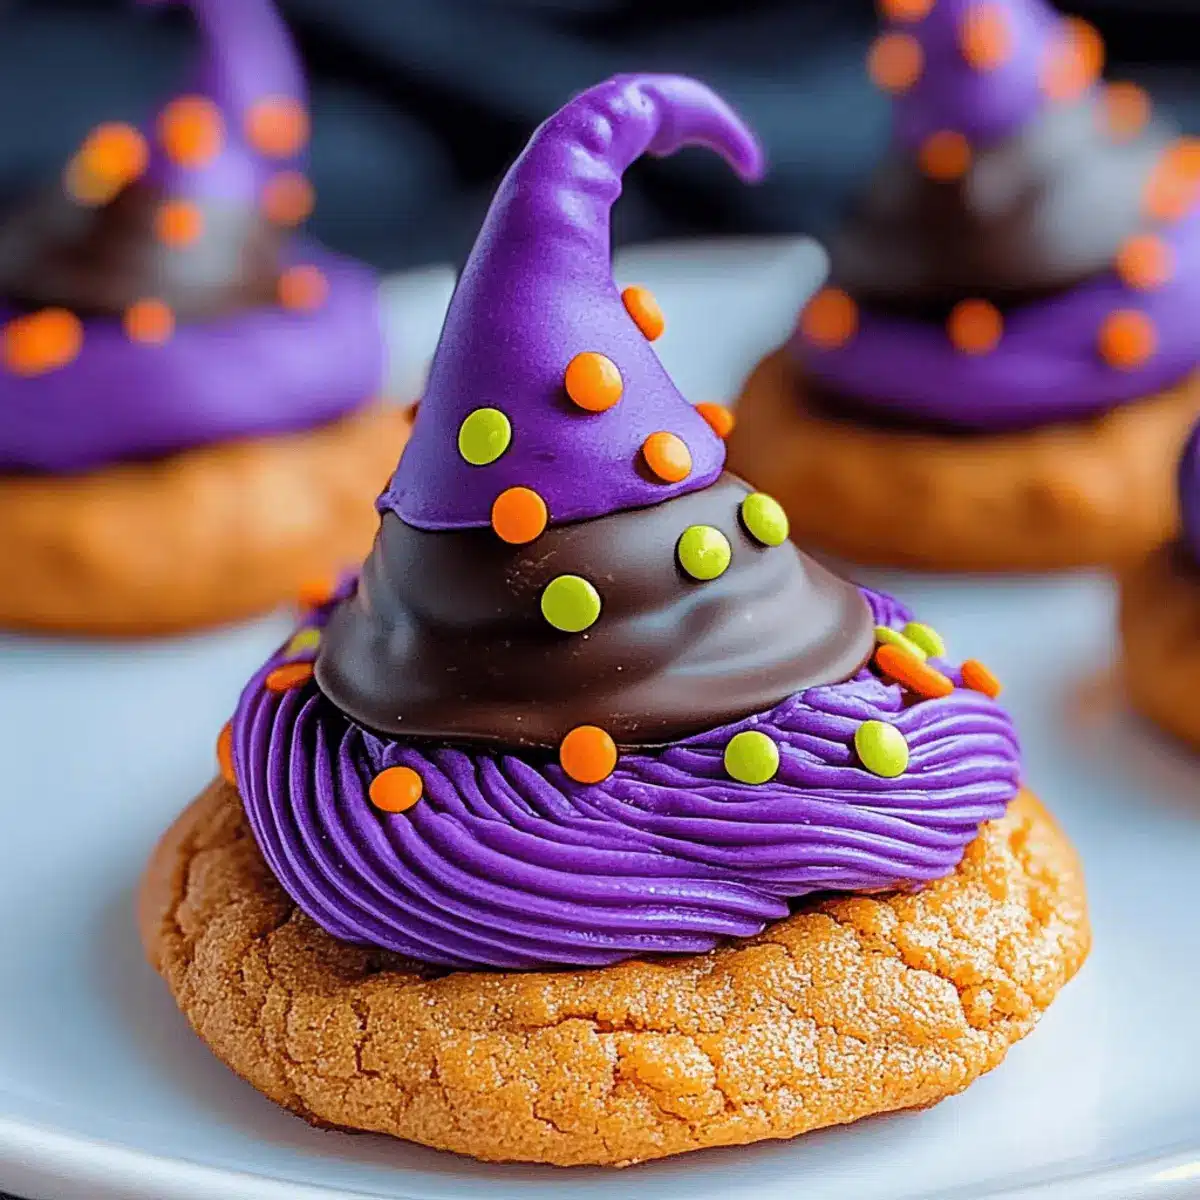
As autumn leaves start to fall, I can’t help but feel the thrill of spooky season in the air. Enter the Witch Hat Cookies Recipe, a playful baking adventure that transforms ordinary treats into whimsical wonders! These delightful cookies—crafted from a soft peanut butter base adorned with rich chocolate—are not just visually enchanting; they are also incredibly quick to whip up, making them perfect for busy bakers. With just a few simple ingredients, you can create a festive dessert that will charm both kids and adults alike, effortlessly adding a touch of magic to your Halloween gatherings. So, are you ready to conjure up some fun in the kitchen? Let’s dive in!
Why Are Witch Hat Cookies So Special?
Whimsical Wonder: These Witch Hat Cookies are not just treats; they’re a delightful experience that adds charm to any Halloween gathering.
Easy to Make: With simple ingredients and quick prep time, even busy bakers can create these festive delights without breaking a sweat.
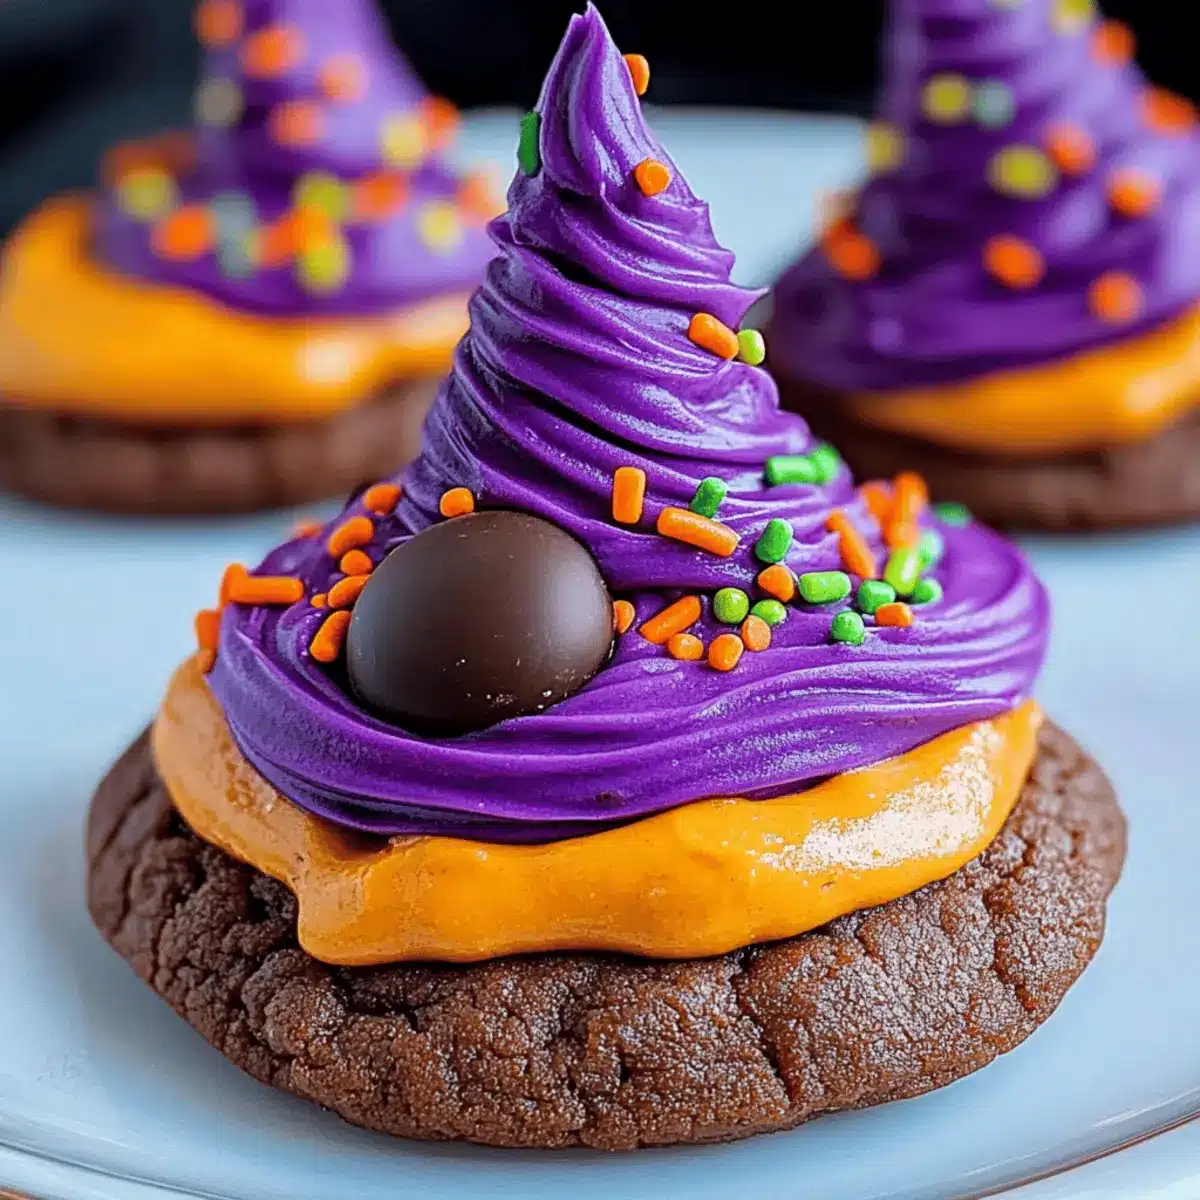
Versatile Creativity: Feel free to switch up the cookie base or frosting colors for different occasions—think orange for Thanksgiving or chocolate as a base for an extra treat!
Crowd-Pleasing Appeal: Their unique hat shape topped with a chocolate Kiss is sure to be a hit with both kids and adults, making them a fantastic addition to your dessert table.
Perfect Pairing: These cookies are best enjoyed with a warm beverage like hot cocoa or coffee, creating cozy moments that everyone will remember.
So, roll up your sleeves and dive into this playful baking adventure! You can also check out my recipes for Pumpkin Smores Cookies and Karaage Chicken Umami for more festive fun!
Witch Hat Cookies Recipe Ingredients
For the Cookie Base
- All-purpose flour – Essential for structure, but substitute with a gluten-free blend for a delicious gluten-free option.
- Cornstarch – Helps create a tender texture in every bite.
- Baking soda – Provides a slight lift to the cookies.
- Baking powder – Works alongside baking soda for lightness.
- Fine sea salt – Balances sweetness and enhances flavors.
- Unsalted butter – Infuses richness; can be swapped for vegan butter for a dairy-free treat.
- Granulated sugar – Adds sweetness and texture; brown sugar can bring extra moisture and a caramel touch.
- Large egg – Acts as a binder; substitute with a flax egg for a vegan alternative.
- Creamy peanut butter – Provides the beloved peanut flavor and a chewy texture; crunchy can add interesting bites.
- Vanilla extract – Deepens the overall flavor profile.
For the Frosting
- Purple gel food coloring – Gives frosting that vibrant Halloween touch; feel free to use other colors for creativity.
- Powdered sugar – Creates a sweet and fluffy consistency for piping.
- Milk – Adjusts frosting thickness; add more for a thinner consistency.
For the Decoration
- Chocolate Kisses or Hugs – These serve as the delightful “hat” on top; consider mini Reese’s Cups for a fun twist.
- Halloween sprinkles or purple sanding sugar – Add festive flair; any seasonal sprinkles can elevate your creations.
Ready to bake? Dive into this Witch Hat Cookies recipe and let the magic happen! 🧙♀️✨
Step‑by‑Step Instructions for Witch Hat Cookies Recipe
Step 1: Prepare the Dough
In a large mixing bowl, cream together 1 cup of softened unsalted butter and 1 cup of granulated sugar until light and fluffy, about 2–3 minutes. Add in 1 large egg, 1 cup of creamy peanut butter, and 1 teaspoon of vanilla extract, mixing until fully combined. In a separate bowl, whisk together 2 cups of all-purpose flour, 2 tablespoons of cornstarch, 1 teaspoon of baking soda, 1 teaspoon of baking powder, and ½ teaspoon of fine sea salt. Gradually add the dry ingredients to the wet mixture until just combined.
Step 2: Chill & Bake the Cookies
Once the dough is ready, cover the bowl with plastic wrap and refrigerate for at least 1 hour to firm up. Preheat your oven to 375°F (190°C). After chilling, scoop the dough and roll it into balls, approximately 1 tablespoon each, then place them onto a baking sheet lined with parchment paper. Bake for 8 to 10 minutes, or until the edges are set but the centers are still slightly soft. Remove from the oven and let them cool completely on a wire rack.
Step 3: Make the Frosting
While the cookies are cooling, prepare the vibrant frosting. In a mixing bowl, beat together ½ cup of softened unsalted butter until creamy, then gradually add 2 cups of powdered sugar. Pour in 2-3 tablespoons of milk, 1 teaspoon of vanilla extract, and a few drops of purple gel food coloring. Mix until the frosting is light, fluffy, and holds a piping consistency. Add more powdered sugar or milk as needed to reach your desired thickness.
Step 4: Assemble the Witch Hat Cookies
Once the cookies have cooled, it’s time to assemble your Witch Hat Cookies. Using a piping bag or a spatula, pipe the purple frosting around the edges of each cookie, creating a festive brim. Gently press a chocolate Kiss or Hug into the center of each frosted cookie, letting it adhere to the icing. This will serve as the witch’s hat, adding a delicious chocolatey touch.
Step 5: Decorate & Set
To add extra festive flair, sprinkle Halloween-themed decorations or purple sanding sugar around the brim of the frosting. Allow the decorated cookies to sit at room temperature until the frosting sets, which usually takes about 30 minutes. Once set, your delightful Witch Hat Cookies are ready to be served at all your spooky gatherings!

Make Ahead Options
Get a head start on your Halloween festivities with Witch Hat Cookies! You can prepare the cookie dough up to 24 hours in advance by mixing all the ingredients and chilling it in the refrigerator. Alternatively, the formed dough balls can be frozen for up to 3 months; simply thaw them in the fridge before baking. For the frosting, mix the ingredients and store it in an airtight container in the fridge for up to 3 days—just give it a quick stir before using. When you’re ready to serve, bake the cookies and assemble them with frosting and chocolate hats, ensuring they’ll be just as delightful and fresh as if made on the spot!
Expert Tips for Witch Hat Cookies
- Butter at Room Temp: Ensure your butter is softened to room temperature for easy mixing and smooth dough, making your Witch Hat Cookies extra delightful.
- Chill the Dough: Don’t skip refrigerating the dough for at least an hour; this step prevents the cookies from spreading too much while baking.
- Piping Perfection: Use a piping bag for frosting to achieve a beautiful edge, giving your cookies a polished, professional look that everyone will admire.
- Experiment Freely: Feel free to mix up the cookie base or frosting colors! Halloween’s not the only time for fun—get creative with flavors and themes!
- Storage Savvy: Keep your cookies in an airtight container at room temperature for 3-4 days, but they can also be frozen for longer enjoyment!
Storage Tips for Witch Hat Cookies
-
Room Temperature: Store your Witch Hat Cookies in an airtight container at room temperature for up to 3-4 days to maintain freshness and texture.
-
Fridge: If you prefer a firmer cookie, keep them in the fridge in an airtight container for up to a week. Just allow them to sit at room temperature for a few minutes before enjoying.
-
Freezer: For longer storage, freeze the cookies by placing them in a single layer on a baking sheet for about 1-2 hours, then transfer to a freezer-safe container. They can be stored for up to 2 months.
-
Reheating: When ready to enjoy, thaw cookies in the fridge overnight or at room temperature for a couple of hours. If desired, gently warm them in a microwave for 5-10 seconds to enhance the chewy texture.
Witch Hat Cookies Recipe Variations
Feel free to add your own twist to the Witch Hat Cookies, making them even more enchanting and unique!
-
Chocolate Base: Swap the peanut butter cookie base for a rich chocolate cookie for a double chocolate delight. It’s a perfect match with the chocolate “hats!”
-
Vegan Option: Use vegan butter and a flax egg instead of traditional butter and eggs to make these cookies entirely plant-based. Everyone deserves a spooky treat!
-
Alternative Frosting: Instead of purple frosting, consider a classic vanilla or even a bright orange for a Halloween twist. Switch it up for birthday parties too!
-
Crunchy Texture: Try using crunchy peanut butter in place of creamy for a delightful texture difference. The added crunch makes each bite exciting!
-
Holiday Adaptations: Change the decorating theme! Use red and green sprinkles for Christmas or pastel colors for Easter. Cookies can be festive all year round!
-
Heat It Up: Add a pinch of cayenne pepper or a dash of cinnamon to the cookie dough for a warm spice kick. This subtle heat pairs beautifully with chocolate.
-
Nut-Free: Substitute peanut butter with sunflower seed butter for a nut-free option, allowing everyone to enjoy these whimsical treats.
-
Add Ins: Toss in mini chocolate chips or caramel bits into the cookie dough for extra sweetness and flavor depth. These surprises make every bite delightful!
So get creative, and don’t hesitate to make these cookies your own! And if you’re looking for more festive ideas, be sure to try my Mini Dessert Cake for an extra treat at your gatherings!
What to Serve with Witch Hat Cookies
Witch Hat Cookies are not just delightful on their own; pairing them with the right treats can elevate your Halloween gathering experience!
-
Hot Cocoa: A warm, chocolatey drink that complements the rich flavors of peanut butter and chocolate perfectly, creating a cozy atmosphere.
-
Spiced Apple Cider: The warm spices and sweetness in the cider balance the richness of the cookies and bring seasonal flavors to your table.
-
Pumpkin Spice Latte: Enjoy this popular fall favorite as it enhances the festive ambiance and pairs beautifully with the whimsical cookies.
-
Caramel Dip: A creamy and sweet caramel sauce adds a contrasting texture, allowing fun dipping moments that both kids and adults will love.
-
Orange Slices: Fresh orange slices provide a citrusy zing that cuts through the sweetness, refreshing the palate between cookie bites.
-
Halloween Fruit Kabobs: Assemble a mix of seasonal fruits on skewers—like strawberries, kiwi, and grapes—that add a burst of color and natural sweetness.
Gather your family around for some creative fun—these pairings not only satisfy hunger but also create sweet memories together!
Witch Hat Cookies Recipe FAQs
How do I know when my peanut butter is ripe for baking?
Absolutely! The peanut butter should be smooth and free of any separation or dark spots, which can indicate age. If you’re using crunchy peanut butter, make sure it doesn’t have any off smells or flavors. Fresh peanut butter will give your cookies that delightful creamy texture.
What are the best storage methods for Witch Hat Cookies?
You can store your Witch Hat Cookies in an airtight container at room temperature for 3 to 4 days. If you’d like to keep them fresh longer, refrigerate them for up to a week. Just let them sit out at room temperature for a few minutes before eating if stored in the fridge. For freezing, lay the cookies in a single layer on a baking sheet for about 1-2 hours, then transfer them to a freezer-safe container for up to 2 months.
Can I freeze Witch Hat Cookies? How?
Very! To freeze your Witch Hat Cookies, first, cool them completely. Then, place them in a single layer on a baking sheet and freeze for about 1-2 hours until solid. Once firm, transfer them to an airtight container or a resealable plastic bag separated by parchment paper. This method keeps them fresh for up to 2 months. When you’re ready to enjoy, simply thaw them at room temperature or warm them slightly in the microwave.
What should I do if my cookies spread too much while baking?
No worries! If your cookies spread too much, it might be due to the dough not being chilled long enough. Make sure to refrigerate for at least an hour before baking. Also, ensure that your butter is softened, not melted, as melted butter can also lead to spreading. Chilling the dough is crucial for maintaining that adorable shape!
Are Witch Hat Cookies suitable for people with allergies?
Absolutely! However, please be aware that they contain peanuts due to the peanut butter, which can be a common allergen. If making for someone with a nut allergy, you could substitute peanut butter with sun butter or a different seed butter. Always check the labels of your other ingredients as well, like chocolate Kisses, to ensure they are allergy-friendly.
Witch Hat Cookies Recipe: Magic in Every Chewy Bite
Ingredients
Equipment
Method
- In a large mixing bowl, cream together the softened butter and granulated sugar until light and fluffy, about 2-3 minutes.
- Add in the egg, creamy peanut butter, and vanilla extract, mixing until fully combined.
- In a separate bowl, whisk together the all-purpose flour, cornstarch, baking soda, baking powder, and fine sea salt.
- Gradually add the dry ingredients to the wet mixture until just combined.
- Cover the bowl with plastic wrap and refrigerate for at least 1 hour.
- Preheat your oven to 375°F (190°C).
- Scoop the dough and roll it into balls, approximately 1 tablespoon each, and place them onto a baking sheet lined with parchment paper.
- Bake for 8-10 minutes, or until the edges are set but the centers are still slightly soft.
- Let cookies cool completely on a wire rack.
- For the frosting, beat the softened butter until creamy, then gradually add the powdered sugar, milk, and vanilla extract.
- Add purple gel food coloring and mix until fluffy and hold piping consistency.
- Once cookies have cooled, pipe the frosting around the edges of each cookie.
- Press a chocolate Kiss or Hug into the center of each frosted cookie.
- Sprinkle Halloween-themed decorations or sanding sugar around the brim of the frosting.
- Allow decorated cookies to sit at room temperature until frosting sets, about 30 minutes.
Leave a Reply