
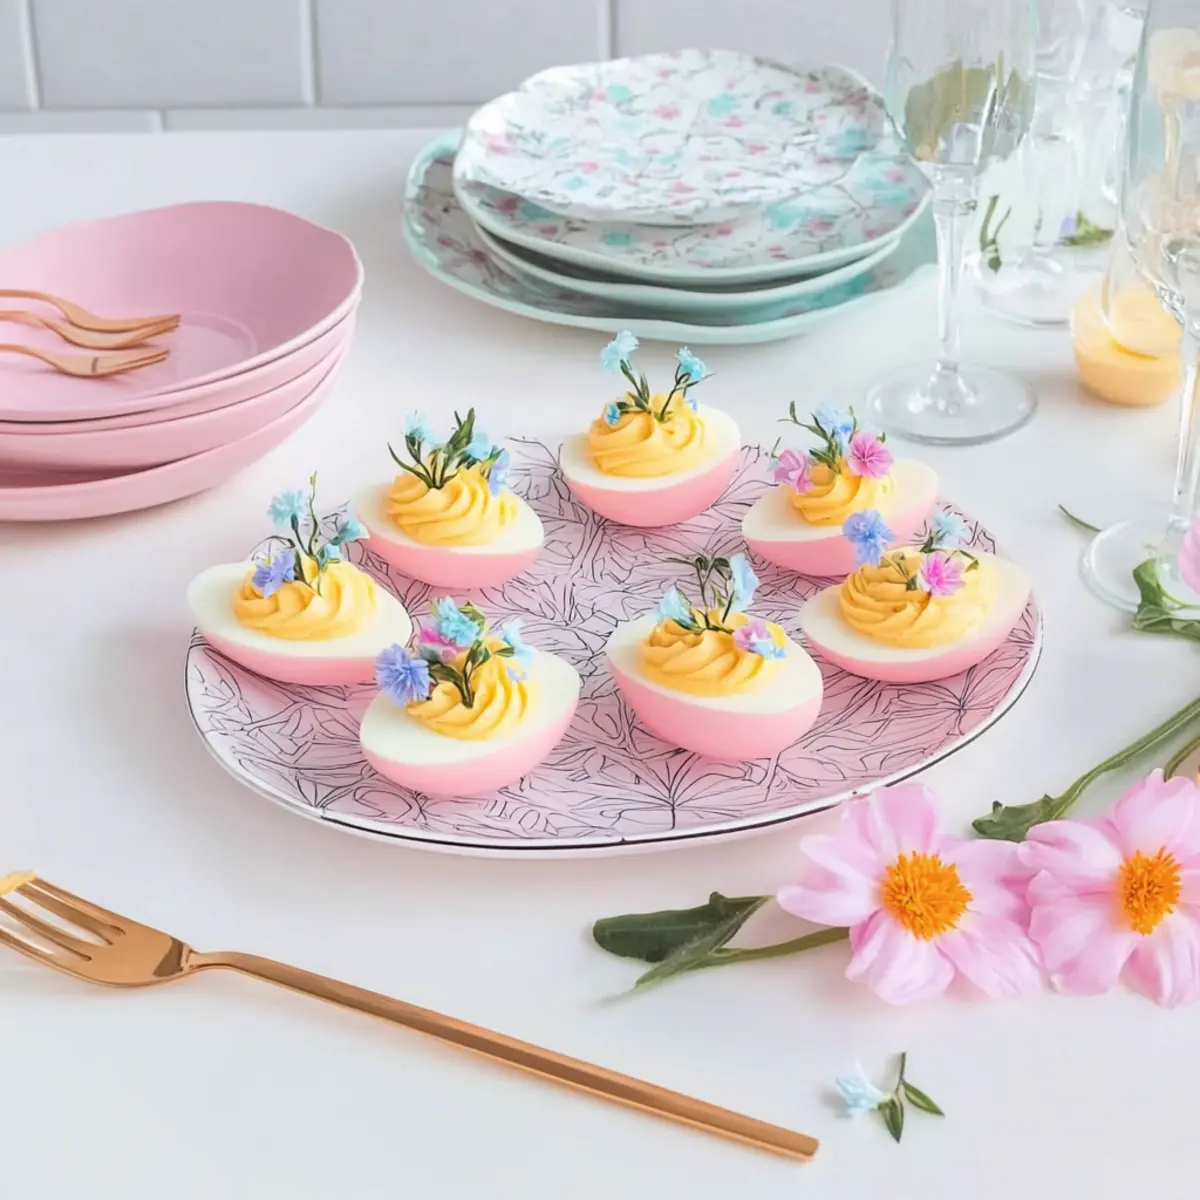
As I stood in my kitchen, colors swirling before my eyes, I couldn’t help but grin at the thought of sharing these Colorful Deviled Eggs. Perfect for any festive spring brunch, these vibrant bites are not only visually stunning but incredibly easy to whip up. With a handful of simple ingredients, you can transform classic deviled eggs into a colorful canvas that will charm your family and friends alike. Not only do they look delightful, but they’re also a wonderful way to enjoy a healthier twist by using natural coloring options like beet juice instead of artificial dyes. Imagine the joy at your table when guests get to choose between eye-catching hues and delicious creamy fillings—all with minimal effort. Ready to dive into a world of colors and flavors? Let’s get started!
Why Are These Deviled Eggs Special?
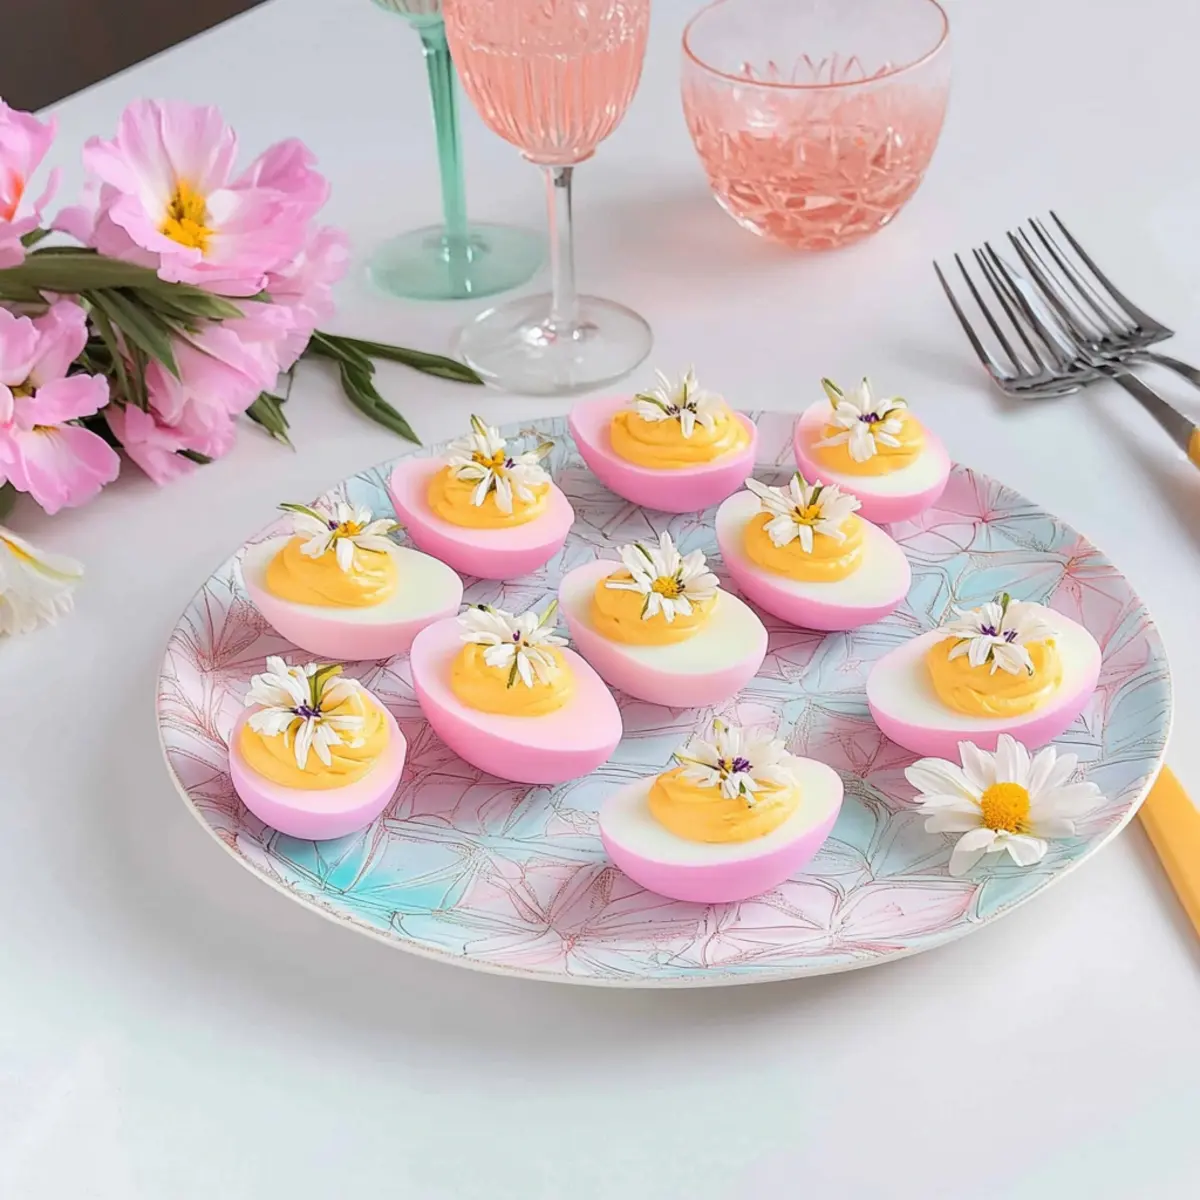
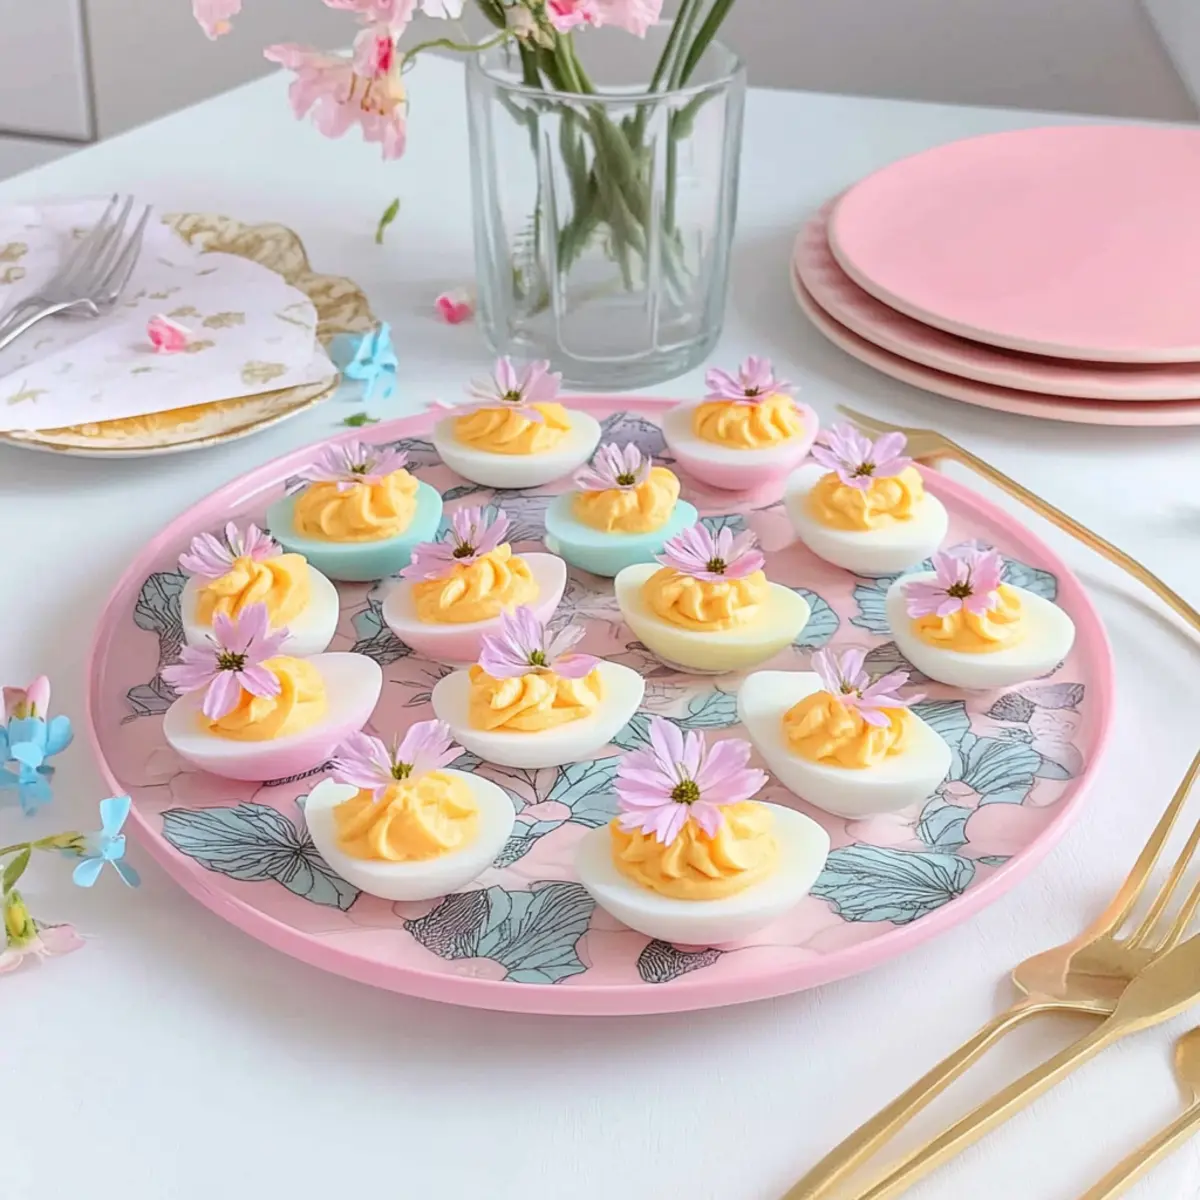
Vibrant Colors: These Colorful Deviled Eggs add an artistic touch to your table. Bright hues not only elevate your brunch spread but also invite playful interaction.
Natural Ingredients: With options like beet juice, you can brighten flavors naturally. Enjoy a healthier take on this classic, making it suitable for everyone!
Simple Preparation: Embrace ease as you combine basic ingredients; even novice cooks will shine. Quick to whip up, these eggs save you time for other brunch delights.
Crowd-Pleasing Appeal: Your guests will rave about these eye-catching bites, making them perfect for parties or family gatherings. Pair them with a light salad or seafood platter for a complete experience!
Perfect Deviled Eggs Ingredients
• Perfect for a colorful brunch!
For the Base
• Eggs – The star of the show, fresh eggs are key for an amazing flavor.
• White Vinegar – Helps in the dyeing process; substitute apple cider vinegar for a milder taste.
• Food Coloring (liquid or natural) – Adds the vibrant colors; try beet juice for a natural alternative!
For the Filling
• Mayonnaise – Creates the creamy texture; Greek yogurt offers a lighter option.
• Mustard – Adds a delightful tang; Dijon mustard works beautifully.
• Pickle Juice – Optional, enhances flavor; skip it for a milder blend.
• Salt & Pepper – Essential seasonings to enhance flavors; consider using sea salt for gourmet flair!
For the Garnish
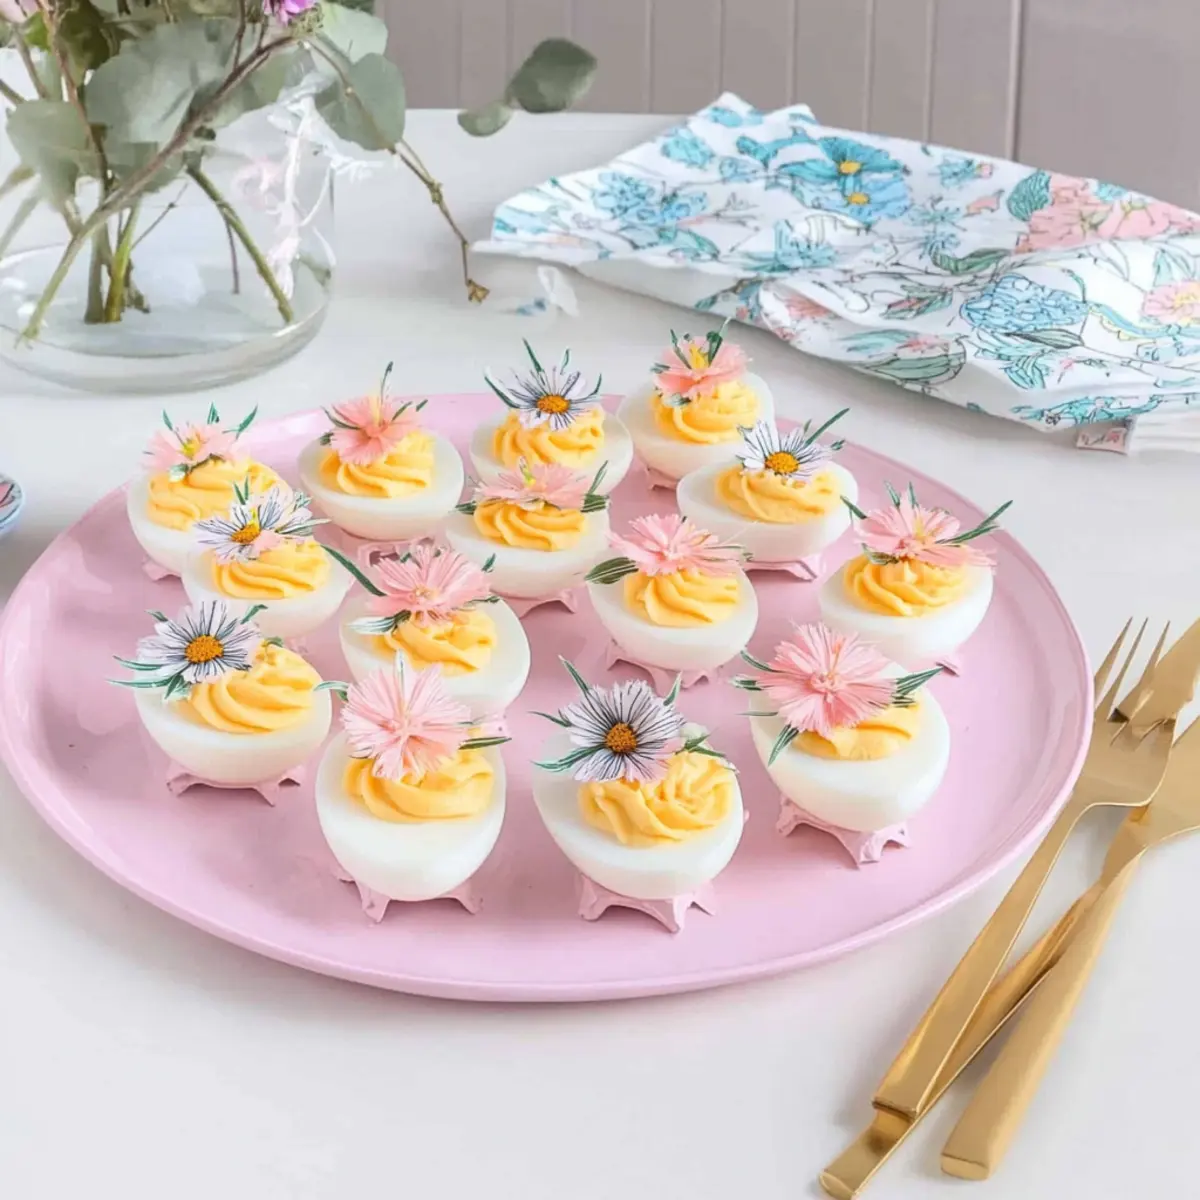
• Edible Flowers – Add elegance and a spring touch to your presentation.
These Perfect Deviled Eggs are destined to impress at any gathering, making them ideal for your next brunch adventure!
Step‑by‑Step Instructions for Perfect Deviled Eggs
Step 1: Prep Eggs
Start by placing fresh eggs in a pot, covering them with water. Bring the water to a boil over medium heat, then cover the pot and turn off the heat, letting the eggs sit for 12 minutes. Once the time’s up, transfer the eggs to an ice bath to cool completely for about 10 minutes. After cooling, peel and halve the eggs lengthwise, gently removing the yolks and placing them in a mixing bowl.
Step 2: Color Eggs
In a large glass, mix 16 ounces of cold water with 2 tablespoons of white vinegar and the food coloring of your choice. Submerge the egg whites in the dye solution for about 10 minutes to achieve your desired vibrant hues. Keep an eye on the color change; you want bright and bold shades that will stand out, enhancing the festive appeal of your Perfect Deviled Eggs.
Step 3: Dry Eggs
Carefully remove the colored egg whites from the dye solution, allowing any excess liquid to drip off. Place them on a paper towel to dry gently, ensuring they are completely moisture-free, which aids in perfect presentation for your Perfect Deviled Eggs. This step is crucial to avoid colors running together and to maintain the vibrancy of your decorated eggs.
Step 4: Make Filling
Mash the yolks in the mixing bowl using a fork until they are crumbly. Mix in mayonnaise, mustard, pickle juice, salt, and pepper until the mixture is smooth and creamy. This filling should be rich and bundled with flavors, reflecting the essence of the Perfect Deviled Eggs. Taste and adjust seasoning as needed, creating a balance that’s sure to delight your guests.
Step 5: Pipe Filling
Transfer the yolk mixture into a pastry bag fitted with a large star tip. Gently pipe the creamy filling into each colored egg white, swirling it like frosting on a cupcake. Aim for a generous dollop that compliments the vibrant colors of your Perfect Deviled Eggs, creating an inviting appearance that will intrigue and tantalize your family and friends.
Step 6: Garnish
Finally, for an extra festive touch to your Perfect Deviled Eggs, delicately place edible flowers on top of each filled egg. This adds an elegant finish and enhances the color theme of your spring brunch. Keep the flowers small and visually appealing, ensuring they harmonize with the bright shades of your eggs, making your dish not only delicious but also a feast for the eyes.
What to Serve with Colorful Deviled Eggs
Transform your spring brunch into a memorable feast by pairing delightful dishes that complement these vibrant bites.
- Fresh Green Salad: A light mix of arugula, spinach, and cherry tomatoes adds a refreshing crunch and balances the richness of the deviled eggs.
- BBQ Shrimp Skewers: Juicy, grilled shrimp drizzled with tangy BBQ sauce brings a smoky flavor that pairs beautifully with the creamy texture of the eggs.
- Herbed Couscous: Fluffy couscous infused with fresh herbs offers a nutty foundation to the meal while enhancing the colorful theme.
- Carrot Sticks with Hummus: Crisp and healthy, these offer a satisfying crunch and a creamy dip, making for a perfect hand-held snack alongside deviled eggs.
- Sparkling Lemonade: Refreshing and bubbly, this drink completes the vibrant spring theme and cleanses the palate between bites.
- Mini Fruit Tartlets: For a sweet finish, these tarts filled with fresh fruit mirror the colors of your deviled eggs, celebrating the essence of spring beautifully!
Each of these pairings harmonizes with the Perfect Deviled Eggs, creating an unforgettable dining experience that celebrates the season.
Perfect Deviled Eggs Variations & Substitutions
Let your culinary creativity shine by customizing these delightful deviled eggs to suit your taste and occasion!
- Dairy-Free: Swap mayonnaise with avocado for a creamy, guilt-free twist that adds healthy fats and a lovely green hue.
- Herb-Infused: Incorporate fresh herbs like dill or chives into the filling for an aromatic flavor boost. These vibrant flavors can elevate your Perfect Deviled Eggs to new heights!
- Spicy Kick: Add a dash of sriracha or hot sauce to the filling for a delightful heat that balances the creaminess. Your guests will love this fiery surprise!
- Bacon Lover’s Delight: Fold in crispy chopped bacon bits to the filling for a savory, crunchy element that’s hard to resist. This twist makes your deviled eggs a sure hit among bacon fans.
- Rainbow Delight: Use a combination of natural dyes like turmeric, spinach, and beet juice to create a stunning rainbow effect. This playful presentation will surely dazzle your guests at brunch!
- Pickled Twist: Add finely chopped pickle or relish for an extra zesty layer of flavor. Pairing these with light salads creates a refreshing contrast on your table.
- Mediterranean Flavor: Mix in crumbled feta cheese and kalamata olives for a Mediterranean flair that turns your classic deviled eggs into a gourmet treat. This swap offers a unique, savory experience!
- Smoky Infusion: Incorporate smoked paprika into the filling for a depth of flavor that recalls classic flavors. Serve alongside grilled dishes, like Grilled Tri Tip, for a delightful pairing!
Feel free to mix and match these variations to create your perfect version of these vibrant and tasty Perfect Deviled Eggs!
How to Store and Freeze Perfect Deviled Eggs
Fridge: Store your colored deviled eggs in an airtight container in the refrigerator for up to 3 days. This helps maintain their vibrant colors and creamy texture while keeping them fresh.
Make-Ahead: Feel free to prepare the egg filling a day in advance and store it separately in the fridge. This will save you time on the day of your event while ensuring a delightful experience for your guests!
Freezer: While it’s not advisable to freeze filled deviled eggs due to potential texture changes, you can freeze uncolored hard-boiled eggs (up to 1 month) for future use. Just remember to thaw and dye them fresh when you’re ready to make your Perfect Deviled Eggs.
Reheating: If you need to serve them warm, you can place them in a preheated oven at 350°F (175°C) for about 10 minutes, but these are best enjoyed chilled!
Make Ahead Options
These Colorful Deviled Eggs are a fantastic choice for meal prep, letting you save time and enjoy a stress-free brunch! You can prepare the egg filling up to 24 hours in advance; just store it in an airtight container in the refrigerator to keep it fresh. For an additional prep option, you can hard-boil and color the egg whites a day ahead, too. When you’re ready to serve, simply pipe the filling into the colored whites and garnish with edible flowers. This way, you’ll have vibrant, tasty appetizers that are just as delicious and visually stunning, all with minimal effort on the day of your gathering!
Expert Tips for Perfect Deviled Eggs
• Cool Down Completely: Ensure eggs are fully cooled after boiling; this helps prevent cracking and allows for better color absorption.
• Vibrant Colors: Use a mixture of food coloring and vinegar to achieve bright shades. Natural alternatives like beet juice also work beautifully without the artificial additives.
• Gentle Piping: When filling the egg whites, pipe gently to avoid breaking them. A steady hand helps maintain the integrity of your Perfect Deviled Eggs.
• Dye Drying: Allow dyed egg whites to dry completely before filling to prevent colors from running and to keep the presentation clean and crisp.
• Taste Testing: Always taste the filling before piping. Adjust flavors like salt and pepper to create a balanced, delicious filling that complements the vibrancy of your Deviled Eggs.
Perfect Deviled Eggs Recipe FAQs
How do I select the best eggs for making deviled eggs?
Absolutely! Opt for fresh eggs as they enhance flavor and provide a firmer texture. Look for eggs without dark spots or cracks on the shells, as these may indicate age or poor quality. Fresh eggs will yield consistently great results for your Perfect Deviled Eggs!
How should I store my colored deviled eggs?
You can store your colorful deviled eggs in an airtight container in the refrigerator for up to 3 days. Make sure they’re completely cool before storage to preserve their vibrant colors and creamy filling. If you prepare them in advance, this method ensures your eggs remain fresh and inviting!
Can I freeze deviled eggs?
While it’s not recommended to freeze filled deviled eggs due to texture changes, you can freeze uncolored hard-boiled eggs. Simply hard-boil and peel them, then freeze for up to 1 month. When you’re ready to enjoy your Perfect Deviled Eggs, thaw and dye them fresh for optimal taste and aesthetics.
How can I fix broken egg whites when filling?
The more the merrier! If you find your egg whites have broken while piping the filling, don’t worry! Simply take a small piece of the broken white and use it to patch the filling, or create a mini stuffed egg. Cover it all with a sprinkle of paprika or an extra garnish to ensure your presentation remains delightful!
Are there any dietary considerations for deviled eggs?
Very much so! If you’re catering to dietary restrictions, consider using Greek yogurt in place of mayonnaise for a lighter, healthier option. Additionally, always check for allergies related to mustard or potential gluten in seasonings. For pet owners, keep in mind that eggs can be a treat for pets but ensure moderation.
Perfect Deviled Eggs That Will Wow Your Spring Brunch Guests
Ingredients
Equipment
Method
- Start by placing fresh eggs in a pot, covering them with water. Bring the water to a boil over medium heat, then cover the pot and turn off the heat, letting the eggs sit for 12 minutes. Transfer the eggs to an ice bath to cool completely for about 10 minutes, then peel and halve them lengthwise.
- In a large glass, mix 16 ounces of cold water with 2 tablespoons of white vinegar and the food coloring of your choice. Submerge the egg whites in the dye solution for about 10 minutes.
- Carefully remove the colored egg whites from the dye solution, allowing any excess liquid to drip off. Place them on a paper towel to dry gently.
- Mash the yolks in a mixing bowl using a fork until they are crumbly. Mix in mayonnaise, mustard, pickle juice, salt, and pepper until smooth and creamy.
- Transfer the yolk mixture into a pastry bag fitted with a large star tip. Gently pipe the creamy filling into each colored egg white.
- Delicately place edible flowers on top of each filled egg to enhance the color theme of your spring brunch.
Leave a Reply