
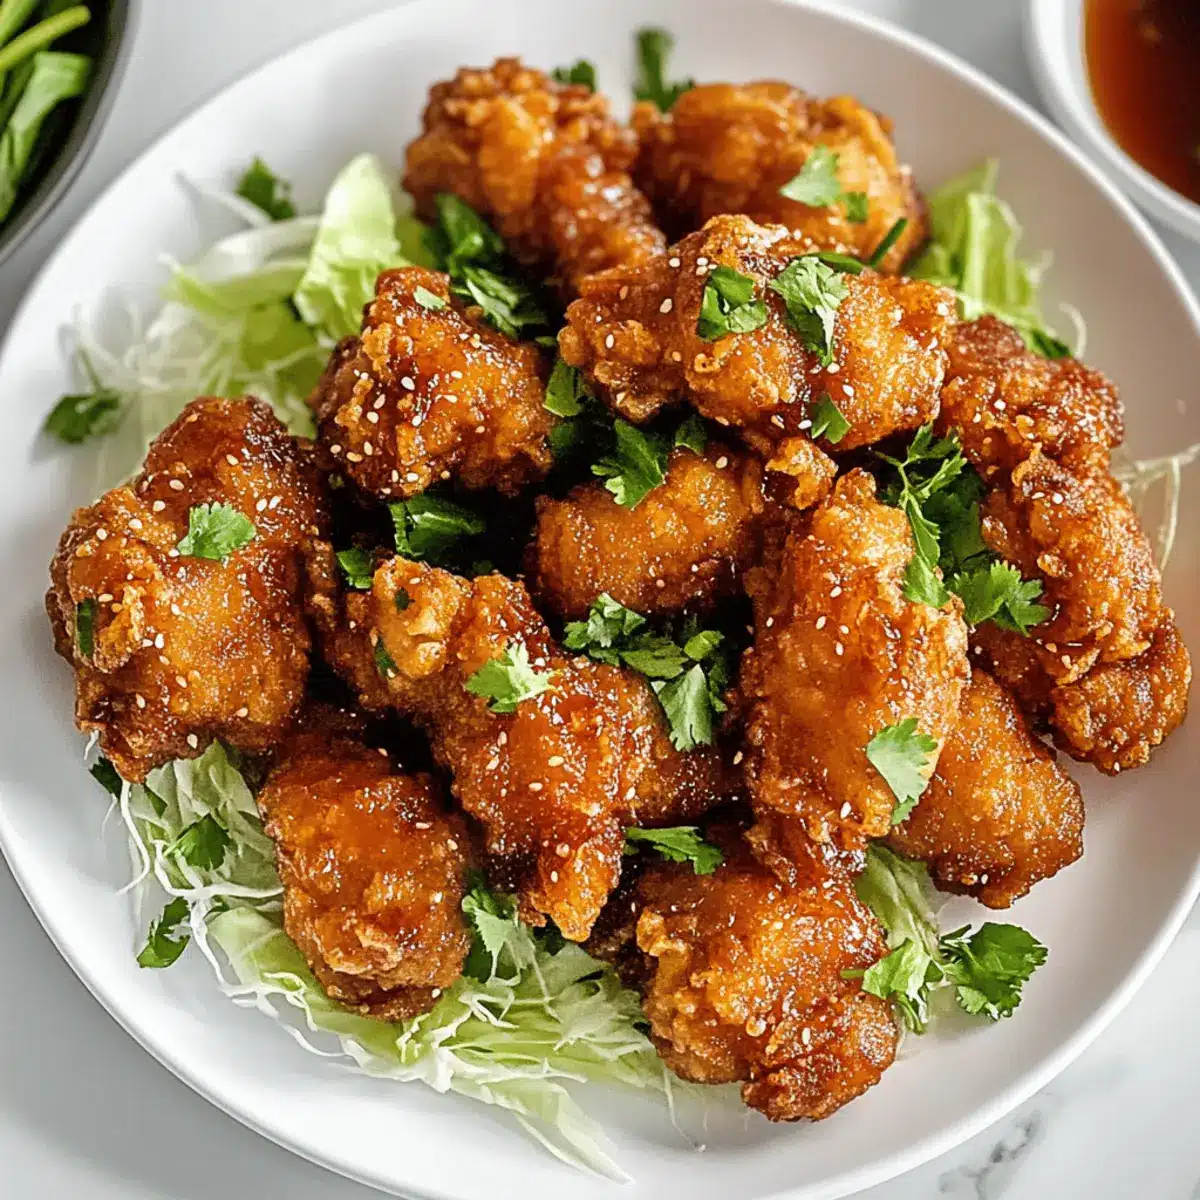
As the kitchen fills with the tantalizing aroma of sizzling chicken, I can’t help but feel a thrill of excitement. This Japanese karaage chicken recipe is my go-to for both cozy dinners and lively gatherings, making it an instant favorite around the table. Each piece is encased in a perfectly crispy shell, with the tasty umami marinade of ginger, garlic, and soy sauce boasting a depth that brings comfort to every bite. Not only is it delightfully gluten-free, but it’s also a fantastic make-ahead option for meal prepping or simply impressing your friends. So, are you ready to try your hand at this deliciously crispy delight? Let’s dive into the magic of karaage!
Why Is This Karaage Chicken Recipe Irresistible?
Simplicity: The process is straightforward, making it accessible for chefs of all skill levels.
Crispy Perfection: Each bite boasts a satisfying crunch from the corn flour coating, elevating your fried chicken game.
Savory Depth: The umami-rich marinade infuses the chicken with tantalizing flavors that leave everyone asking for more.
Versatility: Perfect for any occasion—enjoy as a delightful snack, a hearty meal, or even as a crowd-pleaser at your next gathering.
Make-Ahead Convenience: Ideal for meal prepping, this dish maintains its irresistible crunch even when reheated. Check out my Grilled Salsa Chicken for another meal prep favorite!
Cultural Flair: Embrace the rich tradition of Japanese cuisine with this beloved dish, impressing your guests while treating yourself to a comforting meal.
Karaage Chicken Recipe Ingredients
For the Marinade
- Cooking Sake – Adds depth and moisture to the marinade; substitute with dry sherry if necessary.
- Soy Sauce – Provides saltiness and umami flavor; low-sodium soy sauce can be used for a lighter option.
- Freshly Grated Ginger (including juice) – Adds aromatic warmth; use ground ginger in a pinch, but fresh is recommended for best flavor.
- Mirin – Contributes sweetness and depth; can be replaced with a mix of sugar and water if unavailable.
For the Chicken
- Chicken Thigh Fillets – Offers tenderness and juiciness; chicken breast can be used but may be less juicy.
- Corn Flour/Cornstarch – Creates a crispy coating; substituting with all-purpose flour could reduce crispiness.
- Vegetable Oil – Essential for deep frying; use oil with a high smoke point like canola or peanut.
For Garnishing
- Garnish (Parsley and Shredded Lettuce/Cabbage) – Adds freshness and color; omit based on preference.
This Karaage Chicken Recipe is designed for flavor and simplicity, making it a must-try for all chicken lovers!
Step‑by‑Step Instructions for Karaage Chicken Recipe
Step 1: Prepare the Chicken
Begin by patting the chicken thigh fillets dry with paper towels to remove excess moisture, which helps achieve that signature crispiness in your karaage chicken. After drying, place the chicken in a large zip-lock bag or bowl to prepare for marinating.
Step 2: Make the Marinade
In a mixing bowl, combine cooking sake, soy sauce, freshly grated ginger, and mirin to create a flavorful marinade. Pour this mixture over the chicken in the bag or bowl, ensuring every piece is well-coated. Massage the marinade into the chicken, allowing the salsa to permeate for a rich umami flavor.
Step 3: Marinate the Chicken
Seal the zip-lock bag or cover the bowl, and let the chicken marinate in the refrigerator for 30 minutes to 1 hour. This step is crucial as it allows the chicken to absorb the savory marinade flavors, enhancing the overall taste of your karaage chicken.
Step 4: Prepare to Fry
While the chicken is marinating, heat a deep pot with about 3-4 cm of vegetable oil, bringing it to a steady temperature of 160°C (320°F). Use a thermometer to monitor the heat, ensuring the oil is hot enough for the next step without overcrowding.
Step 5: Drain the Marinade
Once the marination time is up, carefully drain the excess marinade from the chicken. Transfer the chicken pieces onto paper towels to absorb any remaining liquid, which will help the corn flour coating adhere better for that coveted crunch.
Step 6: Coat the Chicken
Place the corn flour in a separate bowl, and take each piece of chicken, coating it thoroughly in the flour. Shake off any excess flour before moving on to the frying process. This step is essential to achieve the crispiness that makes the karaage chicken recipe unforgettable.
Step 7: Fry the Chicken
Carefully lower the coated chicken pieces into the hot oil, frying them in batches for about 2.5 to 3 minutes. Stir occasionally to prevent sticking and ensure even cooking. Look for a light golden color as a visual cue for doneness, indicating a crispy exterior.
Step 8: Rest the Chicken
Once cooked, remove the chicken from the oil and place it on paper towels to drain any excess oil. Let it rest for 3 to 4 minutes; this allows the crust to stabilize while you prepare for the second frying, enhancing the crunch.
Step 9: Increase Oil Temperature
Raise the oil temperature to 190-200°C (374-392°F) for the final fry, ensuring the coating gets extra crispy. Adjust the heat as needed, and double-check the thermometer to maintain consistent oil quality for a perfectly fried karaage chicken.
Step 10: Final Fry
Fry the chicken again for about 30 seconds to 1 minute until it reaches a deep golden color. This final quick fry locks in the flavors and delivers that irresistible crunch that makes karaage chicken a favorite dish for so many.
Step 11: Repeat Frying
Once the first batch is done, repeat the frying process for any remaining chicken pieces. Remember to allow the oil to come back up to temperature between batches, ensuring each piece of chicken is fried to crispy perfection.
Step 12: Serve and Garnish
Once your karaage chicken is golden and crispy, arrange it on a serving plate and garnish with shredded lettuce and parsley for a touch of color. This delicious dish is best served immediately, showcasing its perfect blend of textures and umami flavors!
Make Ahead Options
These crispy karaage chicken recipe pieces are perfect for meal prep enthusiasts! You can marinate the chicken in the savory umami marinade up to 24 hours in advance, allowing the flavors to deeply infuse. After marinating, coat the chicken in corn flour and refrigerate until you’re ready to fry, which keeps it fresh and maintains its quality. When it’s time to serve, simply heat oil to the desired temperature and fry until golden and crispy. This method saves time on busy weeknights while ensuring your chicken remains just as delicious and satisfying when finished!
Karaage Chicken Recipe Variations
Feel free to get creative with this delicious dish, adding your own personal touch!
-
Spicy Kick: Add a pinch of chili flakes to the marinade for a fiery burst. This small addition can elevate flavors and give your palate a delightful surprise.
-
Different Cuts: Swap chicken thigh fillets for drumsticks or wings to experience different textures. Each cut brings its unique charm, making it a fun way to experiment.
-
Flavored Marinade: Add sesame oil or a dash of garlic powder to the marinade for an extra layer of flavor complexity. These enhancements can make your karaage feel even more gourmet.
-
Gluten-Free: Use gluten-free soy sauce and cornstarch to keep this dish gluten-free while maintaining that beloved crispy coating. It’s a great option for those with dietary restrictions.
-
Citrusy Twist: Squeeze in some fresh lime or lemon juice before serving for a zesty finish. The bright acidity complements the umami flavors beautifully, making it refreshing.
-
Herbed Garnish: Toss some fresh herbs like cilantro or green onions on top for a burst of freshness. It not only enhances the visual appeal but also adds intriguing notes to every bite.
For another fabulous chicken recipe, make sure to try my Grilled Salsa Chicken, perfect for outdoor gatherings!
- Add Vegetables: Mix in thinly sliced vegetables, like bell peppers or green beans, during frying for added flavor and texture. Fried vegetables alongside chicken offer a delightful balance.
These variations ensure your karaage chicken recipe remains exciting and adaptable for every occasion!
What to Serve with Crispy Karaage Chicken?
Elevate your meal with delightful accompaniments that balance and enhance the crispy, savory bites of karaage chicken.
- Steamed White Rice: Provides a neutral base that soaks up the savory juices, making each bite of chicken even more satisfying.
- Cucumber Radish Salad: This refreshing crunch adds a vibrant contrast to the rich flavors of the chicken, brightening up your plate.
- Miso Soup: The warm, umami-rich broth pairs perfectly, offering a comforting companion that mirrors Japanese dining experiences.
- Pickled Vegetables: A tangy side bursts with flavor; the acidity complements the fried chicken, refreshing your palate with each bite.
- Japanese Slaw: A colorful mix of cabbage, carrots, and sesame dressing brings delightful texture and freshness to the table.
- Dipping Sauces: Serve with a side of soy sauce or spicy mayo to enhance the flavors; creating an indulgent experience you won’t forget.
- Sapporo Beer or Green Tea: Refreshing beverages that balance the richness; while beer adds warmth, green tea cleanses the palate seamlessly.
- Mochi Ice Cream: For dessert, this sweet treat offers a delightful contrast, making your meal memorable with a satisfying finish.
Savor these pairings alongside your crispy karaage chicken for an unforgettable gastronomic journey.
Expert Tips for Karaage Chicken Recipe
- Oil Temperature: Maintain the oil at a steady 160°C (320°F) while frying the chicken to ensure its crispiness and avoid sogginess.
- Marinate Long Enough: Allow the chicken to marinate for 30 minutes to an hour to fully absorb the umami flavors, which enhances the overall taste.
- Avoid Overcrowding: Fry the chicken in small batches; overcrowding can lower the oil temperature, leading to less crispy results in your karaage chicken recipe.
- Double Frying: Don’t skip the second fry at higher temperatures—it creates that irresistible golden crunch and locks in moisture for juicy chicken.
- Use Fresh Ingredients: Fresh ginger and high-quality soy sauce provide the richest flavor, elevating your karaage chicken to a whole new level.
How to Store and Freeze Karaage Chicken
Fridge: Store leftovers in an airtight container for up to 2 days to maintain the chicken’s flavor and texture. Reheat gently to enjoy.
Freezer: For longer storage, freeze cooked karaage chicken in a single layer on a baking sheet, then transfer to a freezer bag. This allows you to enjoy it for up to 2 months.
Reheating: Reheat in the oven at 375°F (190°C) for about 10-15 minutes to retain the crispiness. Avoid microwaving, as it softens the coating.
Make-Ahead: For meal prep, marinate the chicken and store it in the fridge for up to 24 hours before frying. This enhances the umami flavor in your karaage chicken recipe.

Karaage Chicken Recipe FAQs
What type of chicken is best for karaage?
I recommend using chicken thigh fillets for the juiciest results; they offer tenderness and flavor. While you can use chicken breasts, they may become drier during cooking. If you’re looking for a crispy treat, thighs are truly the star of the show!
How do I know when the chicken is perfectly marinated?
Allow the chicken to marinate for 30 minutes to 1 hour, ensuring it absorbs all that flavorful umami goodness from the marinade. When the chicken looks glossy and has a more vibrant color from the marinade, it’s ready for frying!
How should I store leftover karaage chicken?
To keep the flavors intact, store leftover karaage in an airtight container in the fridge for up to 2 days. Reheat it in the oven at 375°F (190°C) for about 10-15 minutes to maintain that crisp texture. Microwaving isn’t recommended, as it can make the coating soggy.
Can I freeze cooked karaage chicken?
Absolutely! For long-term storage, place the cooked chicken pieces in a single layer on a baking sheet to freeze them individually, then transfer to a freezer bag. This way, you can enjoy your delicious karaage chicken for up to 2 months without sacrificing taste!
What if my karaage chicken isn’t crispy enough?
If your chicken isn’t as crispy as you’d like, there are a couple of things to check. Make sure the oil is at the right temperature (160°C for the first fry, up to 190°C for the second) and avoid overcrowding the pan when frying. The double fry technique is essential for that extra crunch!
Is this karaage chicken gluten-free?
Yes! This karaage chicken recipe can easily be made gluten-free by using gluten-free soy sauce. Just make sure to opt for cornstarch instead of wheat flour for the coating, and you’re all set for a delicious gluten-free feast!
Crispy Karaage Chicken Recipe With Irresistible Umami Flavor
Ingredients
Equipment
Method
- Pat the chicken thigh fillets dry with paper towels.
- Place the chicken in a large zip-lock bag or bowl to prepare for marinating.
- Combine cooking sake, soy sauce, freshly grated ginger, and mirin in a mixing bowl.
- Pour the marinade over the chicken, massaging it in, and let it marinate for 30 minutes to 1 hour.
- Heat a deep pot with about 3-4 cm of vegetable oil to a temperature of 160°C (320°F).
- Drain the excess marinade and place chicken pieces on paper towels.
- Coat each piece of chicken in corn flour, shaking off excess flour.
- Lower the coated chicken pieces into hot oil, frying in batches for about 2.5 to 3 minutes.
- Remove and let the chicken rest on paper towels for 3 to 4 minutes.
- Increase the oil temperature to 190-200°C (374-392°F) for the final fry.
- Fry again for about 30 seconds to 1 minute until golden brown.
- Repeat frying for remaining chicken pieces, ensuring oil temperature is maintained.
- Serve garnished with shredded lettuce and parsley.
Leave a Reply