
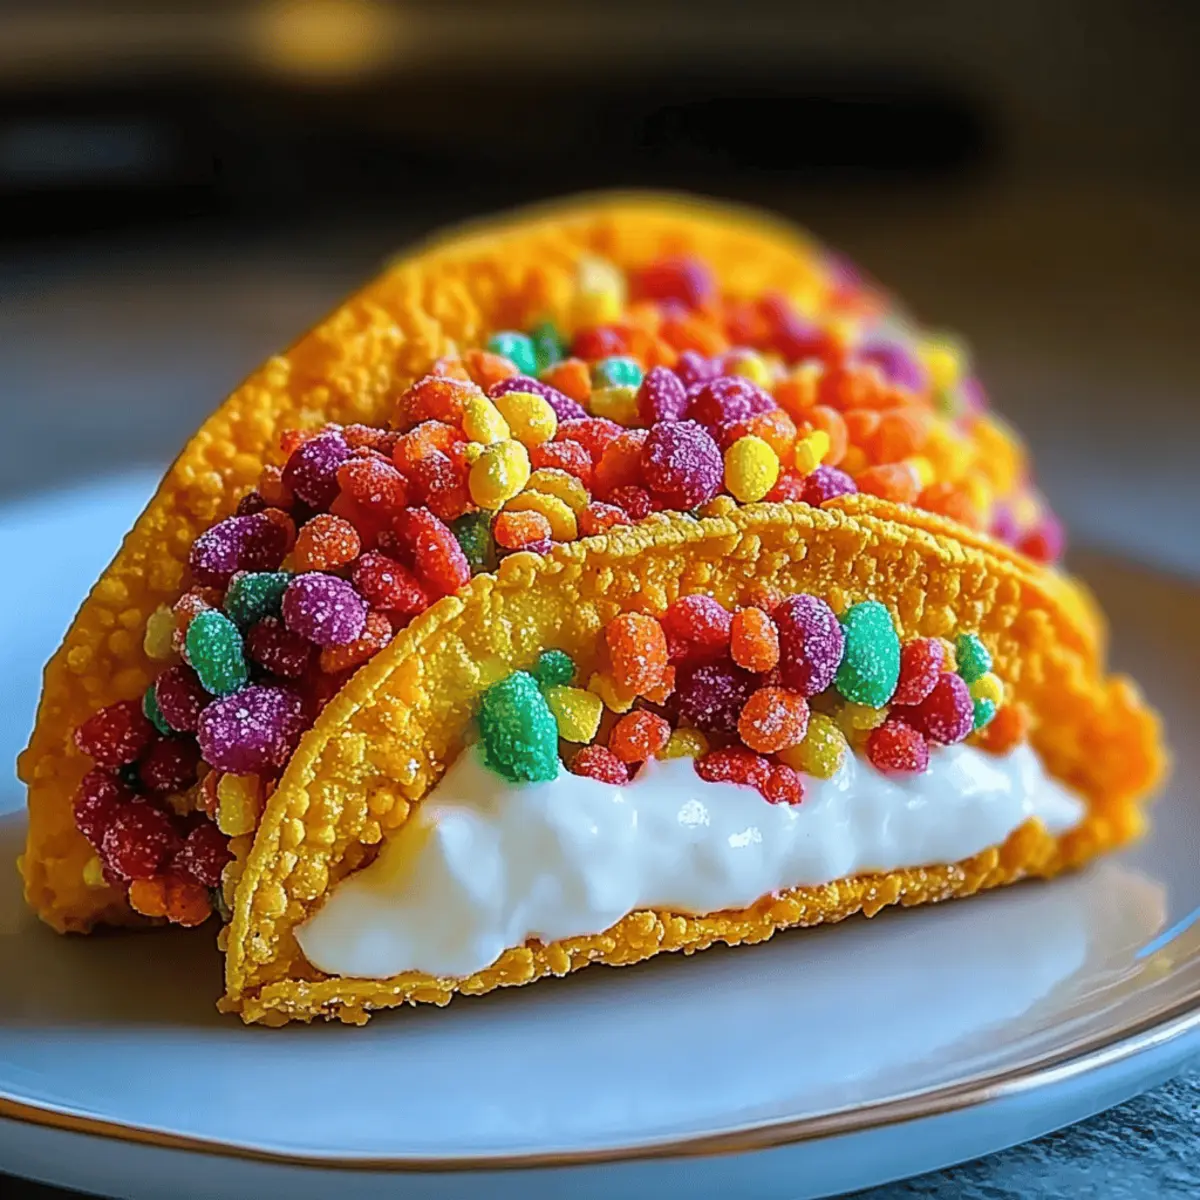
A bright explosion of color and flavor greets you as you dive into making Fruity Pebbles Cheesecake Tacos. These playful delights bring the nostalgia of cereal to the table in an unexpected yet utterly charming way. The best part? Crafting these easy desserts is a breeze! They are perfect for impressing guests at parties or making a fun family treat that everyone can get excited about. Imagine creamy cheesecake nestled within a crunchy taco shell, all topped with vibrant Fruity Pebbles—a visual masterpiece that’s as delicious as it is captivating. Whether you stick to the classic or explore variations with Cocoa Pebbles or crushed Oreos, there’s so much to discover. What topping or twist will make your tacos sing?
Why Are These Tacos So Special?
Unforgettable Flavor: Each bite of these Fruity Pebbles Cheesecake Tacos delivers a burst of cheerful sweetness, making them a hit with kids and adults alike.
Customizable Fun: Feel free to explore with different cereals like Cocoa Pebbles or Frosted Flakes, allowing you to personalize your tacos.
Effortless Preparation: This recipe is surprisingly simple, making it ideal for home cooks of all skill levels, so you can whip them up for any occasion.
Visual Appeal: Their vibrant colors and playful presentation are sure to charm your guests and brighten up any gathering, just like my Baja Fish Tacos do!
Kid-Friendly: Kids will be drawn to the lively colors and crunchy texture, making it a perfect dessert for family occasions or parties.
Perfectly Shareable: Each taco is a delightful treat, making it easy for everyone to enjoy a bite-sized dessert. Add your own flair with toppings for a spectacular finish!
Fruity Pebbles Cheesecake Tacos Ingredients
For the Taco Shells
• Flour Tortillas – These create the taco’s base; you can cut them into smaller circles for a fun bite-sized treat.
• White Chocolate Chips – Essential for coating the taco shells, ensuring a sweet, melt-in-your-mouth experience.
For the Cheesecake Filling
• Cream Cheese – This is the star of the filling; remember to soften it for easy mixing.
• Powdered Sugar – This sweetens the cheesecake filling; feel free to adjust based on your sweetness preference.
• Vanilla Extract – Use pure vanilla extract for the best flavor to round out your cheesecake.
• Heavy Cream – Whipped to stiff peaks, this lightens the filling and gives it a creamy texture.
For the Crunchy Topping
• Fruity Pebbles Cereal – Adds crunch and a lively pop of color; this key ingredient truly makes the tacos shine.
Step‑by‑Step Instructions for Fruity Pebbles Cheesecake Tacos
Step 1: Prepare Taco Shells
Begin by cutting small circles from the flour tortillas, about 6 inches in diameter, using a cookie cutter or a knife. Heat vegetable oil in a deep pan over medium heat. Once hot, gently fry each tortilla circle for 1-2 minutes on each side until they are crispy and lightly golden. Remove them from the oil and place them on a paper towel to drain excess oil. Allow the taco shells to cool completely before proceeding.
Step 2: Coat Shells
In a microwave-safe bowl, melt the white chocolate chips in 20-second intervals, stirring after each until smooth. Once melted, dip the edges of each cooled taco shell into the white chocolate, allowing excess to drip off. Immediately roll the chocolate-coated edges in crushed Fruity Pebbles, ensuring a generous coating. Set the finished taco shells on parchment paper and let them harden at room temperature, about 15-20 minutes.
Step 3: Make Filling
In a mixing bowl, beat the softened cream cheese with powdered sugar and vanilla extract using an electric mixer until completely smooth and creamy, which should take about 2-3 minutes. In a separate bowl, whip the heavy cream until it reaches stiff peaks. Gently fold the whipped cream into the cream cheese mixture, ensuring a light and airy texture for the cheesecake filling. This delightful filling is what will make your Fruity Pebbles Cheesecake Tacos truly irresistible!
Step 4: Assemble Tacos
Once your filling is ready, use a piping bag or a spoon to fill each taco shell with the cheesecake mixture, being careful not to overfill. For an added touch of fun, top each filled taco with extra Fruity Pebbles, creating a vibrant and colorful display. Take care to fill all your taco shells until the filling is used up, resulting in a delightful assembly of Fruity Pebbles Cheesecake Tacos.
Step 5: Serve Immediately
Enjoy the Fruity Pebbles Cheesecake Tacos fresh for the best texture, as the shells maintain their crunch and the filling remains creamy. This lovely dessert is perfect for parties or family gatherings. If not serving right away, keep the components separate to maintain optimal texture, assembling just before you’re ready to treat your guests or family.
What to Serve with Fruity Pebbles Cheesecake Tacos
Brighten up your dessert table with these charming tacos, paired perfectly with delightful sides and treats.
-
Colorful Fruit Salad: A refreshing mix of seasonal fruits provides a naturally sweet counterbalance to the creamy cheesecake filling, enhancing the overall experience.
-
Whipped Cream: Light and fluffy, a dollop of homemade whipped cream adds an extra layer of indulgence to each taco.
-
Chocolate Sauce: Drizzle warm chocolate sauce over the tacos for an irresistible combination of flavors and a fun, decadent twist.
-
Ice Cream: A scoop of vanilla or fruity ice cream creates a delightful temperature contrast, guaranteeing a luscious dessert journey.
-
Sparkling Lemonade: Serve with a glass of chilled sparkling lemonade to add a zesty sparkle that will tickle the taste buds and refresh your palate.
-
Marshmallow Fluff Dip: A fluffy dip paired with fresh fruit skewers makes for an interactive and fun dessert spread that complements the sweet crunch of the tacos perfectly.
Elevate your gathering by mixing and matching these delicious additions!
How to Store and Freeze Fruity Pebbles Cheesecake Tacos
Fridge: Store taco components separately in airtight containers for up to 24 hours. Keep taco shells, cheesecake filling, and toppings apart to maintain crunchiness.
Freezer: The cheesecake filling can be frozen in a sealed container for up to 3 months. Thaw in the refrigerator before using it to fill taco shells.
Room Temperature: It’s best to serve Fruity Pebbles Cheesecake Tacos immediately after assembly to retain their delightful crunch.
Reheating: If needed, re-crisp taco shells in a preheated oven at 350°F for about 5 minutes before filling for fresh taste.
Fruity Pebbles Cheesecake Tacos Variations
Embrace your creativity and make these Fruity Pebbles Cheesecake Tacos truly yours—let’s change things up a bit!
- Cocoa Pebbles: Swap Fruity Pebbles for Cocoa Pebbles for a chocolaty twist that chocolate lovers will adore.
- Frosted Flakes: Opt for Frosted Flakes for a sweet, crunchy texture that pairs beautifully with the creamy cheesecake.
- Oreo Crunch: Crushed Oreos not only change the flavor but also add an exciting cookie crunch—an indulgent twist!
- Graham Cracker Shells: Use graham cracker taco shells instead of tortillas for a delightful, nutty flavor that enhances the cheesecake.
- Nutty Additions: Stir in a tablespoon of finely chopped nuts like pecans or walnuts into the cheesecake filling for a textural upgrade.
- Fresh Fruit: Add slices of fresh strawberries or bananas as an additional topping for a delectable burst of freshness.
- Spicy Kick: For adventurous eaters, sprinkle a pinch of cayenne or chili powder in the cheesecake filling for a surprising heat element.
- Peanut Butter Drizzle: Finish with a drizzle of peanut butter for a rich, nutty topping that takes the flavor to the next level—so irresistible!
Whether you choose to make them with Cocoa Pebbles or opt for a twist like the Oreo Crunch, these variations will ensure your Fruity Pebbles Cheesecake Tacos are a delightful surprise for all. For more fun dessert ideas, check out my Berrylicious Strawberry Crunch Cheesecake to keep the sweetness flowing!
Expert Tips for Fruity Pebbles Cheesecake Tacos
-
Chill Ingredients: Ensure that your cream cheese and heavy cream are properly chilled before mixing, resulting in a fluffier cheesecake filling for the Fruity Pebbles Cheesecake Tacos.
-
Perfect Taco Shells: Fry the taco shells until they are golden brown and crispy; undercooking may lead to sogginess when filled with creamy cheesecake.
-
Adjust Sweetness: Taste the cheesecake filling before using all the powdered sugar; you can adjust based on your preference for sweetness while ensuring it complements the colorful crunch of the Fruity Pebbles.
-
Harden Time: Allow the coated taco shells to set at room temperature for at least 15-20 minutes to ensure the white chocolate coating becomes firm and holds up when filled.
-
Assemble Just Before Serving: For the best texture, fill your Fruity Pebbles Cheesecake Tacos just before serving; this ensures the taco shells remain crispy and enjoyable for everyone!
Make Ahead Options
These Fruity Pebbles Cheesecake Tacos are perfect for meal prep enthusiasts! You can prepare the taco shells and cheesecake filling up to 24 hours in advance. To do this, follow the first three steps in the instructions, then store the cooled taco shells in an airtight container at room temperature and the cheesecake filling in the refrigerator. Just before serving, fill the taco shells with the cheesecake mixture and top with extra Fruity Pebbles for that delightful crunch and color. This way, you’ll maintain the freshness and texture, allowing you to whip up these fun desserts in a snap, ideal for busy weeknights or last-minute gatherings!
Fruity Pebbles Cheesecake Tacos Recipe FAQs
What is the best way to select ripe ingredients for my Fruity Pebbles Cheesecake Tacos?
Absolutely! For the best flavor, make sure your cream cheese is fully softened before mixing; this helps achieve that lovely creamy texture in the filling. While the Fruity Pebbles don’t need ripeness checks, always pick a fresh box with vibrant colors and no signs of staleness, like clumping or faded hues. It ensures that every bite is bursting with flavor and fun!
How should I store my Fruity Pebbles Cheesecake Tacos?
Very! To maintain the gorgeous crunch of the taco shells and the creaminess of your filling, store all components separately in airtight containers in the refrigerator for up to 24 hours. This way, the taco shells won’t become soggy before you’re ready to serve them. Just assemble right before serving for that perfect texture!
Can I freeze the cheesecake filling for later use?
Absolutely! You can freeze the cheesecake filling for up to 3 months. To do this, place it in a sealed container, making sure to push out as much air as possible to prevent freezer burn. When you’re ready to enjoy your tacos, simply thaw the filling in the refrigerator overnight before filling your cooled taco shells. It’s a great time-saver for a future dessert!
What should I do if my taco shells turn out soggy after frying?
No worries! If your taco shells come out soggy, here’s what you can do: ensure your frying oil is hot enough—about 350°F—before you start frying. If they still aren’t crisp, try placing them in a preheated oven at 350°F for about 5-10 minutes to allow them to crisp up before filling. This step will salvage your taco shells and get your Fruity Pebbles Cheesecake Tacos back on track!
Are there any dietary considerations I should keep in mind when making these tacos?
Very! If you have guests with dietary restrictions, feel free to adjust the ingredients. You can use lactose-free cream cheese and heavy cream for a dairy-free option. Additionally, if there’s a concern for gluten, check for gluten-free flour tortillas. Always be mindful of allergies and ensure any substitutions you make accommodate your guests’ dietary needs!
Fruity Pebbles Cheesecake Tacos for a Sweet Surprise Party
Ingredients
Equipment
Method
- Cut small circles from the flour tortillas, about 6 inches in diameter, using a cookie cutter or a knife. Heat vegetable oil in a deep pan over medium heat. Once hot, gently fry each tortilla circle for 1-2 minutes on each side until crispy and lightly golden. Remove and place on a paper towel to drain excess oil and cool completely.
- In a microwave-safe bowl, melt the white chocolate chips in 20-second intervals, stirring after each until smooth. Dip the edges of each cooled taco shell into the white chocolate and roll in crushed Fruity Pebbles. Set on parchment paper to harden for 15-20 minutes.
- Beat softened cream cheese with powdered sugar and vanilla extract until smooth and creamy, about 2-3 minutes. In a separate bowl, whip heavy cream to stiff peaks, then gently fold into the cream cheese mixture.
- Fill each taco shell with the cheesecake mixture using a piping bag or spoon. Top with extra Fruity Pebbles before serving.
- Serve immediately for best texture; the shells will stay crunchy and the filling creamy.
Leave a Reply