
There I was, rummaging through my fridge, hungry for something that could lift my spirits and satisfy my cravings in no time. That’s when the idea for an Easy Grilled Cheese Burrito hit me—melding cheesy goodness with a cozy tortilla shell. This recipe is a game changer, delivering rich, bold flavors all wrapped up and ready to go in under 30 minutes! Among its enticing perks, this meal is not only quick and easy but also incredibly customizable, allowing you to swap in your favorite fillings for a personal touch. Whether you’re feeding a crowd or just treating yourself after a long day, this kid-approved dish is bound to become a family favorite. Ready to take your taste buds on a taco-inspired adventure? Let’s dive into creating your very own grilled cheese burrito masterpiece!
Why is this grilled cheese burrito special?
Customization: Tailor every bite to your preferences by adding your favorite fillings—whether that’s spicy jalapeños, vibrant veggies, or even a zesty twist with black beans.
Quick & Easy: This recipe can be whipped up in under 30 minutes, making it a fantastic choice for busy weeknights or impromptu meals.
Kid-Approved: With its cheesy goodness and fun format, even picky eaters will be begging for seconds!
Crowd-Pleaser: Perfect for gatherings, these burritos can be made in batches and served with a side of fresh salsa or guacamole for extra flavor.
Satisfying Texture: Experience the delightful crunch of a grilled exterior enveloping a melty, gooey filling—every bite is pure comfort food heaven!
Easy Grilled Cheese Burrito Ingredients
• Get ready to create a flavor-packed delight at home!
For the Filling
- Ground Beef – A savory main protein that can be swapped with chicken, beans, or meat alternatives for flexibility.
- Taco Seasoning – Adds a burst of flavor; you can use your favorite store-bought mix or whip up a homemade blend.
- Cooked White Rice – Provides a hearty texture; brown rice is a great healthier substitute.
- Sour Cream – Brings creaminess to the mix; consider Greek yogurt for a lighter twist.
For the Cheese Lovers
- Nacho Cheese Sauce – Offers that classic, cheesy flavor; feel free to use any cheese sauce or a vegan alternative if desired.
- Shredded Cheddar Cheese – Melts beautifully, enhancing the dish; try mozzarella or a cheese blend for variety.
- Shredded Mozzarella Cheese – Adds a creamy mouthfeel; substitute with another melty cheese if preferred.
For the Tortilla Wrap
- Flour Tortillas – The essential base; swap in whole wheat or gluten-free tortillas for lighter or dietary options.
For Grilling
- Butter or Oil – Essential for grilling to achieve that crispy, golden texture on your burrito.
This Easy Grilled Cheese Burrito is not just a meal; it’s an experience bursting with flavors you can adapt to your personal taste! Enjoy crafting your perfect burrito at home!
Step‑by‑Step Instructions for Easy Grilled Cheese Burrito
Step 1: Cook the Ground Beef
In a large skillet over medium heat, add your ground beef and cook for about 8-10 minutes, breaking it up with a spatula until it’s browned and fully cooked. Drain any excess grease, then sprinkle taco seasoning over the meat along with ¼ cup of water. Let it simmer for 5 minutes, until the mixture thickens slightly and absorbs the flavors, creating a delicious base for your Easy Grilled Cheese Burrito.
Step 2: Warm the Tortillas
To ensure your tortillas are pliable and easy to work with, warm them up in a skillet or microwave. For the skillet method, heat a non-stick pan over medium-low heat and warm each tortilla for about 30 seconds on each side until they become soft. If using the microwave, place a damp paper towel over a stack of tortillas and microwave for 20-30 seconds. Warming them up enhances the burrito experience!
Step 3: Assemble the Filling
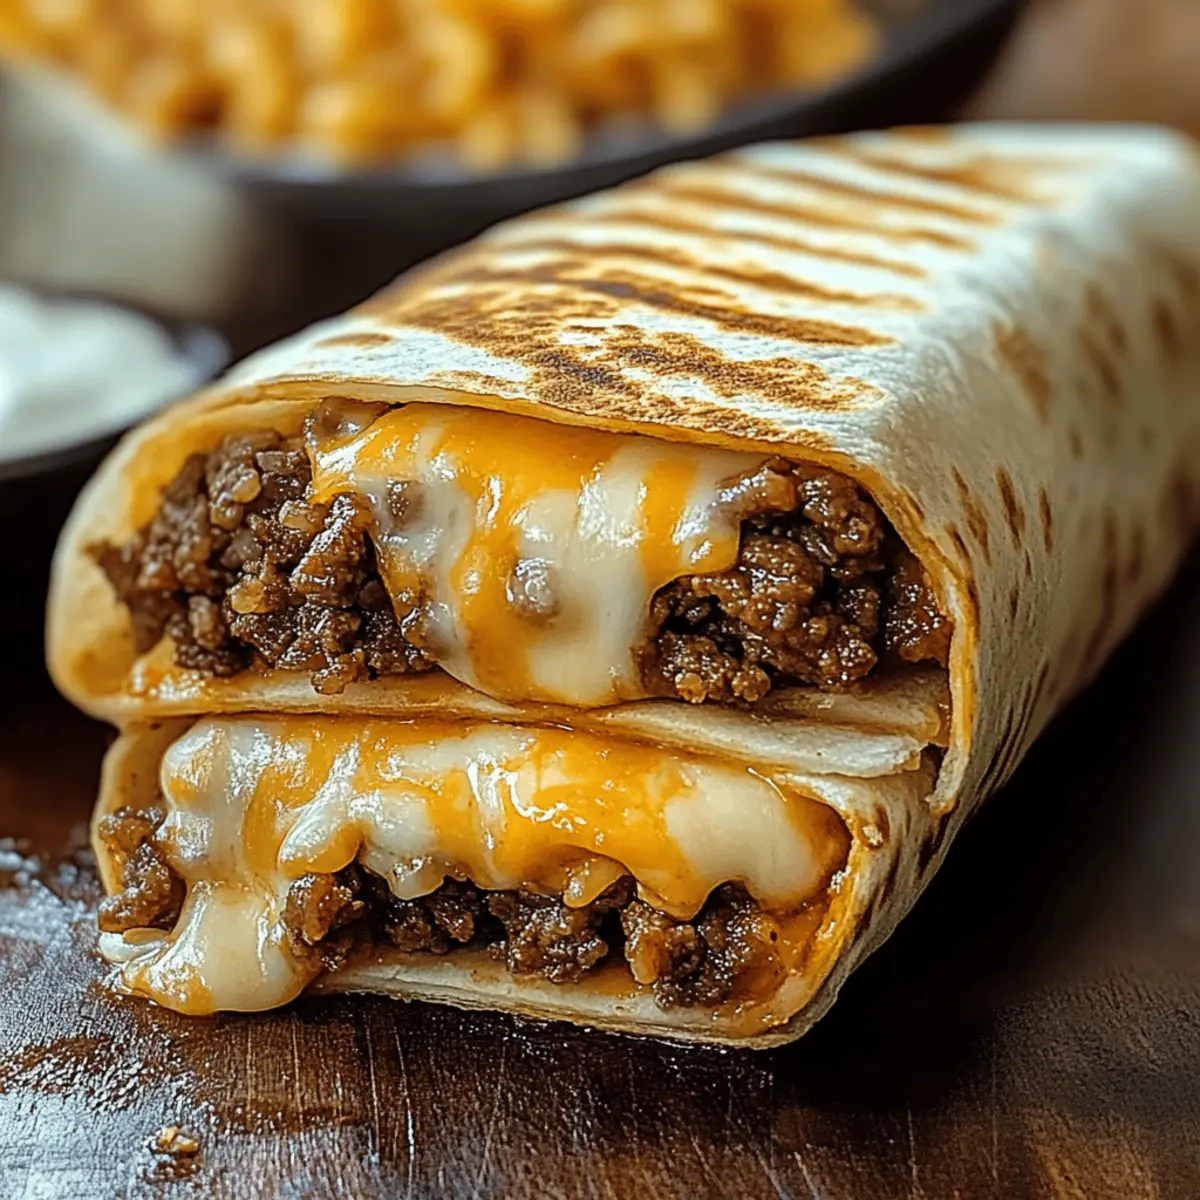
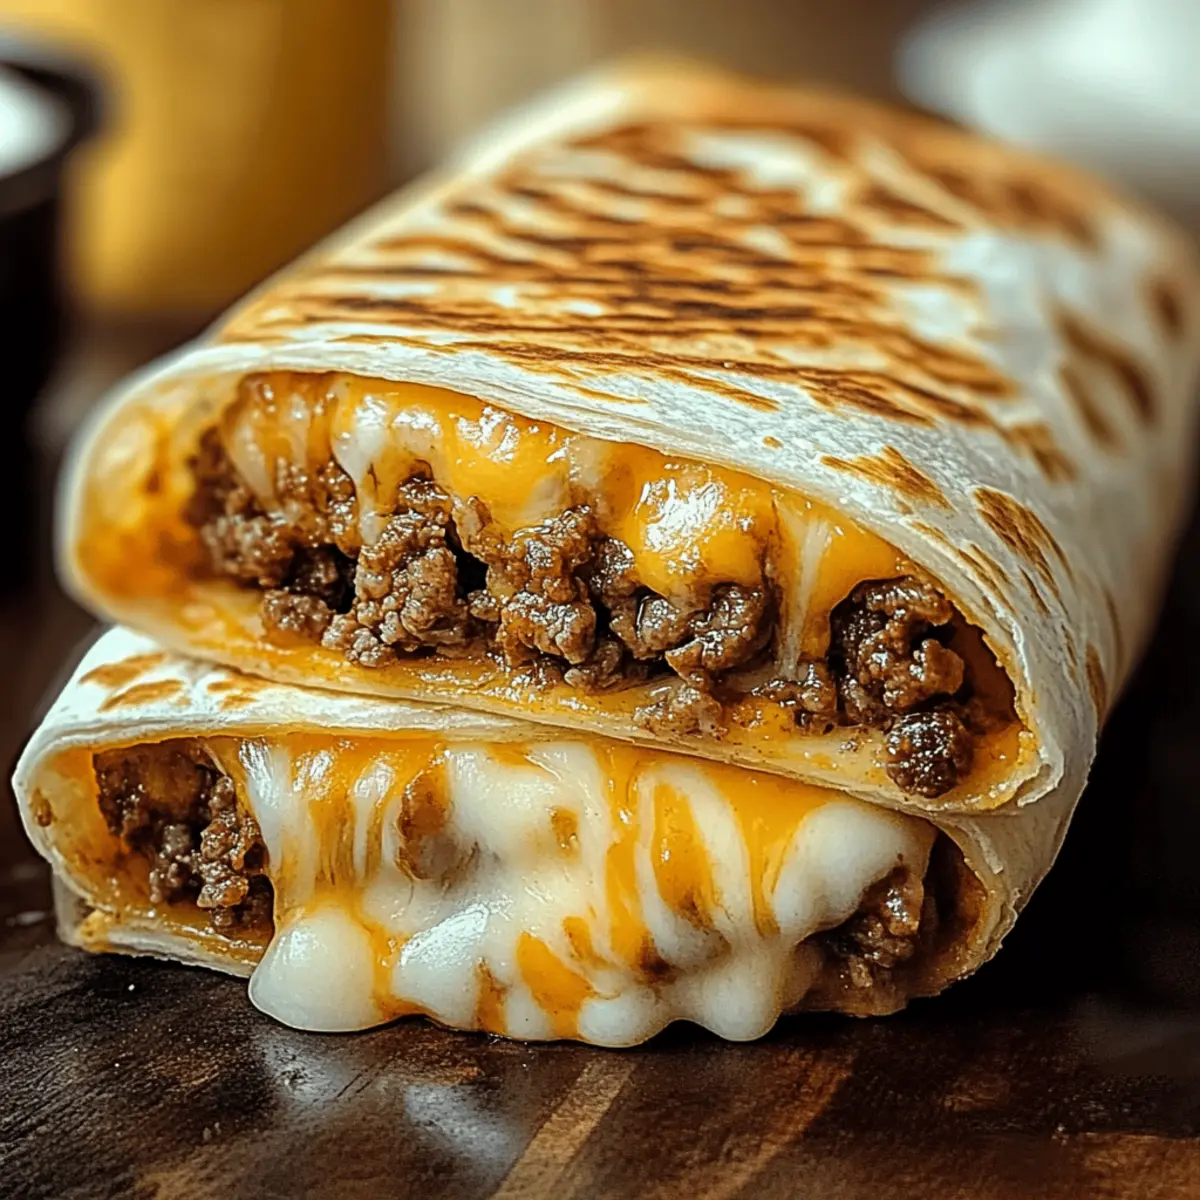
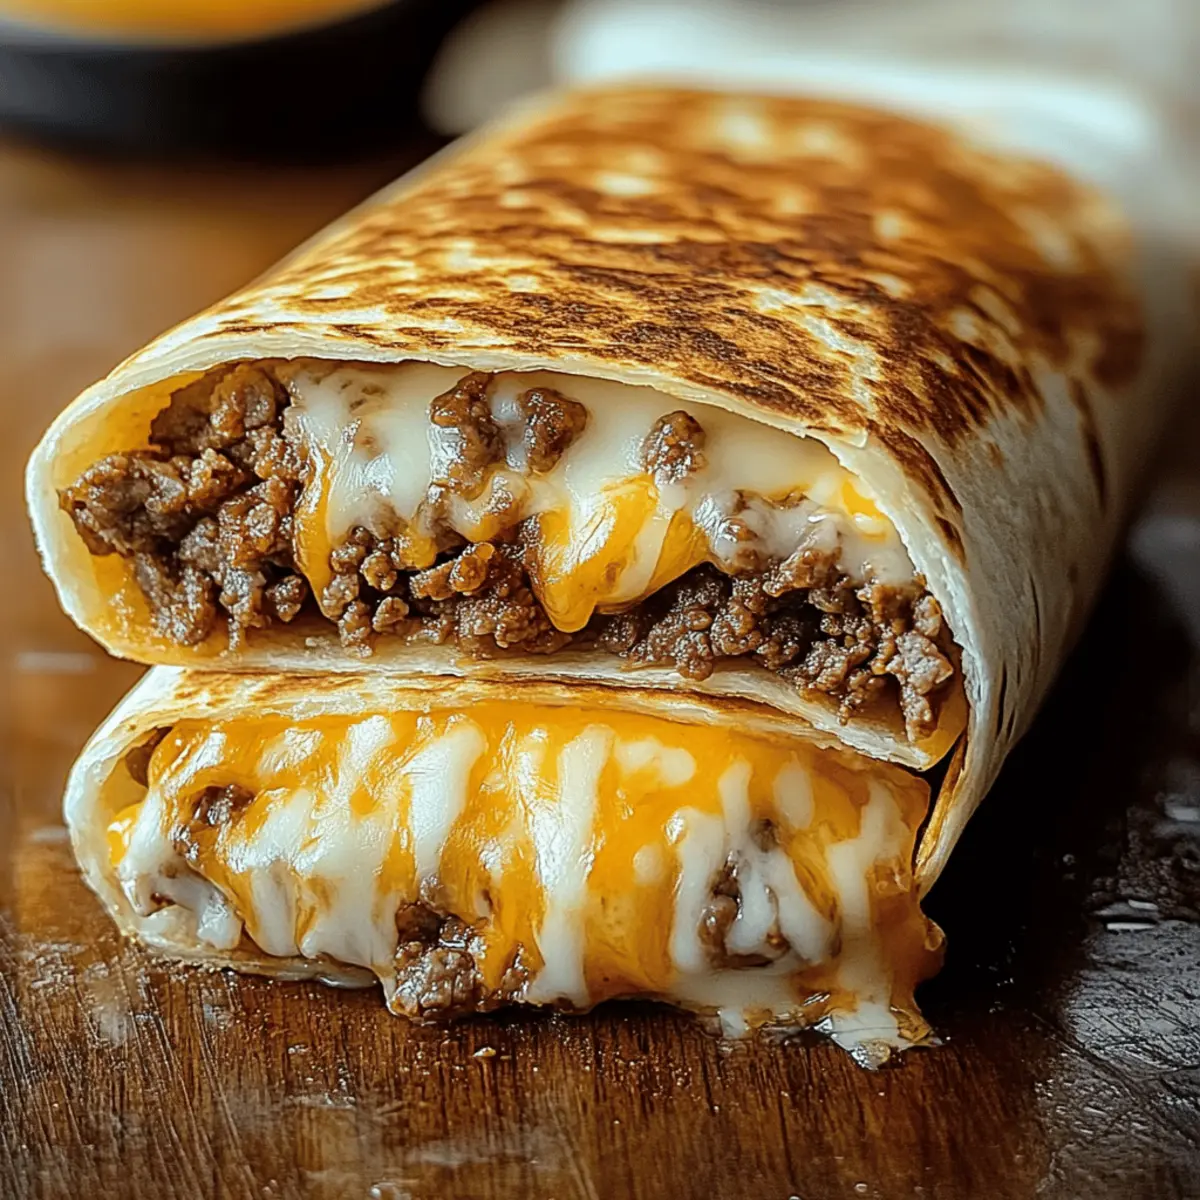
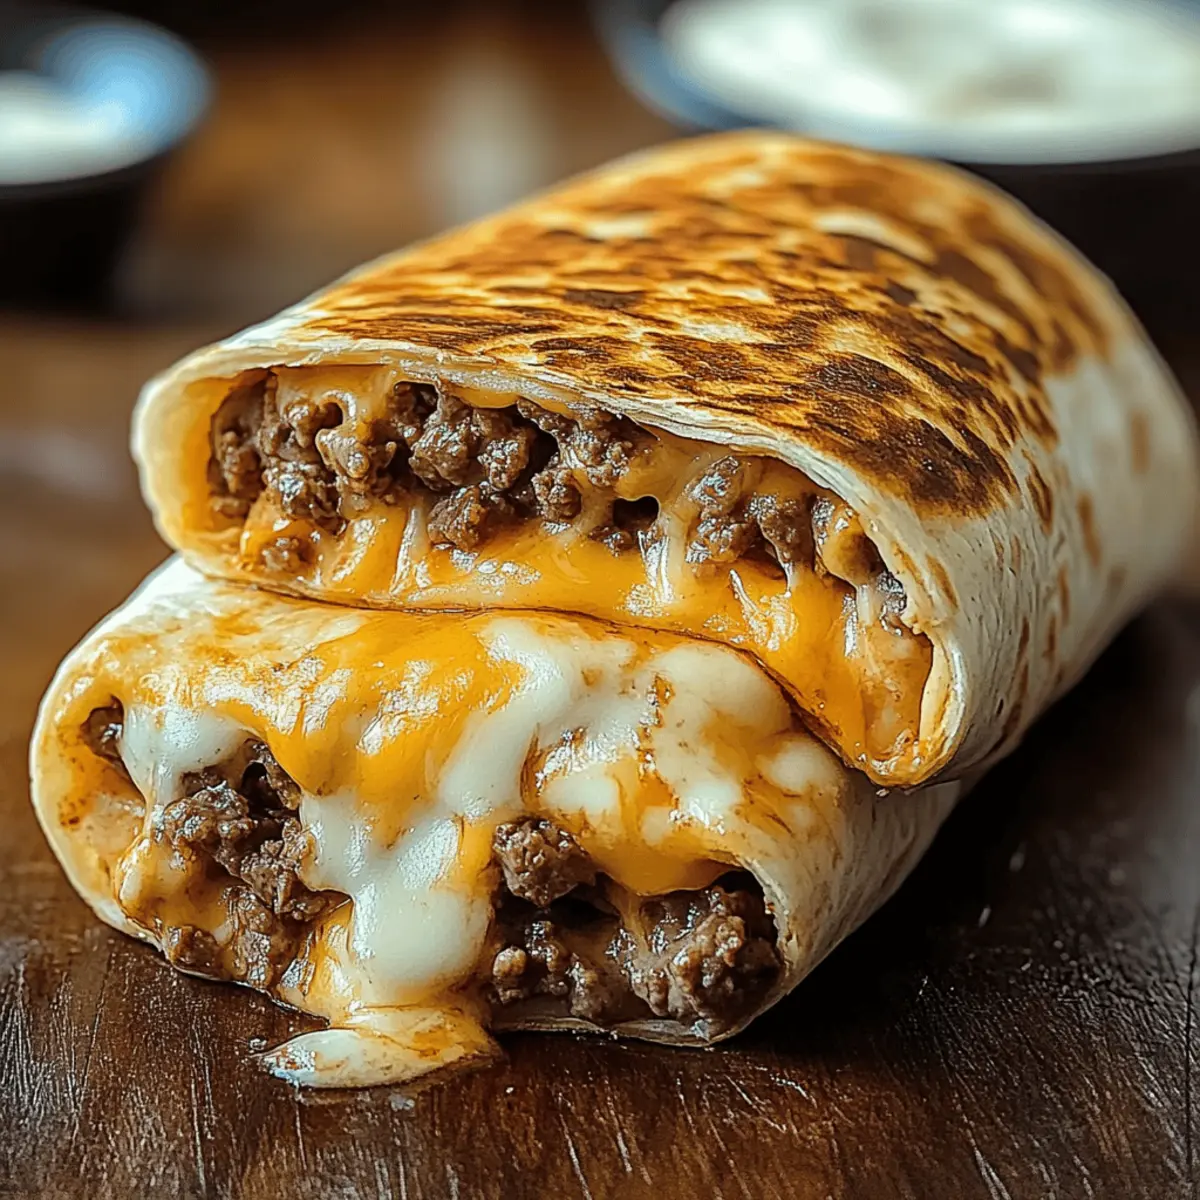
Grab a warm tortilla and lay it flat on a clean surface. Start by layering cooked white rice in the center, followed by the flavorful seasoned beef. Drizzle a generous amount of creamy nacho cheese sauce on top, then add a squeeze of tangy chipotle sauce and a spoonful of sour cream. Lastly, sprinkle shredded cheddar and mozzarella cheese over the filling to amplify that melty goodness.
Step 4: Wrap the Burrito
Carefully fold in the sides of the tortilla over the filling, then tightly roll it from the bottom to the top, ensuring all the delicious ingredients stay inside. Place the burrito seam-side down on a plate or cutting board. It’s key to wrap it snugly to create the perfect burrito shape that will hold up while grilling, ready to crisp up in the next step.
Step 5: Grill the Burrito
Heat a clean skillet over medium heat and add a drizzle of butter or oil to coat. Once hot, sprinkle about 2 tablespoons of shredded cheese onto the skillet and place the burrito seam-side down. Cook for about 3-4 minutes, pressing down gently with a spatula until the cheese melts and forms a crispy golden crust. Flip carefully and grill the other side for another 3-4 minutes until equally crispy and delicious, creating that irresistible crunch on your Easy Grilled Cheese Burrito.
Step 6: Serve and Enjoy
Remove the burrito from the skillet and let it cool for a minute before slicing it in half to reveal the gooey insides. Serve your Easy Grilled Cheese Burrito with a side of fresh salsa or guacamole for dipping. The contrast of the warm, cheesy filling with the crispy exterior is sure to be a hit—perfect for family dinners or a personal treat!
Make Ahead Options
These Easy Grilled Cheese Burritos are a fantastic choice for meal prep enthusiasts! You can prepare the filling—seasoned beef, rice, and cheese—up to 3 days in advance. Simply cook and combine the ingredients, then refrigerate in an airtight container. When you’re ready to enjoy, warm the tortillas and assemble the burritos, ensuring to grill them right before serving for that crispy exterior. If you want to take it a step further, you can also assemble the burritos entirely and refrigerate for up to 24 hours before grilling. This way, on busy weeknights, you can have delicious, homemade burritos ready to go, just as satisfying as a fast-food treat!
What to Serve with Easy Grilled Cheese Burrito
There’s nothing quite like complementing a cheesy burrito with sides and flavors that take your meal to the next level!
-
Fresh Guacamole: Creamy and rich, it adds a delightful freshness that balances the cheesy decadence of the burrito.
-
Spicy Salsa: A zesty, homemade or store-bought salsa introduces a burst of flavor with every bite, enhancing the overall taste experience.
-
Crunchy Tortilla Chips: Serve alongside for that satisfying crunch, perfect for scooping up salsa or guacamole.
-
Mexican Street Corn Salad: The sweet and tangy notes of corn elevate your meal while adding a colorful and healthy twist.
-
Cilantro Lime Rice: This aromatic rice provides a light, citrusy side that beautifully complements the bold flavors of the burrito.
-
Black Bean Soup: Silky and hearty, this soup serves as a perfect warm counterpart, providing a nice textural contrast on the side.
-
Sweet Tea or Lemonade: A refreshing beverage can round out your meal; both options offer a sweet balance with hints of citrus—wonderful against the cheese!
-
Churros: Finish the meal with something sweet and crispy. These fried treats are perfect for dipping in chocolate sauce, satisfying that sweet tooth!
-
Mexican Chocolate Cookies: With their rich flavor and textured crunch, these cookies offer a delightful way to end the meal, celebrating the flavors of the region.
Easy Grilled Cheese Burrito Variations
Embrace your culinary creativity and make this easy grilled cheese burrito truly yours with simple swaps and additions!
-
Vegetarian: Substitute the ground beef with black beans or lentils for a delightful plant-based twist. Packed with protein, this option is not only satisfying but also vibrant in flavor.
-
Spicy Kick: Add diced jalapeños or a sprinkle of cayenne pepper to the filling for an extra heat boost that will fire up your taste buds! A little spice can transform this comfort food into an exciting experience.
-
Creamy Avocado: Layer sliced or mashed avocado inside for a creamy texture that balances the crunchy burrito exterior. It brings a pop of freshness to every bite.
-
Cheesy Delight: Incorporate a blend of different cheeses, such as pepper jack, for even more flavor and fun! Mixing melty cheeses elevates the indulgence level, making each bite heartier and gooier.
-
Whole Wheat Tortillas: Opt for whole wheat tortillas instead of standard flour for a healthier alternative that adds a nutty flavor, making your burrito not only tasty but also more nutritious.
-
Southwestern Style: Toss in some corn and black olives to infuse a burst of classic southwestern flavors into your burrito. This combo adds sweetness and depth while maximizing the deliciousness!
-
Mango Salsa Topping: Drizzle some homemade mango salsa or even a store-bought version over your grilled burrito for a fruity, zesty finish. The sweetness of the mango pairs perfectly with the savory filling.
-
BBQ Sauce Addition: Mix in a bit of barbecue sauce with the beef for a smoky taste sensation that’s both tangy and satisfying. It’s a delightful variation that adds a whole new twist to your classic burrito!
By incorporating these variations, you can enjoy a fresh take on your easy grilled cheese burrito every time! If you’re looking for easy meal planning, check out my tips on how to store and freeze burritos so you can keep this comforting favorite on hand. Enjoy crafting your perfect burrito creation!
How to Store and Freeze Easy Grilled Cheese Burrito
Fridge: Store leftover burritos in an airtight container for up to 3 days. This helps maintain their flavors and texture while preventing moisture loss.
Freezer: For longer storage, wrap burritos individually in foil or plastic wrap. They can be frozen for up to 1 month, perfect for quick meals on busy days.
Reheating: When reheating, place frozen burritos in the oven at 350°F (175°C) for about 20-25 minutes for the best crispy texture. Microwave for a quick option, but expect a softer exterior.
Prepping Ahead: You can assemble the Easy Grilled Cheese Burrito ahead of time and keep them refrigerated for up to 24 hours before grilling, allowing for easy weeknight dinners.
Expert Tips for Easy Grilled Cheese Burrito
-
Cheese Choice: Always use a blend of cheeses for the best melt. Cheddar and mozzarella create that gooey, stringy texture everyone loves in an Easy Grilled Cheese Burrito.
-
Avoid Overfilling: Less is more! Too much filling can make it hard to wrap the burrito tightly. Stick to a modest amount for a perfect shape and easy grilling.
-
Skillet Temperature: Make sure your skillet is at the right temperature. A medium heat ensures the cheese melts perfectly while forming a crispy exterior without burning.
-
Press Gently: While grilling, press down gently on the burrito with a spatula. This helps the cheese stick and creates a harmonious finish, ensuring every bite of your Easy Grilled Cheese Burrito is cheesy bliss.
-
Cooling Time: Allow your burrito to cool for a minute after grilling. This helps the cheese set and makes it easier to slice without spilling out the delicious filling.
-
Customize Wisely: Experiment with ingredients like black beans or sautéed veggies, but be cautious not to add too many wet ingredients, which can make it soggy.
Easy Grilled Cheese Burrito Recipe FAQs
What type of ground beef should I use?
Absolutely! For the best flavor, I recommend using 80/20 ground beef, which has the right amount of fat to keep the filling juicy. If you’re looking to cut down on calories or prefer leaner meat, ground turkey or chicken work wonderfully too!
How do I store leftover burritos?
After you’ve enjoyed your meal, you can keep leftover Easy Grilled Cheese Burritos in an airtight container in the refrigerator for up to 3 days. This keeps them fresh and ready to heat when you crave that cheesy goodness again!
Can I freeze assembled burritos?
Very much! To freeze your Easy Grilled Cheese Burritos, wrap each burrito tightly in plastic wrap or aluminum foil, ensuring they are well sealed to prevent freezer burn. They can be frozen for up to 1 month. Just remember to label them with the date so you can keep track!
What should I do if my burrito is falling apart while grilling?
No worries, it happens to the best of us! If your burrito falls apart, try using less filling next time—overfilling is often to blame. Also, make sure you wrap the burrito tightly to hold everything together. If it’s still troublesome, you can use toothpicks to keep it secure while grilling!
Are there any dietary considerations for pets?
This recipe contains ingredients like onions and certain spices that aren’t safe for pets, so it’s best to keep your Easy Grilled Cheese Burrito to yourself. If your furry friend is begging for a taste, consider making them a separate, pet-friendly treat without those harmful ingredients!
Can I make a vegetarian version of this burrito?
Absolutely! You can substitute the ground beef with black beans, lentils, or grilled veggies like bell peppers and zucchini. These options not only make a delicious filling but also align perfectly with a vegetarian diet, ensuring everyone can enjoy this delightful Easy Grilled Cheese Burrito!
Zesty Easy Grilled Cheese Burrito You Can Customize at Home
Ingredients
Equipment
Method
- Cook the Ground Beef in a large skillet over medium heat for about 8-10 minutes, breaking it up until browned. Drain excess grease, add taco seasoning and ¼ cup water, simmer for 5 minutes.
- Warm the Tortillas by heating them in a skillet or microwave—30 seconds on each side in a skillet or 20-30 seconds in the microwave with a damp paper towel.
- Assemble the Filling by layering cooked white rice, seasoned beef, nacho cheese sauce, chipotle sauce, sour cream, and shredded cheeses on a warmed tortilla.
- Wrap the Burrito tightly by folding in the sides and rolling from the bottom, placing it seam-side down.
- Grill the Burrito on medium heat with butter or oil for 3-4 minutes on each side, pressing gently until cheese melts and forms a crispy crust.
- Serve and Enjoy by allowing the burrito to cool for a minute, slice in half, and serve with salsa or guacamole.
Leave a Reply