
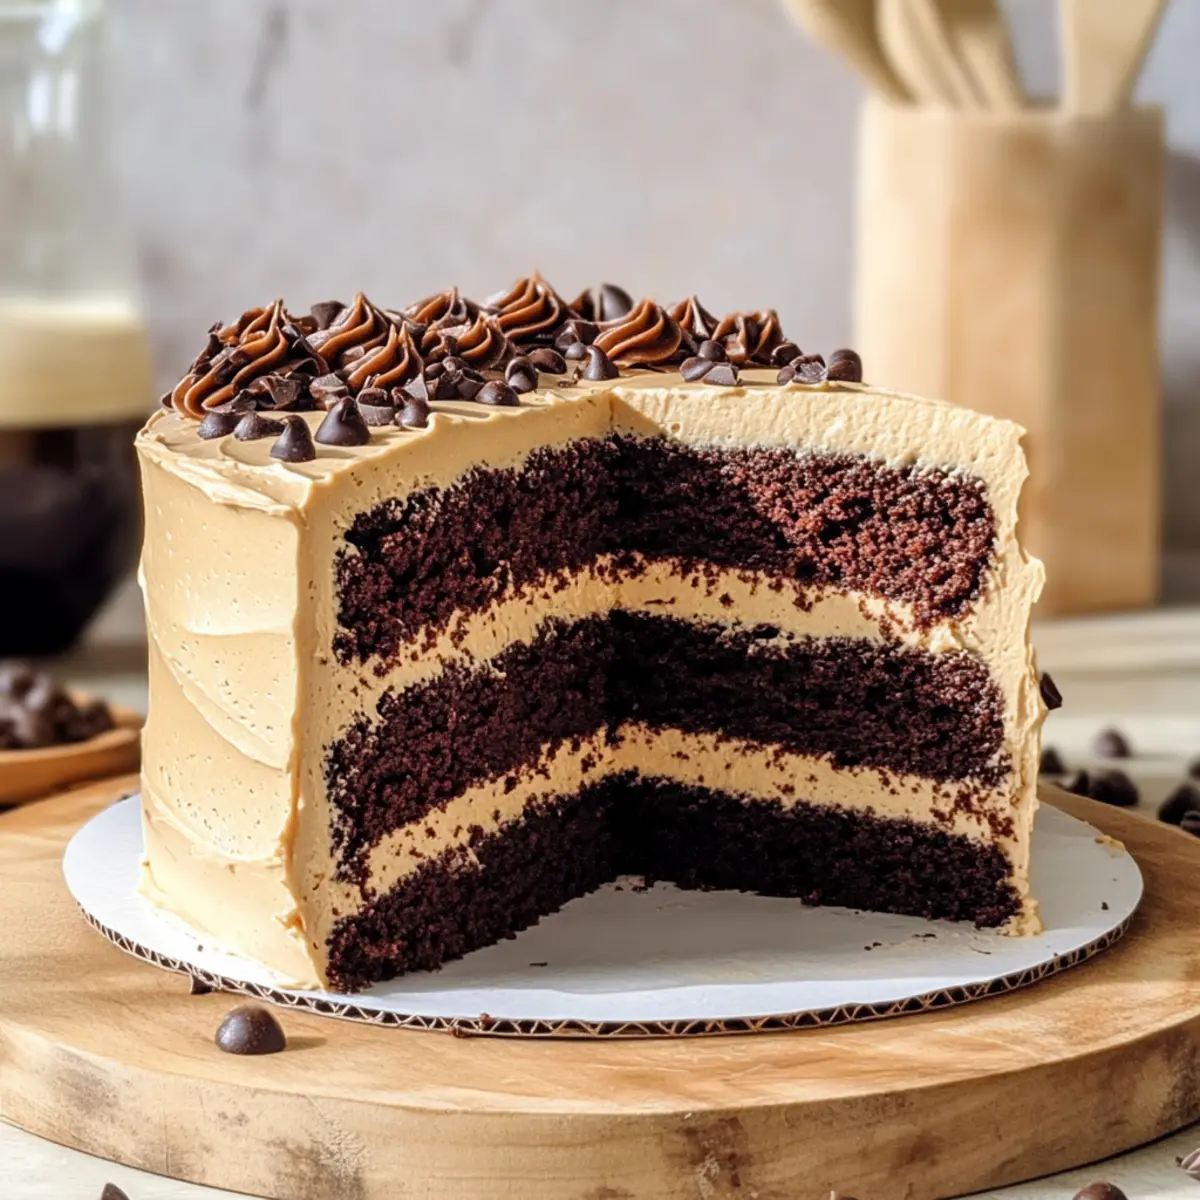
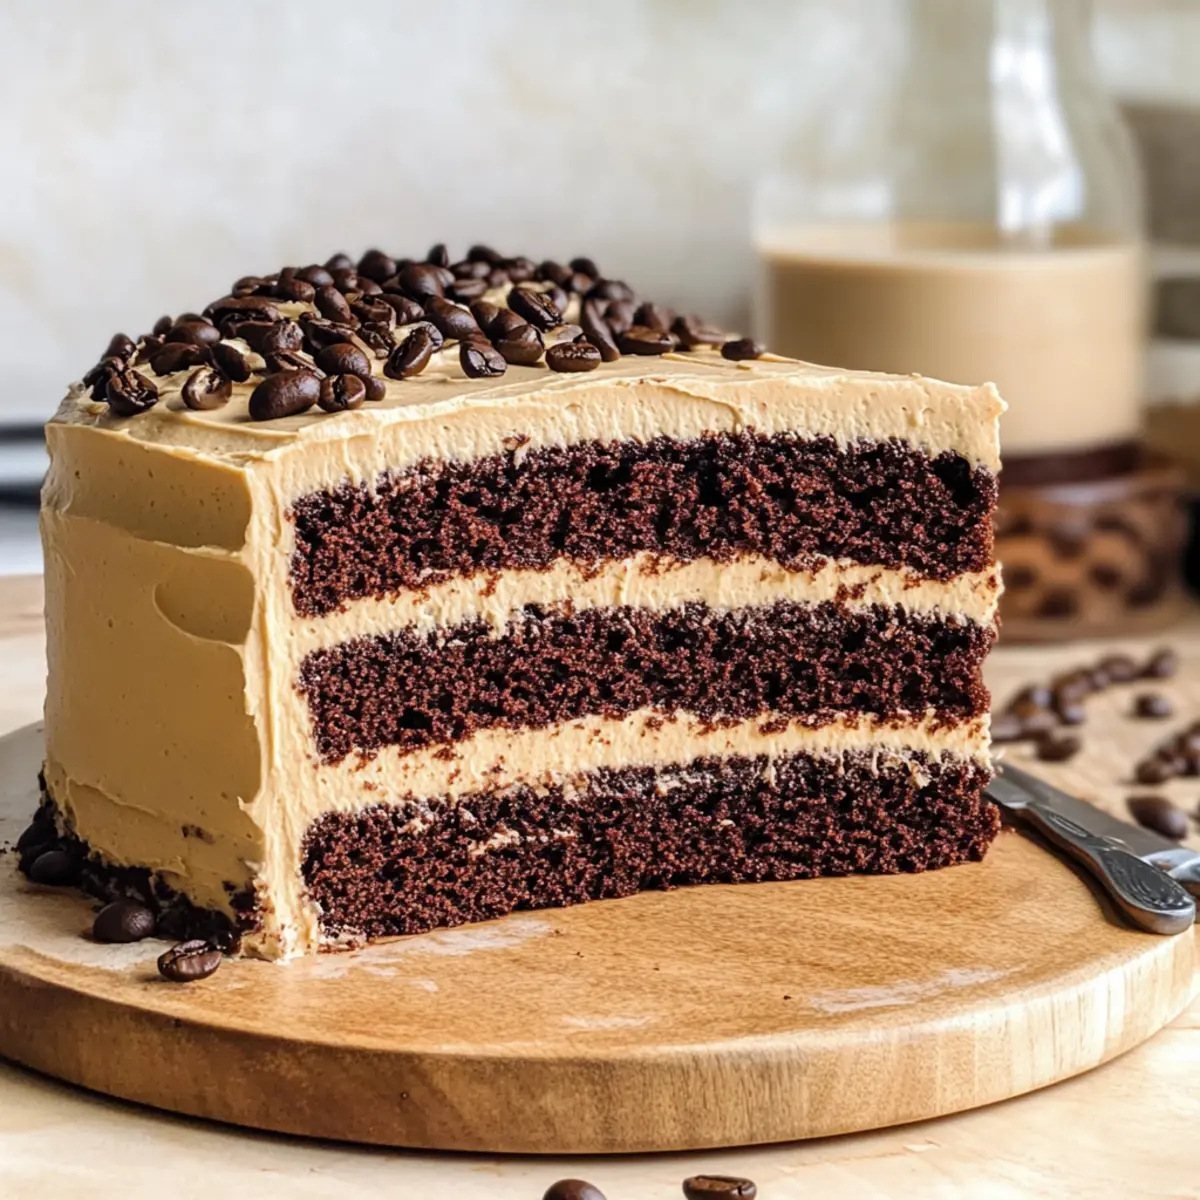
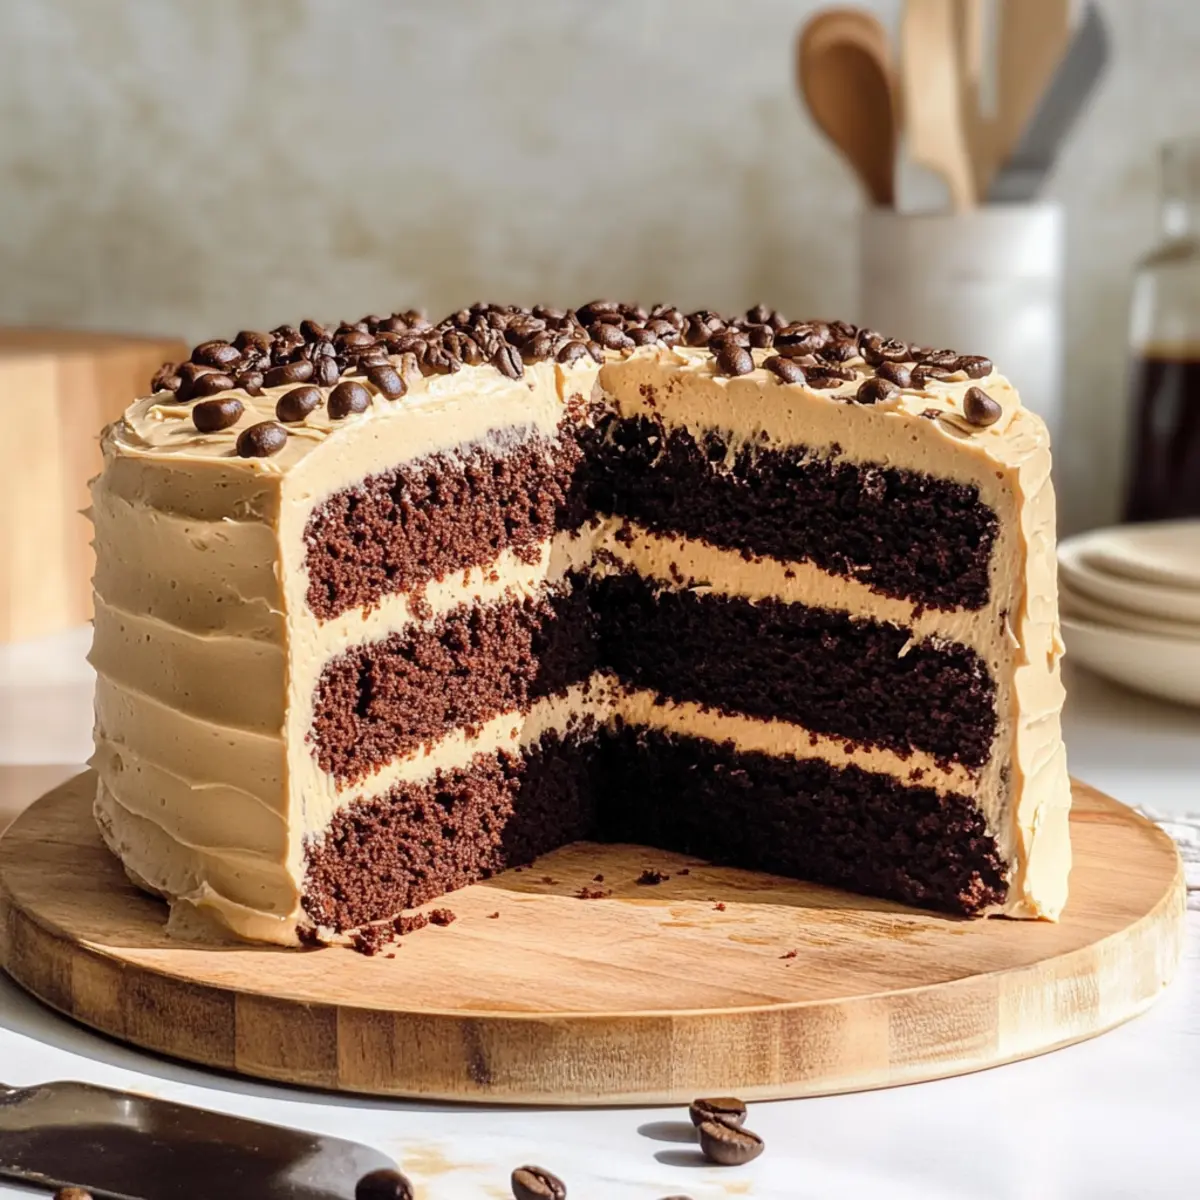
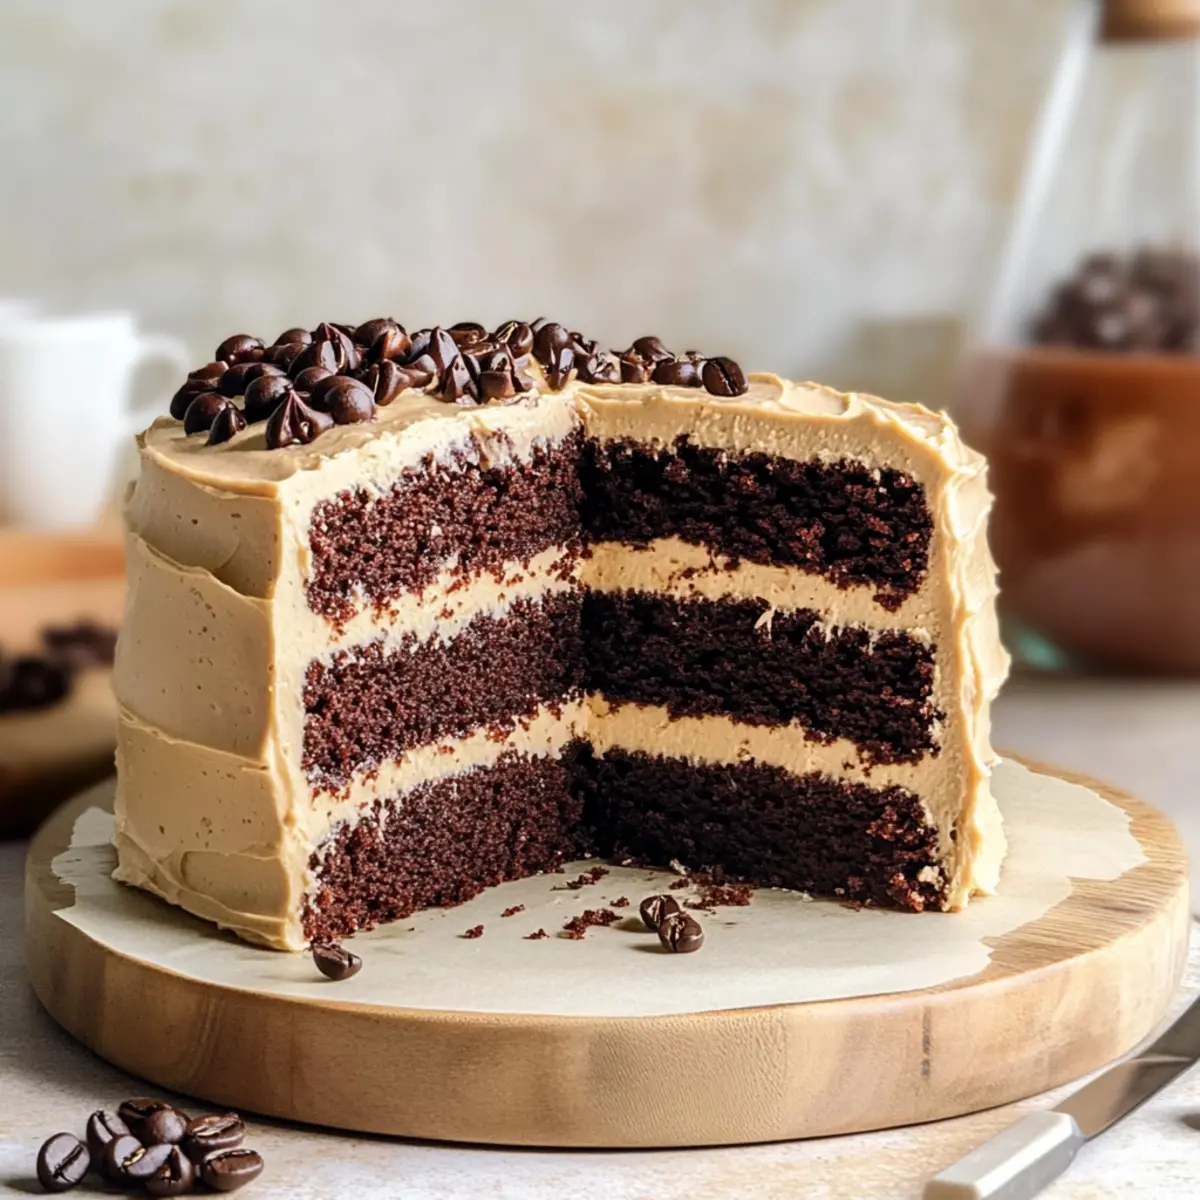
As I took my first bite of this decadent dessert, swirling layers of rich chocolate and fragrant coffee danced on my palate, instantly transporting me to a cozy café. This Coffee Chocolate Cake is a true gem for any baking enthusiast, elegantly featuring three layers of moist chocolate cake, embraced by a smooth buttercream frosting infused with coffee goodness. What makes it extra special? It’s not just a showstopper for gatherings and celebrations; this cake is also surprisingly easy to whip up, making it the go-to recipe for busy home-chefs looking for that perfect blend of indulgence and convenience. Whether you’re treating yourself or impressing friends, this delightful creation offers an experience that’s both comforting and unforgettable. Who’s ready to dive into a slice of bliss with me?
Why is this Coffee Chocolate Cake a must-try?
Irresistible flavor: The combination of rich chocolate and aromatic coffee creates a dessert that’s truly unforgettable.
Effortlessly Simple: Despite its gourmet appearance, the recipe is straightforward, making it accessible for bakers of all skill levels.
Crowd-Pleasing Delight: Perfect for birthday parties, holidays, or just an afternoon treat with friends, this cake will impress everyone at the table.
Endless Variations: Feel free to tailor it to your taste by swapping coffee for espresso or adding flavor extracts to create a personal touch.
Stays Fresh: Store any leftovers in an airtight container for several days, allowing you to enjoy this decadent cake longer!
Enjoy your baking journey, and if you’re looking for more delightful recipes, check out my Strawberry Crunch Cheesecake or consider a slice of the delightful Mini Dessert Cake.
Coffee Chocolate Cake Ingredients
For the Cake
- Black Coffee – Adds a rich coffee flavor; use 2 teaspoons of instant coffee for a quick alternative.
- All-Purpose Flour – Provides essential structure for the cake.
- Cornstarch – Enhances the tenderness of the cake layers.
- Granulated Sugar – Brings sweetness and moisture into the cake.
- Dark Brown Sugar – Contributes deep, caramel notes for a richer flavor.
- Dutch Cocoa Powder – Gives the cake an intense chocolate depth and richness.
- Baking Powder – Acts as a leavening agent for a delightful rise.
- Baking Soda – Adds extra lift to achieve that fluffy texture.
- Salt – Balances the sweetness and elevates overall flavors.
- Vegetable Oil – Ensures the cake remains moist and tender.
- Sour Cream – Adds moisture and richness; substitute with full-fat Greek yogurt 1:1.
- Eggs – Provides structure and moisture to the cake.
- Vanilla Extract – Enhances the cake’s flavor profile beautifully.
For the Buttercream Frosting
- Butter – The key fat that provides creaminess and stability.
- Powdered Sugar – Sweetens and stabilizes the buttercream.
- Vanilla Extract (for buttercream) – Adds an additional layer of flavor.
- Instant Espresso Powder (optional) – Enhances the coffee intensity for a deeper flavor.
Indulge in baking this delectable Coffee Chocolate Cake, where each ingredient plays a vital role in crafting pure bliss!
Step‑by‑Step Instructions for Coffee Chocolate Cake
Step 1: Preheat the Oven
Begin by preheating your oven to 170ºC (340ºF). While it’s heating, line three 20 cm (8-inch) cake pans with parchment paper, ensuring it’s placed flat against the bottom to prevent sticking. This step is crucial for achieving evenly baked layers that will hold their shape beautifully when stacked.
Step 2: Mix Dry Ingredients
In a large bowl, sift and combine the all-purpose flour, cornstarch, granulated sugar, dark brown sugar, Dutch cocoa powder, baking powder, baking soda, and salt. Whisk these ingredients together until well blended. This step ensures an even distribution of the leavening agents, providing your Coffee Chocolate Cake with the perfect rise and tender crumb.
Step 3: Mix Wet Ingredients
In a separate bowl, whisk together the warm black coffee, vegetable oil, sour cream, eggs, and vanilla extract until fully combined. The warmth of the coffee helps melt the sugars and creates a smooth mixture. This rich blend is essential to infuse your cake with that delightful coffee flavor that complements the chocolate.
Step 4: Combine Mixtures
Gradually pour the wet mixture into the dry ingredients, stirring gently until the batter is smooth and well incorporated. Be careful not to over-mix, as this can turn your Coffee Chocolate Cake dense. The batter will be rich and lush, with a deep chocolate hue that foreshadows the deliciousness to come.
Step 5: Bake the Cake
Divide the batter evenly among the prepared cake pans. Place them in the preheated oven and bake for 28 to 30 minutes. The cakes are done when a toothpick inserted into the center comes out clean. Once baked, remove the pans from the oven and allow the layers to cool in the pans for about 10 minutes before transferring them to wire racks.
Step 6: Prepare the Buttercream Frosting
While the cake layers are cooling, prepare the luscious buttercream by beating the softened butter in a mixing bowl until creamy. Gradually add the powdered sugar, mixing at a low speed to prevent a sugar cloud. Incorporate the vanilla extract and optional espresso powder, continuing to mix until the frosting is light, fluffy, and spreadable.
Step 7: Assemble the Cake
Once the cake layers have completely cooled, carefully level the tops if necessary. Place one layer on a serving plate, spread a generous layer of buttercream over it, then repeat with the second layer. For the final layer, apply a crumb coat to seal in any loose crumbs, smoothing the frosting over the top and sides of the cake for a polished finish.
Step 8: Final Frosting
After the crumb coat has set for about 15 minutes, spread a final thick layer of buttercream over the top and sides of your assembled Coffee Chocolate Cake. Use a spatula or cake scraper to create a smooth finish. Decorate with any desired toppings or chocolate shavings before slicing into this decadent delight.
What to Serve With Coffee Chocolate Cake?
Imagine the sweet aroma of freshly brewed coffee mingling with rich chocolate, creating the perfect backdrop for your indulgent gathering. Pairing this exquisite cake with delightful sides will elevate your dessert experience to new heights.
- Fresh Berries: The tartness of raspberries or strawberries provides a refreshing contrast to the rich flavors of the cake, making each bite balanced and delightful.
- Vanilla Ice Cream: A scoop of creamy vanilla ice cream beside your slice melts beautifully into the cake, enhancing its moist texture and adding a cool touch.
- Whipped Cream: Lightly sweetened whipped cream adds an airy quality, making it an ideal partner for the dense chocolate cake and coffee buttercream.
- Espresso: A shot of espresso deepens the coffee experience while pairing seamlessly with the cake’s flavors—perfect for coffee enthusiasts.
- Chocolate Ganache Drizzle: A rich ganache adds extra chocolate decadence, finishing your cake with an indulgent touch that will wow your guests!
- Hazelnut Biscotti: Crunchy, nutty biscotti gives a delightful textural contrast, perfect for dipping into coffee or enjoying alongside your chocolate creation.
Together, these pairings will not only complement the Coffee Chocolate Cake but also create a warm and inviting feel, ensuring your dessert table is a feast for the senses!
How to Store and Freeze Coffee Chocolate Cake
Room Temperature: Keep the cake in an airtight container for up to 3 days. This will help maintain its moisture and flavor.
Fridge: If the cake is frosted, store it in the fridge covered with plastic wrap or in an airtight container for up to 5 days. Enjoy it chilled or allow it to come to room temperature before serving.
Freezer: The Coffee Chocolate Cake can be frozen for up to 3 months. Wrap each layer tightly in plastic wrap, then in aluminum foil to prevent freezer burn. Allow layers to thaw in the fridge overnight before frosting or serving.
Reheating: If you’ve frozen slices, let them thaw at room temperature or warm them gently in a microwave for a few seconds to enjoy the cake’s delicious flavors once again.
Expert Tips for Coffee Chocolate Cake
-
Room Temperature Ingredients: Always make sure your ingredients are at room temperature before mixing. This ensures a smoother batter and contributes to the cake’s tenderness.
-
Doneness Check: Use a cake tester or toothpick inserted into the center to check for doneness. If it comes out clean, your Coffee Chocolate Cake is perfectly baked.
-
Cooling Layers: Allow cake layers to cool completely before frosting. This prevents the buttercream from melting and keeps your cake looking elegant.
-
Crumb Coat Importance: Don’t skip the crumb coat! It seals in crumbs making frosting effortless and results in a beautifully smooth finish.
-
Flavor Enhancements: For a more intense coffee flavor, consider folding mini chocolate chips or instant espresso powder into the buttercream for an extra boost.
Make Ahead Options
These delightful Coffee Chocolate Cake layers are perfect for meal prep, saving you time and effort on busy days! You can bake the cake layers up to 3 days in advance; simply cool them completely, wrap them tightly in plastic wrap, and refrigerate. For the buttercream, prepare it up to 24 hours ahead and store it in an airtight container in the fridge to keep it fresh. Before serving, allow the cake layers to return to room temperature, then assemble with your frosting and any desired decorative toppings. This proactive approach ensures your Coffee Chocolate Cake is just as delicious and satisfying when it’s time to enjoy it!
Coffee Chocolate Cake Variations
Feel free to transform this Coffee Chocolate Cake into your own masterpiece with these delightful twists and substitutions!
-
Espresso Boost: Use brewed espresso instead of black coffee for an extra jolt of rich coffee flavor. The intensified essence will make your cake utterly irresistible.
-
Gluten-Free Option: Substitute all-purpose flour with a 1:1 gluten-free baking blend to cater to gluten sensitivities without compromising taste. Your cake will still come out just as moist and delicious!
-
Nutty Addition: Fold in finely chopped walnuts or pecans into the batter for a delightful crunch and earthy flavor that pairs beautifully with chocolate and coffee.
-
Dairy-Free Delight: Swap the butter in the frosting with coconut oil and use almond milk instead of sour cream to create a deliciously creamy frosting. This variation holds true to flavor while accommodating dairy-free diets.
-
Caramel Swirl: Add a swirl of caramel sauce between the layers for a sweet surprise with each bite. The blend of coffee, chocolate, and caramel is simply divine!
-
Fruity Twist: Incorporate raspberry or cherry puree into the buttercream to introduce a tart contrast to the cake’s rich flavors. This adds a fresh, fruity note that balances the sweetness beautifully.
-
Cacao Nibs Crunch: For texture and a deeper chocolate flavor, sprinkle cacao nibs between the layers or on top of the frosting. This twist not only enhances the aesthetic but also adds a gourmet touch!
If you’re captivated by these ideas, you might also enjoy the refreshing taste of my Whole Wheat Pumpkin Pancakes alongside this delectable dessert, or perhaps try the luscious Brown Sugar Cold for a coffee pairing that perfectly complements this cake.
Coffee Chocolate Cake Recipe FAQs
What type of coffee should I use for the cake?
Absolutely! Using brewed black coffee enhances the rich flavors in the cake. If you’re in a pinch, you can easily substitute it with 2 teaspoons of instant coffee mixed in 1 cup of hot water.
How should I store my Coffee Chocolate Cake?
You can store the cake in an airtight container at room temperature for up to 3 days. If it’s frosted, it can last in the fridge for about 5 days, wrapped with plastic wrap or in an airtight container. Just remember, it’s best enjoyed at room temperature!
Can I freeze the Coffee Chocolate Cake?
Yes, you can! Wrap each layer of the cooled cake tightly in plastic wrap, then in aluminum foil to prevent freezer burn. It will stay fresh in the freezer for up to 3 months. When you’re ready to enjoy, thaw the layers in the fridge overnight before assembling or frosting.
Why did my cake turn out dense?
Very often, a dense cake can be the result of overmixing your batter or not having the right consistency in your ingredients. Always combine wet and dry ingredients gently just until they’re incorporated. Also, check your baking powder for freshness; it should be active to give your cake the lift it needs!
Are there any dietary considerations for this cake?
If you’re baking for someone with allergies, keep in mind this recipe contains common allergens like eggs, dairy, and gluten. For a dairy-free option, you can substitute the butter in the frosting with a vegan alternative like coconut oil, and use almond or oat milk in place of sour cream. Check for gluten-free flour blends if needed for a gluten-free version.
Can I add flavors to the buttercream frosting?
Absolutely! You can personalize your buttercream by folding in mini chocolate chips for a delightful crunch or adding a splash of flavored extracts—like almond or hazelnut—while mixing to give it a unique twist.
Heavenly Coffee Chocolate Cake That'll Steal Your Heart
Ingredients
Equipment
Method
- Preheat the oven to 170ºC (340ºF) and line three 20 cm (8-inch) cake pans with parchment paper.
- In a large bowl, sift and combine the all-purpose flour, cornstarch, granulated sugar, dark brown sugar, Dutch cocoa powder, baking powder, baking soda, and salt. Whisk until well blended.
- In a separate bowl, whisk together the warm black coffee, vegetable oil, sour cream, eggs, and vanilla extract until fully combined.
- Gradually pour the wet mixture into the dry ingredients, stirring gently until the batter is smooth.
- Divide the batter evenly among the prepared cake pans and bake for 28 to 30 minutes.
- Allow the layers to cool in the pans for about 10 minutes before transferring them to wire racks.
- Prepare the buttercream by beating softened butter until creamy, then add powdered sugar and mix at low speed. Incorporate vanilla extract and optional espresso powder.
- Once the cake layers are cool, assemble by leveling tops if necessary, spreading buttercream between layers, and applying a crumb coat.
- After the crumb coat has set for about 15 minutes, apply a final thick layer of buttercream and smooth it out.
Leave a Reply