
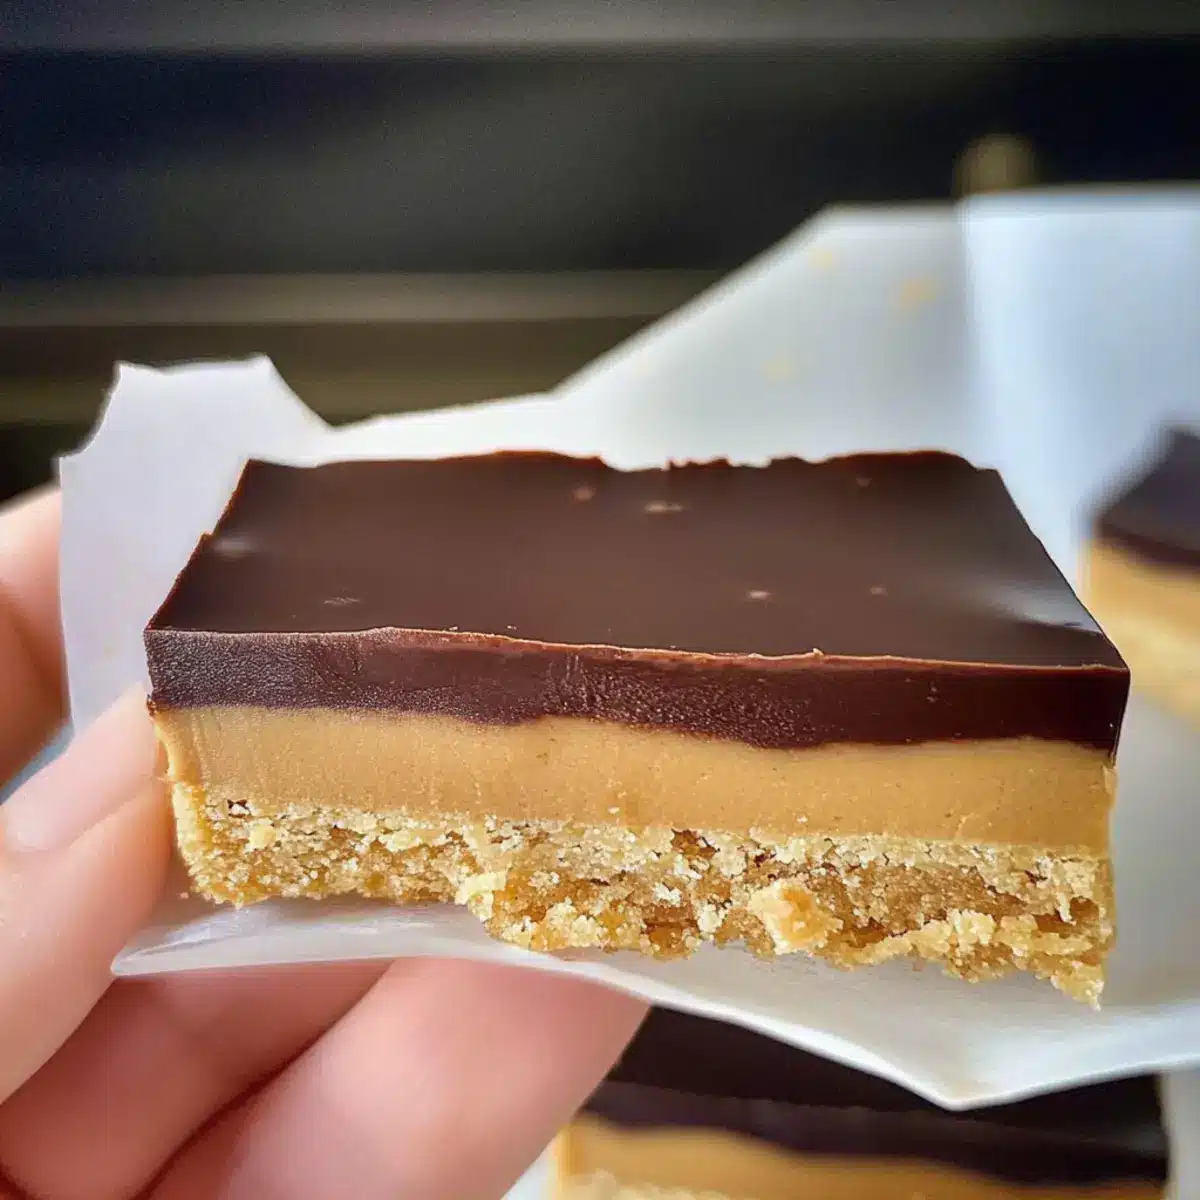
As I rummaged through my pantry, I stumbled upon a treasure trove of snacks just waiting to be transformed into something magical—enter the Chocolate Peanut Butter No Bake Bars! With just five ingredients, these bars harmonize the deep richness of chocolate with the creamy goodness of peanut butter to satisfy any sweet craving. What makes them even better? They’re a quick 15-minute treat that’s not only gluten-free and vegan but also perfect for a post-workout snack or a spontaneous dessert for friends. The delightful balance of flavors and textures means you won’t feel guilty indulging in this healthy dessert, making it a winner in my home. Curious about how to whip up these bars? Let’s dive in!
Why You Need These Bars Today?
Ease of Preparation: With just five simple ingredients, you’re minutes away from your new favorite treat! There’s no baking involved, making them perfect for even the busiest of days.
Indulgent Flavor: Each bite delivers an irresistible combination of rich chocolate and creamy peanut butter, which truly satisfies that sweet tooth without weighing you down.
Nutritional Benefits: These bars are not just tasty but packed with healthy fats and protein, giving you a guilt-free indulgence that’s also great for post-workout recovery.
Versatile Variations: Feeling adventurous? You can easily switch up the nut butter or add mix-ins like dried fruit or nuts to customize these bars to your liking!
Crowd-Pleaser: Whether at a party or a quiet night in, these Chocolate Peanut Butter No Bake Bars are sure to impress family and friends alike. Serve them alongside a scoop of Pumpkin Gnocchi Bake for a wholesome meal or enjoy them as they are for a light dessert.
Chocolate Peanut Butter No Bake Bars Ingredients
These simple ingredients come together to create magic!
For the Base
- Natural Peanut Butter – Creamy texture for richness; substitute with any nut or seed butter as desired.
- Gluten-free Oat Flour or Almond Flour – Provides structure; oat flour can be made by grinding gluten-free oats, while almond flour works well for those avoiding oats.
- Maple Syrup – Adds sweetness and binds the ingredients; honey can also be used for a different flavor.
For the Topping
- Chocolate Chips – Adds a sweet and chocolatey finish; opt for dairy-free chocolate chips for a fully vegan dessert.
- Coconut Oil – Adds shine and a smooth texture to the chocolate topping; if you prefer, this ingredient can be omitted entirely.
Step‑by‑Step Instructions for Chocolate Peanut Butter No Bake Bars
Step 1: Prepare Pan
Start by lining an 8×8 inch square pan with parchment paper, allowing some overhang for easy removal later. This ensures that your Chocolate Peanut Butter No Bake Bars will release easily once set. Press the parchment tightly into the corners to prevent any sticking, making your cleanup a breeze.
Step 2: Base Mix
In a small saucepan over low heat, combine 1 cup of natural peanut butter and 1/2 cup of maple syrup. Stir these ingredients together for about 2 minutes until they become smooth and creamy. Once melted and well-blended, remove the pan from the heat and gradually add 1 cup of gluten-free oat flour or almond flour, mixing until a thick dough forms.
Step 3: Spread Base
Transfer the thick peanut butter mixture into the prepared pan, pressing it down evenly with a spatula to create a smooth and firm base. This will be the foundation of your bars and helps ensure they hold together once set. Aim for an even layer for consistent thickness throughout each bar.
Step 4: Make Topping
Clean the saucepan and return it to low heat. Add 1 cup of chocolate chips along with 2 tablespoons of coconut oil. Stir the mixture continuously for about 3-5 minutes until it melts and becomes a smooth, glossy chocolate. This rich topping will add the perfect chocolatey finish to your bars.
Step 5: Assemble Bars
Pour the melted chocolate mixture over the peanut butter base, using the spatula to spread it evenly across the surface. Make sure the chocolate layer is well-distributed to enhance both the look and taste of your Chocolate Peanut Butter No Bake Bars. This indulgent layer will add a lovely contrast to the creamy base.
Step 6: Chill
Cover the pan with plastic wrap or foil, then refrigerate for 2-3 hours, or preferably overnight, until the bars are firm to the touch. This chilling time is crucial for allowing the chocolate to set properly, making slicing easier and ensuring every bite is as delightful as the last.
Step 7: Slice & Serve
After chilling, let the bars sit at room temperature for about 10 minutes. This helps soften the chocolate slightly, preventing cracking when you slice it. Use a sharp knife to cut the bars into squares or rectangles, depending on your preference. Store any leftovers in the fridge or freeze for a quick, healthy snack later.
Expert Tips for Chocolate Peanut Butter No Bake Bars
-
Room Temperature Matters: Letting the bars sit at room temperature for a few minutes before slicing can prevent the chocolate from cracking when you cut them.
-
Adjustment for Sweetness: If you’re using a sweetened peanut butter, consider reducing the maple syrup to balance flavors and keep your bars from becoming overly sweet.
-
Even Distribution: When pressing the mixture into the pan, ensure it’s evenly spread to avoid uneven bars. Each piece of your Chocolate Peanut Butter No Bake Bars should be uniformly delicious!
-
Chill Time is Key: Refrigerating the bars for a few hours or overnight is vital. This helps them set properly, giving them the perfect texture for slicing.
-
Mix-In Magic: Don’t be afraid to get creative! Adding nuts, seeds, or dried fruit can enhance the flavor and texture of your bars, making them even more delightful.
Chocolate Peanut Butter No Bake Bars Variations
Feel free to get creative and make these bars uniquely yours with these fun twists!
-
Nut-Free: Use sunflower seed butter instead of peanut butter for a delicious nut-free alternative that’s still packed with flavor.
-
Grain-Free: Swap out oat flour for almond flour to create a completely grain-free version while maintaining that rich, nutty taste.
-
Sweetener Alternatives: Replace maple syrup with agave nectar or coconut nectar for various sweetness options that suit your taste.
-
Flavor Boost: Include a teaspoon of vanilla extract to enhance the overall flavor profile, adding a warm, aromatic touch to each bite.
-
Crispy Texture: Mix in crispy brown rice cereal to the base for an extra crunch that’s sure to keep your taste buds excited with every bite.
-
Extra Chocolate: Drizzle some melted dark chocolate over the top after chilling for an indulgent finish that chocolate lovers will adore.
-
Spicy Kick: Add a pinch of cayenne pepper for a hint of heat that pairs surprisingly well with the rich sweetness of the bars.
-
Fruity Bits: Toss in some dried fruit like cranberries or cherries to introduce a tart contrast to the creamy peanut butter and chocolate flavors.
No matter how you choose to customize your Chocolate Peanut Butter No Bake Bars, they will remain a delectable treat perfect for satisfying your cravings. Enjoy them at gatherings or cozy nights in – perhaps even alongside a slice of scrumptious Pumpkin Pie Bars for a delightful dessert spread!
Make Ahead Options
These Chocolate Peanut Butter No Bake Bars are perfect for busy home cooks looking to simplify meal planning! You can easily prepare the base and topping up to 24 hours in advance by following the initial steps. Once you’ve pressed the peanut butter mixture into the pan and made the chocolate topping, simply refrigerate them separately. When you’re ready to serve, just pour the chocolate over the base and let them set in the fridge for 2-3 hours (or overnight) for the best results. To maintain quality, ensure both components are stored in airtight containers before assembly to prevent any drying out. This way, you can enjoy these delicious bars with minimal effort whenever you need a healthy treat!
What to Serve with Chocolate Peanut Butter No Bake Bars
Indulging in these delectable bars is a delightful experience, but pairing them with the right accompaniments can elevate your culinary adventure.
-
Fresh Fruit Platter: Bright, juicy fruits like strawberries or bananas complement the rich chocolate and peanut butter flavors perfectly, adding a refreshing touch.
-
Creamy Coconut Yogurt: Serve these bars with a dollop of coconut yogurt for a creamy contrast that enhances the overall texture and taste.
-
Roasted Nuts: A sprinkle of lightly salted roasted nuts adds crunch and a savory note, balancing the sweetness of the bars beautifully.
-
Homemade Coconut Whipped Cream: Light and fluffy, a scoop of coconut whipped cream adds an airy sweetness that will leave you craving more.
-
Iced Almond Milk Latte: The nutty flavor of an iced almond milk latte pairs well with the bars, creating a delightful contrast that’s perfect for any time of day.
-
Dark Chocolate Dipped Strawberries: For a touch of elegance, serve the bars alongside dark chocolate-dipped strawberries, enhancing that rich chocolate experience.
-
Cinnamon-Infused Herbal Tea: A warm cup of cinnamon-infused herbal tea provides a cozy and soothing pairing, rounding out your dessert experience with its comforting flavors.
Enjoy exploring these delightful pairings, and create moments to cherish with every sweet bite!
How to Store and Freeze Chocolate Peanut Butter No Bake Bars
Fridge: Store the bars in an airtight container in the refrigerator for up to 1 week to maintain their freshness and texture.
Freezer: For longer storage, freeze the bars for up to 2 months. Wrap each bar individually in plastic wrap before placing them in a freezer-safe container.
Thawing: To enjoy frozen bars, simply remove a bar from the freezer and let it thaw in the fridge for a few hours or at room temperature for about 30 minutes.
Reheating: There’s no need to reheat these Chocolate Peanut Butter No Bake Bars, as they are delightful served chilled or at room temperature!
Chocolate Peanut Butter No Bake Bars Recipe FAQs
What type of peanut butter should I use?
For the best results, use natural peanut butter that is free from additives and sugars. This ensures a creamy texture and allows the rich flavor to shine. If you have a nut allergy, feel free to substitute peanut butter with almond butter or sunflower seed butter.
How should I store these Chocolate Peanut Butter No Bake Bars?
Store the bars in an airtight container in the refrigerator for up to 1 week. If you want to keep them longer, wrap each bar individually in plastic wrap and place them in a freezer-safe container. They can be frozen for up to 2 months.
Can I freeze these bars? What’s the best way?
Absolutely! To freeze, wrap each bar tightly in plastic wrap and place them in a freezer-safe container or bag. When you’re ready to enjoy, simply thaw them in the fridge for a few hours or at room temperature for about 30 minutes. This method keeps them fresh and maintains their delightful texture.
What should I do if my mixture is too dry?
If your mixture feels too dry when combining the peanut butter, maple syrup, and flour, add a tablespoon of warm water or extra maple syrup, mixing until it reaches a smooth and thick consistency. The key is to create a moldable base that still holds together without crumbling.
Are these bars safe for people with allergies?
These bars are gluten-free and can be made nut-free by using seed butter instead of peanut butter. However, steer clear of any allergies by checking labels on your ingredients to ensure they meet your dietary needs. Always inform others about the ingredients if serving to avoid any allergy risks.
Irresistible Chocolate Peanut Butter No Bake Bars You'll Love
Ingredients
Equipment
Method
- Line an 8x8 inch square pan with parchment paper, allowing some overhang for easy removal later.
- In a small saucepan over low heat, combine 1 cup of natural peanut butter and 1/2 cup of maple syrup. Stir for about 2 minutes until smooth.
- Gradually add 1 cup of gluten-free oat flour or almond flour and mix until a thick dough forms.
- Transfer the mixture into the prepared pan and press it down evenly.
- Clean the saucepan and return it to low heat. Add 1 cup of chocolate chips and 2 tablespoons of coconut oil. Stir for 3-5 minutes until melted.
- Pour the melted chocolate mixture over the peanut butter base and spread evenly.
- Cover the pan and refrigerate for 2-3 hours or overnight until firm.
- Let the bars sit at room temperature for about 10 minutes before slicing.
Leave a Reply