
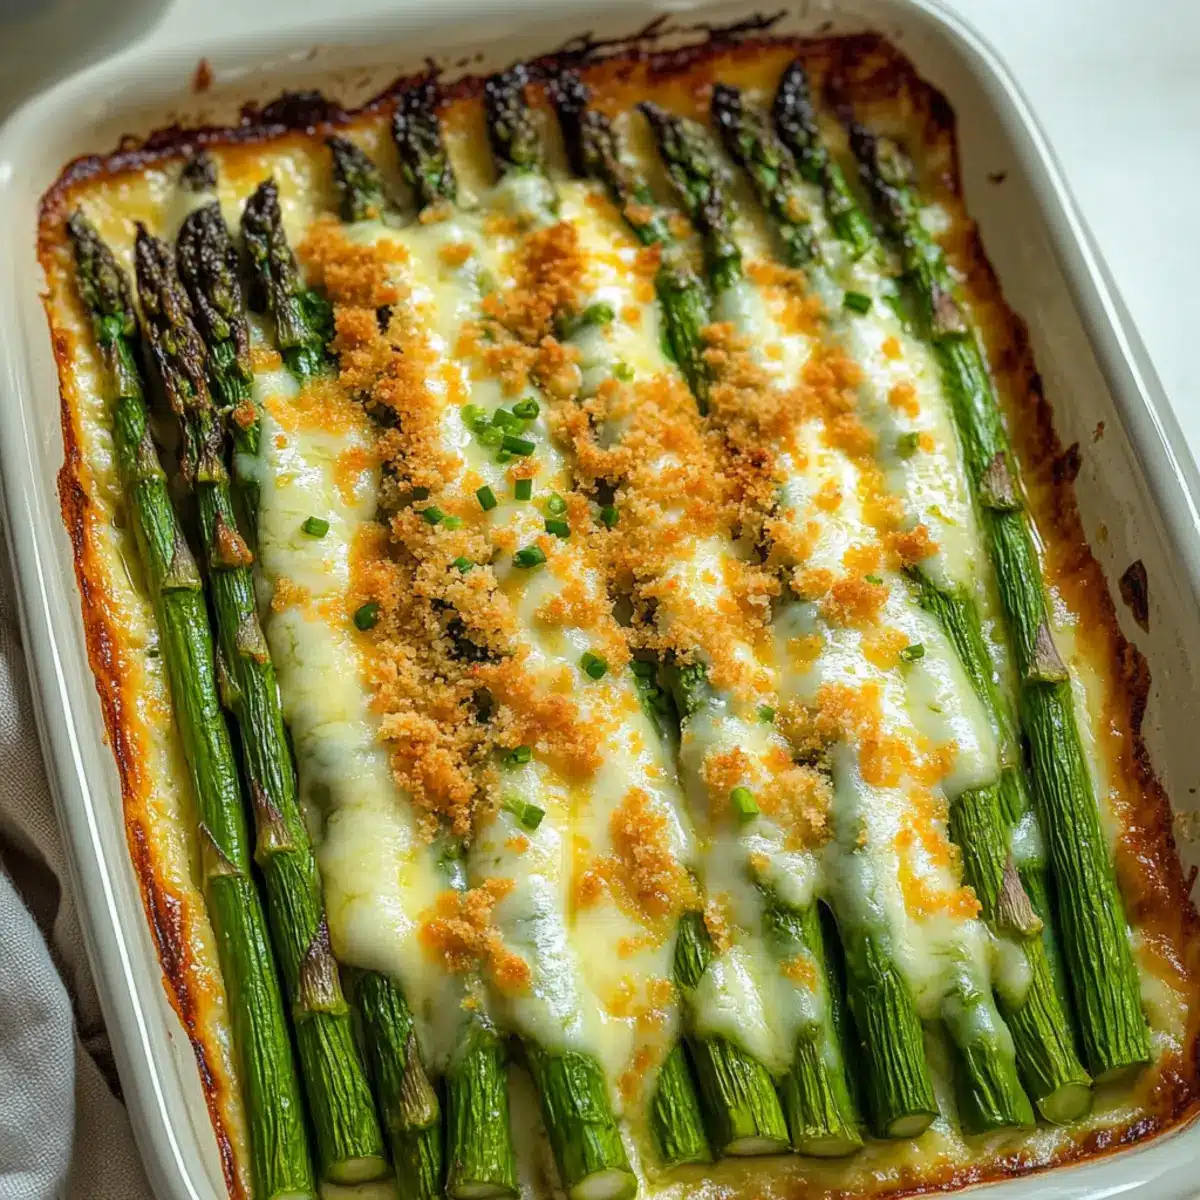
As the warm aromas began to waft through my kitchen, I could hardly resist the bright green spears of fresh asparagus waiting for their moment to shine. Enter my Quick Cheesy Baked Asparagus, a dish that transforms those typically forgotten veggies into a creamy, garlicky delight your family won’t be able to resist. In just under 20 minutes, you can serve up this irresistible side that’s not only quick to prepare but also keto-friendly and low in carbs. The crispy breadcrumb topping adds that perfect crunch, making this dish a fun twist on a classic that even the pickiest eaters will devour. Are you ready to elevate your vegetable game? Let’s dive into this delicious recipe!
Why is this asparagus dish irresistible?
Quick, Easy Preparation: You’ll love how simple it is to whip up this delightful side dish in under 20 minutes!
Gourmet Flavor: The creamy garlic cheese sauce enveloping the asparagus provides a rich, savory taste that’s hard to resist.
Crunchy Contrast: The addition of crispy breadcrumbs takes this dish to the next level, adding texture that contrasts beautifully with the tender asparagus.
Versatile Pairing: It complements grilled chicken, beef, or pork chops effortlessly, making it a go-to for any protein-packed meal.
Healthy Indulgence: With its keto-friendly profile and low-carb count, this dish satisfies your cravings without the guilt—perfect for those seeking healthier options.
Discover more ways to enjoy veggies with links to recipes like Baked Pumpkin Goat and Banana Baked Oatmeal for additional side dish inspiration!
Cheesy Baked Asparagus Ingredients
For the Asparagus
• Asparagus – Fresh asparagus spears are the star of this dish; trim woody ends for a perfect bite.
For the Garlic Sauce
• Olive Oil – High-quality extra virgin olive oil brings richness; substitute with avocado oil if needed.
• Garlic – Finely minced garlic adds a flavorful punch; you can use garlic powder (1 teaspoon) as a quick substitute.
• Salt – A touch of kosher salt enhances the flavors; table salt works if that’s all you have.
• Black Pepper – Freshly cracked black pepper gives a subtle heat; it’s optional for those who prefer a milder taste.
For the Cheesy Topping
• Mozzarella Cheese – This cheese provides a delightful gooeyness; 1 1/4 cups yields the perfect melt. Feel free to swap it for cheddar if you want a sharper flavor.
For the Crunch
• Breadcrumbs – These are optional but create a lovely crunch; use gluten-free breadcrumbs for a special dietary need.
Dive into this Cheesy Baked Asparagus recipe and discover how a simple veggie can become an extraordinary side dish!
Step‑by‑Step Instructions for Cheesy Baked Asparagus
Step 1: Preheat and Prepare
Begin by preheating your oven to 425°F (220°C) while you prepare your baking sheet. Lightly spray a baking sheet with non-stick spray to prevent sticking and ensure easy cleanup. This step is essential for achieving perfectly roasted Cheesy Baked Asparagus, so make sure to get the oven hot and ready!
Step 2: Arrange the Asparagus
Trim the woody ends off your fresh asparagus spears for the best texture. Next, arrange the trimmed asparagus in a single layer on your prepared baking sheet. Make sure they’re spaced evenly to allow for proper roasting, which will help them turn bright green and tender during baking.
Step 3: Mix the Flavorful Coating
In a medium bowl, combine about 2 tablespoons of high-quality olive oil, the finely minced garlic, kosher salt, and freshly cracked black pepper. Stir until well combined. Drizzle this flavorful mixture evenly over the asparagus, ensuring each spear is coated for maximum flavor in your Cheesy Baked Asparagus.
Step 4: Roast the Asparagus
Now, place the baking sheet in your preheated oven and roast the asparagus for 10 to 15 minutes. Keep an eye on them; you’re looking for vibrant green spears that are slightly tender when pierced with a fork, but still maintain their crunch. This roasting will enhance the natural flavor of the asparagus.
Step 5: Add Cheese and Broil
Once the asparagus is perfectly roasted, take it out of the oven and sprinkle an ample amount of mozzarella cheese over the top. Switch your oven setting to broil and return the baking sheet for an additional 4 to 5 minutes. Watch closely as the cheese melts and bubbles, turning golden brown for an irresistible topping.
Step 6: Final Seasoning and Serve
After broiling, carefully remove the Cheesy Baked Asparagus from the oven. Adjust seasoning with extra salt and pepper to taste, if desired. Serve the dish immediately while it’s warm, allowing everyone to enjoy the creamy, cheesy goodness alongside that delightful crunch from the breadcrumb topping.
What to Serve with Cheesy Baked Asparagus
Create a luscious meal around this delightful dish that tantalizes your taste buds and delights your family.
-
Grilled Chicken: Juicy, herb-marinated chicken pairs perfectly with the creamy, cheesy asparagus. A complete meal that feels gourmet yet simple!
-
Beef Tenderloin: The rich, savory flavors of a perfectly seared beef tenderloin create a beautiful contrast with the lightness of the asparagus.
-
Lemon Herb Quinoa: This fluffy, citrus-infused quinoa complements the garlicky notes of the asparagus, bringing a fresh zest to your plate.
-
Garlic Bread: A crunchy, buttery garlic bread is perfect for savoring every last bit of the cheesy goodness on your plate.
-
Caesar Salad: Crisp romaine lettuce topped with creamy dressing and crunchy croutons gives your meal a refreshing, crunchy texture that contrasts well with the dish.
-
Chardonnay: This crisp white wine complements the creamy richness of the asparagus while enhancing its savory flavors with its fruity notes.
-
Chocolate Mousse: Surprise everyone with a light dessert like chocolate mousse. Its airy texture contrasts beautifully with the meal’s heartiness.
Expert Tips for Cheesy Baked Asparagus
• Watch the Broiling: Keep a close eye while broiling your Cheesy Baked Asparagus; it can burn quickly if left unattended.
• Trim Wisely: Always trim the woody ends of asparagus to ensure you’re left with tender, flavorful bites that everyone will love.
• Avoid Overcooking: Roast asparagus until just tender; overcooking can result in limp spears, losing that delightful crunch and vibrant color.
• Cheese Swaps: Feel free to mix and match cheeses; cheddar or a sharp feta can elevate the flavors in your Cheesy Baked Asparagus.
• Crunch Factor: For added depth, consider blending your breadcrumbs with some grated Parmesan before sprinkling over the cheese.
• Fresh Garnish: Consider finishing your dish with a sprinkle of lemon juice or fresh parsley for a burst of freshness and a beautiful presentation.
Make Ahead Options
These Cheesy Baked Asparagus are a fantastic option for meal prep enthusiasts! You can trim the asparagus and prepare the garlic cheese mixture up to 24 hours in advance, storing them in separate airtight containers in the refrigerator to maintain freshness and prevent browning. Additionally, the breadcrumbs can be mixed and kept ready for a crunchy topping. When you’re ready to enjoy this delicious dish, simply roast the asparagus, add the cheese, and broil for about 4-5 minutes until golden and bubbly. This approach saves you precious time on busy weeknights while ensuring your Cheesy Baked Asparagus remains just as delightful!
How to Store and Freeze Cheesy Baked Asparagus
Fridge: Store leftovers in an airtight container for up to 3 days. Ensure the asparagus is completely cooled before sealing to maintain freshness.
Freezer: For longer storage, freeze the Cheesy Baked Asparagus in a freezer-safe container for up to 2 months. Consider cutting into portions for easy thawing.
Reheating: Reheat in the oven for 10-15 minutes at 350°F (175°C) to regain its crispy texture. Avoid microwaving to keep the topping crunchy.
Make-Ahead Tips: Prepare the asparagus and cheese mixture a few hours ahead and keep them separate. Combine and bake when you’re ready to enjoy this delightful dish!
Cheesy Baked Asparagus Variations
Feel free to explore these variations that will add your personal touch to this creamy, crunchy dish!
-
Meaty Addition: Add cooked bacon or pancetta to the mix for a savory twist that will make your taste buds dance. The salty, crispy bacon pairs wonderfully with the creamy cheese.
-
Cheese Swap: Try different cheeses like feta or Parmesan for a unique flavor profile. Each cheese brings its own character to the dish, turning the ordinary into something truly special.
-
Spicy Kick: Sprinkle crushed red pepper flakes over the asparagus before baking for a gentle heat. A little spice can elevate the entire dish, adding excitement with every bite!
-
Herb Infusion: Incorporate fresh herbs like thyme or basil for an aromatic burst of flavor. A sprinkle of fresh herbs brings a garden-fresh essence that pairs perfectly with the creamy goodness.
-
Gluten-Free Option: Use gluten-free breadcrumbs to make this dish suitable for those with dietary restrictions. You won’t miss the traditional breadcrumbs at all; the flavor and crunch remain intact!
-
Lemon Zest: Add a sprinkle of lemon zest for a sunny brightness. This refreshing citrus touch can balance the richness of the cheese and adds an enticing aroma that will fill your kitchen.
You might also enjoy making Extra Cheesy Lasagna Soup for a cozy dinner or try a hearty Baked Pumpkin Goat with a comforting flavor twist.

Cheesy Baked Asparagus Recipe FAQs
What is the best way to select fresh asparagus?
Absolutely! When choosing asparagus, look for bright green spears with tightly closed tips. Avoid any that show signs of wilting or have dark spots all over. The thickness of the spears can vary, but remember, thinner spears tend to be more tender, while thicker ones are more robust in flavor.
How should I store leftover Cheesy Baked Asparagus?
To keep your Cheesy Baked Asparagus fresh, store any leftovers in an airtight container in the refrigerator for up to 3 days. Make sure it has completely cooled before sealing to prevent sogginess. When you’re ready to reheat, the oven is your best friend—simply place it in the oven at 350°F (175°C) for about 10-15 minutes to restore that lovely crispiness!
Can I freeze Cheesy Baked Asparagus?
Yes! For longer storage, you can freeze Cheesy Baked Asparagus. Allow it to cool completely, then cut it into portion sizes and place in a freezer-safe container for up to 2 months. When you’re ready to enjoy, thaw overnight in the refrigerator and reheat in the oven at 350°F (175°C) for about 10-15 minutes. Don’t microwave; you want to keep that delightful crunch!
What if my asparagus is overcooked or mushy?
Very! If you find your asparagus has become overcooked and mushy, you can always rescue it by turning it into a creamy pasta sauce. Simply sauté some garlic and onion, add the asparagus, a splash of cream, and blend until smooth. You can then toss it with your favorite pasta for a delicious alternative.
Is Cheesy Baked Asparagus suitable for gluten-free diets?
Definitely! You can make this dish gluten-free by simply using gluten-free breadcrumbs. Just check the label of your breadcrumbs to ensure they meet your dietary needs, and you can still enjoy this delightful side without compromise!
Can pets eat asparagus?
While asparagus can be a healthy treat for some pets, it’s essential to avoid seasoning if you choose to share this dish with your furry friends. Always consult with your veterinarian about introducing any new foods into your pet’s diet, especially seasoned or cooked items like Cheesy Baked Asparagus.

Cheesy Baked Asparagus: A Quick, Delicious Side Dish Treat
Ingredients
Equipment
Method
- Preheat your oven to 425°F (220°C) and prepare your baking sheet by lightly spraying it with non-stick spray.
- Trim the woody ends off the asparagus and arrange them in a single layer on the prepared baking sheet.
- In a medium bowl, mix olive oil, minced garlic, kosher salt, and black pepper. Drizzle this mixture over the asparagus.
- Roast the asparagus in the oven for 10 to 15 minutes until vibrant green and slightly tender.
- Sprinkle mozzarella cheese over the roasted asparagus, switch the oven to broil, and broil for 4 to 5 minutes until golden brown.
- Remove from the oven, adjust seasoning with extra salt and pepper, and serve immediately while warm.
Leave a Reply