
As I rummaged through my pantry, a curious idea struck me: what if I could create a Halloween dessert that was as fun to make as it was to eat? Enter the Ghoulishly Good Beetlejuice Mini Trifles—layered delights that are not only visually stunning but also devilishly simple to prepare. These no-bake treats combine fluffy vanilla cake, luscious cheesecake filling, and the satisfying crunch of Oreos, making them a crowd-pleaser for all ages. With the versatility to cater to dietary preferences, you’ll find gluten-free and dairy-free options that keep every guest happy. So, whether you’re throwing a spooky bash or just want to indulge your sweet tooth, you might be wondering: how will you decorate your fiendishly delightful trifles?
How will you customize your trifles?
Customization Awaits: The Beetlejuice Mini Trifles invite your creativity, enabling you to adjust flavors and colors. No-Bake Convenience: These desserts eliminate the oven hassle, perfect for busy bakers. Gluten-Free and Dairy-Free Options: Cater to all dietary needs with easy swaps like almond milk and coconut cream. Eye-Catching Presentation: The vibrant green and purple layers guarantee an Instagram-worthy treat. Crowd-Pleaser Appeal: Delight your guests with a dessert that’s fun to make and even more fun to eat, making every Halloween gathering a hit! Check out these Mini Dessert Cups for another festive treat to impress!
Beetlejuice Mini Trifles Ingredients
• Here’s what you need for this spooky treat!
For the Cake
- White Cake Mix – The essential base; feel free to swap for yellow cake mix if you prefer.
- Instant Vanilla Pudding Mix – Enhances flavor and moisture; other pudding flavors can also add a fun twist.
- Egg Whites – Essential for aeration; substitute with aquafaba for a vegan-friendly option.
- Milk – Hydrates the mixture; almond milk is a great dairy-free choice.
- Sour Cream – Adds richness; Greek yogurt works too for a tangy variation.
- Vegetable Oil – Keeps the cake moist; melted butter can be used for a richer flavor.
- Vanilla Extract – Adds depth; almond extract can be omitted for nut allergy concerns.
- Food Coloring (Green and Purple) – Creates a spooky aesthetic; try beet juice for a natural option.
For the Cheesecake Filling
- Heavy Cream – Provides lightness; coconut cream is perfect for a dairy-free alternative.
- Cream Cheese – Adds creaminess; consider using dairy-free cream cheese for inclusivity.
- Powdered Sugar – Sweetens the filling; no substitutes are particularly recommended.
For Assembly
- Oreos – Provide a crucial crunch; any favorite cookie can serve as a delightful substitute.
- Halloween-themed Sprinkles – A fun decoration; optional but definitely enhances visual appeal.
Step‑by‑Step Instructions for Beetlejuice Mini Trifles
Step 1: Preheat the Oven
Begin by preheating your oven to 350ºF (175ºC). This is a crucial step for baking the cake layers of your Beetlejuice Mini Trifles. While the oven heats up, gather your baking pans, and prepare them by greasing and lining with parchment paper to ensure easy removal later.
Step 2: Make the Cake Batter
In a large mixing bowl, combine the white cake mix, instant vanilla pudding mix, egg whites, milk, sour cream, vegetable oil, and vanilla extract. Beat the mixture on medium speed for about 2 minutes until smooth and well combined. Divide the batter into two bowls, adding green food coloring to one and purple to the other, creating vibrant hues for your trifles.
Step 3: Bake the Cake Layers
Pour each colored batter into separate prepared pans and bake them in the preheated oven for 28-30 minutes. Check for doneness by inserting a toothpick into the center—if it comes out clean, the cakes are ready. Once baked, let them cool in the pans for 10 minutes before transferring to a wire rack to cool completely.
Step 4: Prepare the Cheesecake Filling
While the cakes cool, whip the heavy cream in a chilled bowl until stiff peaks form—this will take about 3-5 minutes. In another bowl, beat the cream cheese and powdered sugar until smooth. Gently fold the whipped cream into the cream cheese mixture until fully combined, creating a fluffy cheesecake filling perfect for your Beetlejuice Mini Trifles.
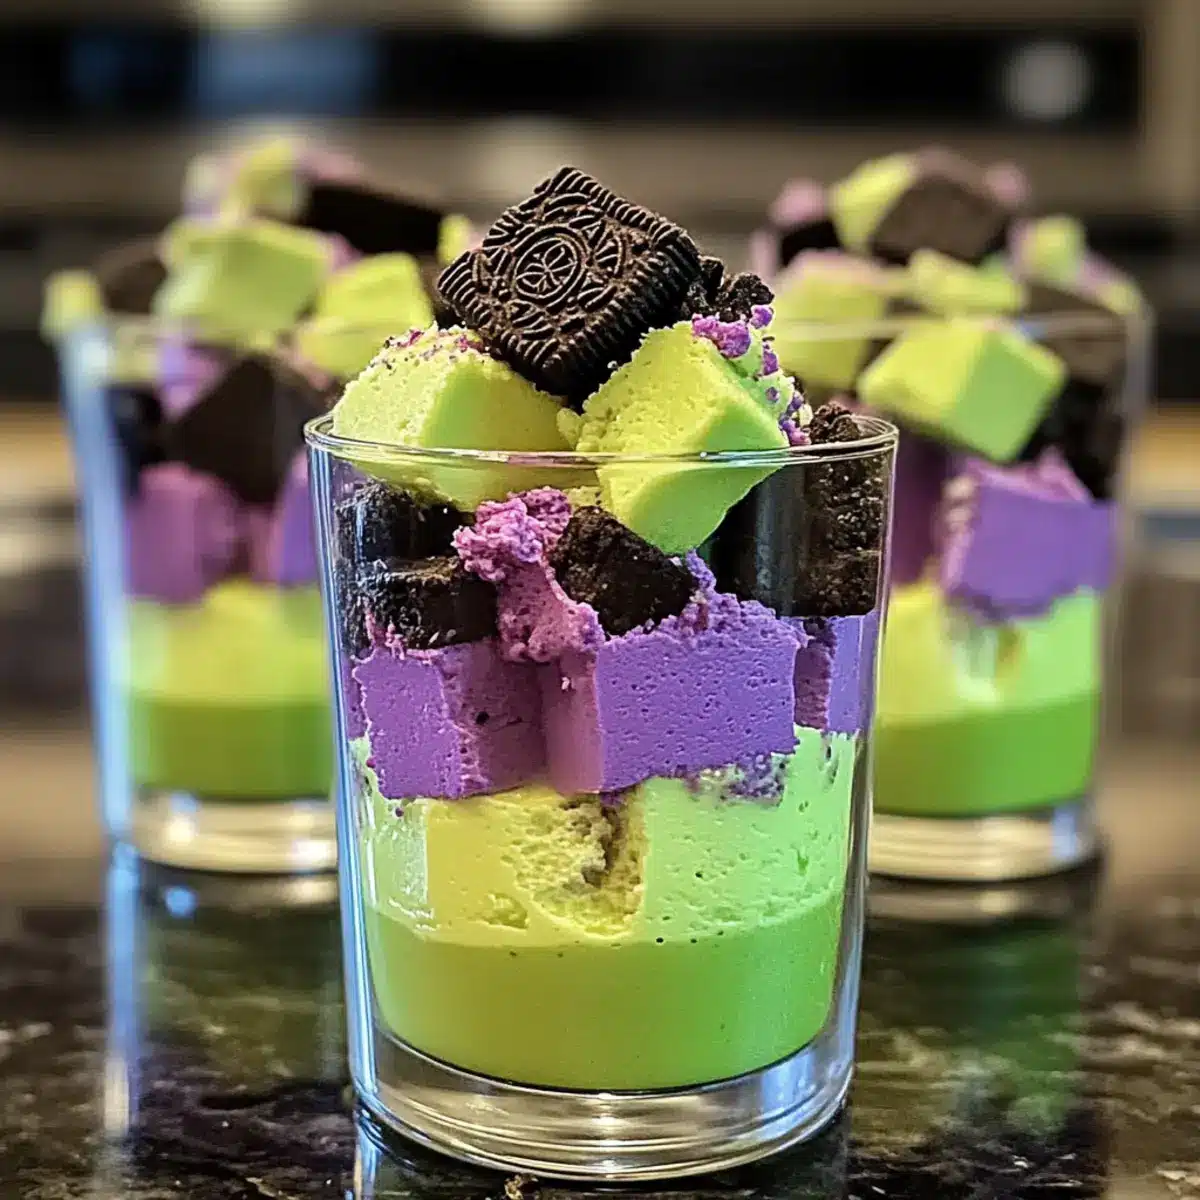
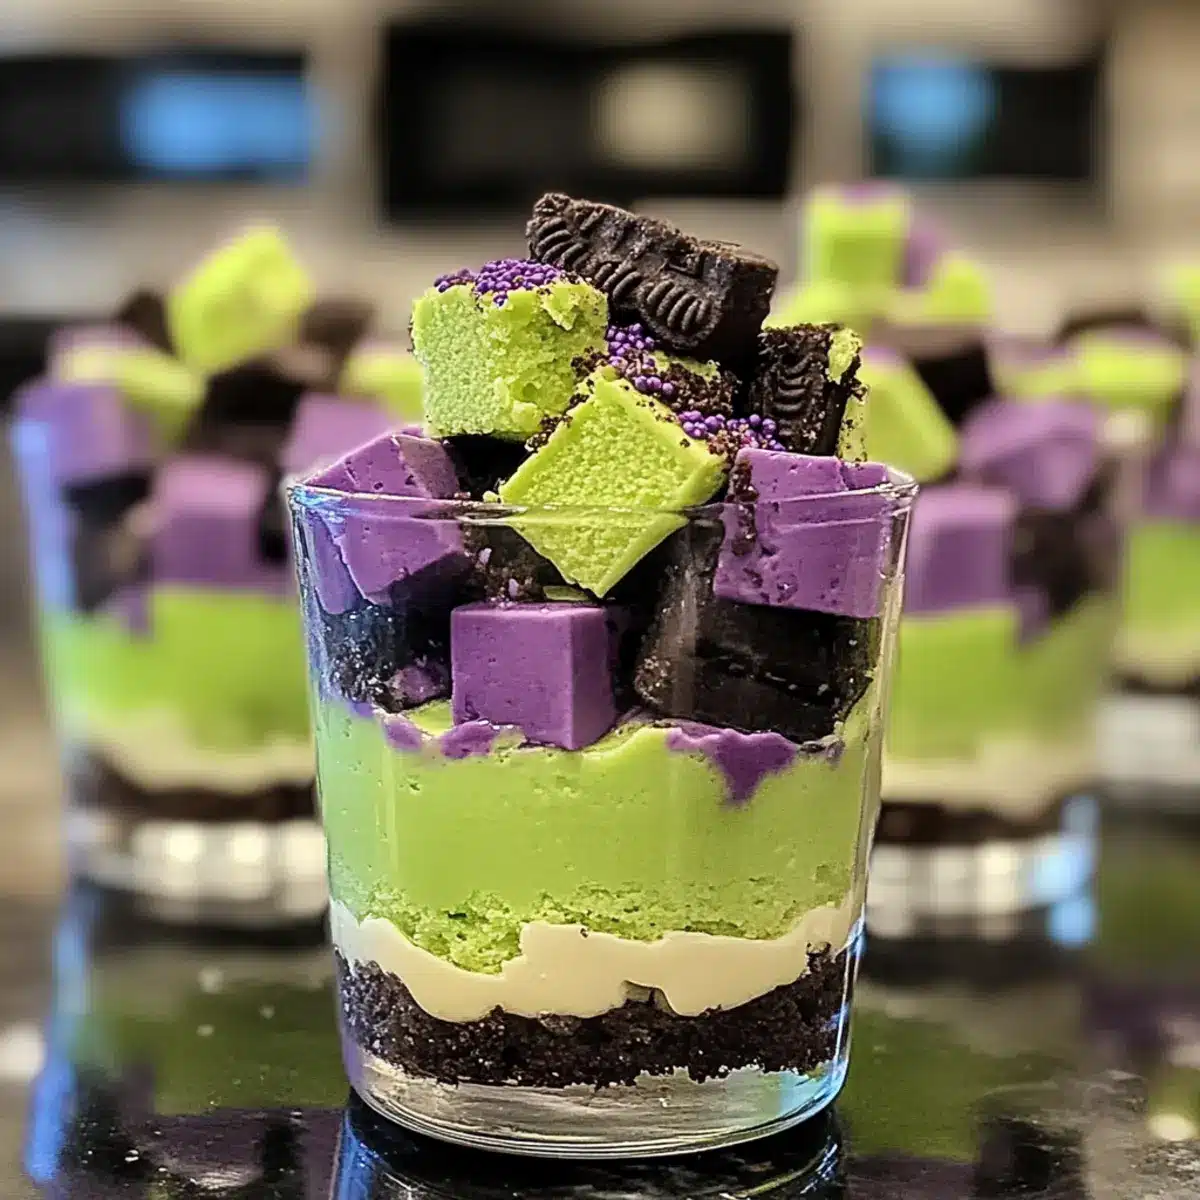
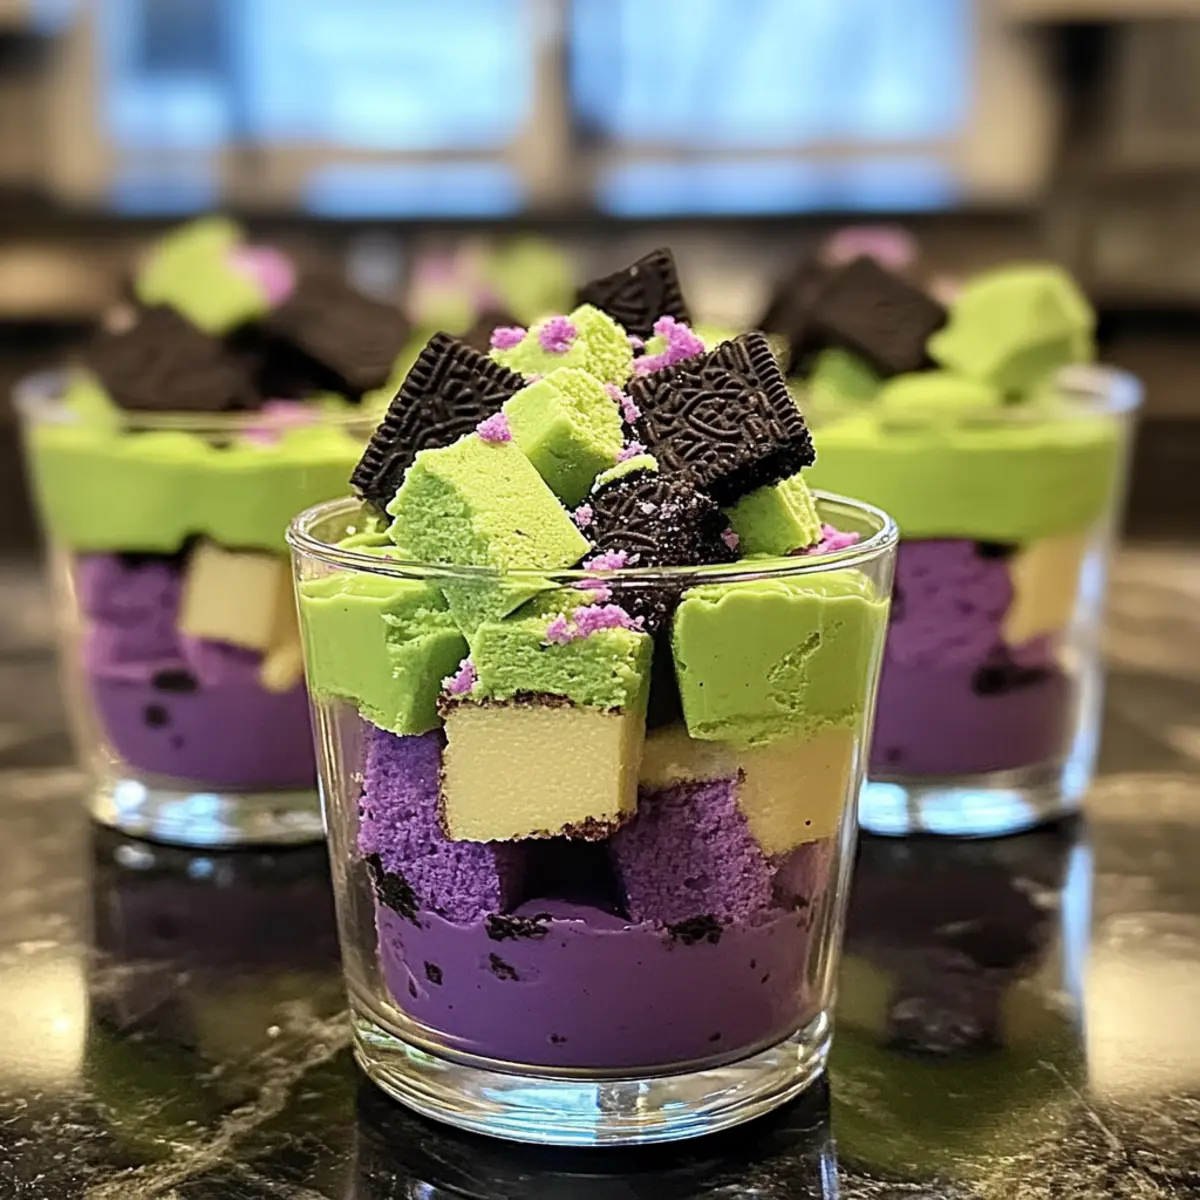
Step 5: Assemble the Trifles
Start with a layer of green cake cubes at the bottom of your serving cups. Follow this with a sprinkle of chopped Oreos for crunch, then pipe half of the cheesecake filling on top. Repeat the layers with purple cake cubes, Oreos, and the remaining filling, creating striking layers in each cup that celebrate the festive theme.
Step 6: Finish and Chill
Pipe the remaining cheesecake filling on top of each trifle and decorate with an Oreo and Halloween-themed sprinkles for extra flair. Place the assembled Beetlejuice Mini Trifles in the refrigerator to chill for at least 1 hour. This helps meld the flavors and allows the filling to set, ensuring a delightful presentation when serving.
What to Serve with Ghoulishly Good Beetlejuice Mini Trifles
Transform your Halloween celebration into a memorable feast that tantalizes the senses and delights your guests.
-
Spooky Sugar Cookies: These festive cookies bring a sweet crunch to your spread and match the playful theme of your trifles. Decorate them with ghostly icing for extra fun!
-
Witch’s Brew Sangria: A magical, fruity drink that’s both refreshing and eye-catching. Mix in dark fruits for a bewitching effect that complements the colors of the trifles beautifully.
-
Pumpkin Spice Cupcakes: Soft, spiced, and perfectly seasonal, these cupcakes provide a lovely contrast to the creamy sweetness of the Beetlejuice Mini Trifles.
-
Caramel Apple Slices: The tartness of apples paired with sweet caramel creates a delicious bite-sized treat. Their fresh crunch balances the rich layers of your dessert.
-
Chocolate Mousse Cups: Indulge in a silky, smooth chocolate dessert that pairs well with the lighter textures of your trifles, offering a delightful mix of flavors.
-
Halloween Fruit Platter: Arrange colorful fruits like oranges, grapes, and strawberries on a platter to add a fresh and healthy element that visually contrasts with the rich trifles.
Let your creativity shine while enhancing your Halloween festivities with these exciting pairings!
Make Ahead Options
These Beetlejuice Mini Trifles are ideal for meal prep, allowing you to enjoy hassle-free desserts when the time comes to celebrate. You can prepare the cake layers and cheesecake filling up to 24 hours in advance—simply store them separately in airtight containers in the refrigerator to keep their freshness and prevent moisture loss. When you’re ready to assemble, cut the cake into cubes and layer it with the filling and Oreos in your serving cups. For optimal flavor blending, let the finished trifles chill in the fridge for at least 1 hour before serving. This way, you’ll have stunning and delicious treats that require minimal last-minute effort, leaving you more time to enjoy the festivities!
Beetlejuice Mini Trifles Customizations
Customize your Beetlejuice Mini Trifles to tantalize every taste bud, embracing flavors and textures that excite.
-
Dairy-Free: Replace heavy cream with coconut cream and cream cheese with dairy-free alternatives for a creamy yet cruelty-free dessert.
-
Gluten-Free: Use a gluten-free cake mix, allowing everyone to join in on the fun without worry. These desserts can be as inclusive as they are delicious!
-
Flavor Boost: Add orange zest to the cream for a citrusy brightness—it’s refreshing and pairs beautifully with the rich cheesecake.
-
Chocolate Lovers: Layer in chocolate cake for a deeper, richer taste, amplifying those decadent chocolate notes that enhance the overall flavor.
-
Natural Coloring: Opt for beet juice and purple sweet potatoes for vibrant, natural color alternatives to food dye. Nature’s palette is both beautiful and healthy!
-
Cookie Base: Create a cookie crust with crushed biscuits: it adds extra crunch and makes these trifles even more delightful to dive into.
-
Spicy Kick: For those who love heat, a sprinkle of cayenne pepper in the filling or on top can spark an unexpected twist, tantalizing your taste buds.
-
Layered Twist: Alternate between cheesecake and whipped cream layers for a textured surprise that makes each spoonful a delightful adventure.
With these suggestions, your Beetlejuice Mini Trifles will not only captivate the eyes but also cater to every preference! And if you’re seeking another delightful treat, I recommend trying these tasty Mini Dessert Cups as a perfect pairing.
Storage Tips for Beetlejuice Mini Trifles
Fridge: Keep assembled Beetlejuice Mini Trifles in the refrigerator for up to 3 days. Make sure they are covered with plastic wrap or in an airtight container to maintain freshness.
Freezer: You can freeze the trifles without toppings for up to 6 months. Just allow them to thaw in the fridge overnight before serving.
Reheating: Since these are no-bake desserts, there’s no need to reheat! Just enjoy them chilled for the best flavor and texture.
Make-Ahead: Prepare the cake layers and cheesecake filling in advance, then assemble the trifles closer to serving time for optimal freshness.
Expert Tips for Beetlejuice Mini Trifles
• Chill Your Ingredients: Keep your heavy cream chilled for maximum volume when whipping; it creates the best texture for your cheesecake filling.
• Parchment Paper Magic: Line your cake pans with parchment to effortlessly lift out the cakes after baking; this avoids any crumbling.
• Cooling Time is Key: Ensure your cakes cool completely before cutting; this preserves their moisture and structural integrity for layering.
• Layering Technique: Apply gentle pressure when layering to avoid collapsing; this helps maintain the beautiful presentation of your Beetlejuice Mini Trifles.
• Customization is Fun: Don’t hesitate to experiment with flavors like orange zest or different cookie bases to make the trifles uniquely yours!

Beetlejuice Mini Trifles Recipe FAQs
How do I select ripe ingredients for the Beetlejuice Mini Trifles?
Absolutely! For the best flavors, ensure your eggs are fresh and your milk is close to its expiration date, as fresh dairy creates the richest taste. When choosing food coloring, avoid brands that contain artificial dyes if you prefer natural options; look for beet juice or spirulina powder for a fun, all-natural color.
What’s the best way to store my Beetlejuice Mini Trifles?
You can keep the assembled trifles in the refrigerator for up to 3 days. Just cover them with plastic wrap or place them in an airtight container to maintain the creamy texture and delightful crunch of the Oreos.
Can I freeze Beetlejuice Mini Trifles?
Yes, you can freeze the trifles without toppings for up to 6 months. To do this, wrap each container tightly in plastic wrap and then foil, which prevents freezer burn. When you’re ready to enjoy them, simply transfer them to the fridge overnight to thaw, and then top with sprinkles before serving.
What if my cheesecake filling is too runny?
If your cheesecake filling turns out runny, no worries! This can happen if the heavy cream isn’t whipped to stiff peaks. To fix it, put the mixture in the fridge for about 15-20 minutes to cool and then whip it again until fluffy. Additionally, you can add a bit more powdered sugar for added thickness.
Are there any allergy considerations for the ingredients in Beetlejuice Mini Trifles?
Very! If you’re serving guests with allergies, consider using dairy-free cream cheese and heavy cream alternatives like coconut cream for your filling. For gluten allergies, ensure that your cake mix and Oreos are gluten-free. Always read labels to double-check for potential cross-contamination.
Can I make these Beetlejuice Mini Trifles vegan?
Absolutely! To make these trifles vegan, replace the egg whites with aquafaba (the liquid from canned chickpeas), use plant-based milk like almond or oat milk, and substitute heavy cream and cream cheese with coconut cream and dairy-free alternatives. These swaps will still deliver a delicious flavor while keeping your dessert plant-based.
Treat Yourself to No-Bake Beetlejuice Mini Trifles
Ingredients
Equipment
Method
- Preheat the oven to 350ºF (175ºC). Grease and line your baking pans with parchment paper.
- In a large mixing bowl, combine the white cake mix, instant vanilla pudding mix, egg whites, milk, sour cream, vegetable oil, and vanilla extract. Beat until smooth.
- Divide batter into two bowls, adding green food coloring to one and purple to the other. Pour into prepared pans and bake for 28-30 minutes.
- Let cakes cool in pans for 10 minutes before transferring to a wire rack to cool completely.
- Whip the heavy cream until stiff peaks form. In another bowl, beat cream cheese and powdered sugar until smooth. Fold whipped cream into cream cheese mixture.
- Layer green cake cubes, chopped Oreos, and cheesecake filling in serving cups. Repeat with purple cake cubes.
- Decorate with remaining cheesecake filling and sprinkles. Refrigerate for at least 1 hour before serving.
Leave a Reply